.NET Tutorial
Overview
The purpose of this tutorial is to introduce io.Connect Desktop and some of its features to .NET developers and to show the io.Connect way of developing apps. The tutorial starts with four WPF apps working independently from each other and when completed, the same apps will be integrated with io.Connect Desktop and will interoperate as one unified user-friendly system.
Prerequisites
- io.Connect Desktop installed and running.
- Experience with C# and WPF.
- Basic understanding of asynchronous programming.
Resources
Before you start the tutorial, see the .NET examples on GitHub - a repository with sample projects that use the io.Connect .NET API.
Setup
First, clone the tutorial repository and start io.Connect Desktop.
After that, reference the ioConnectNET.dll, located in the <installation_location>/interop.io/io.Connect Desktop/SDK/.NET/lib/net45 folder, in each of the projects.
Repository structure:
data- contains an EXE which hosts all client related data on port 8083;config- contains the configuration files for all apps;skeleton- contains the skeleton of the solution in which you will start;solution- contains a full solution to the tutorial, which you can use for reference how everything should work when completed;start- the folder in which your work will begin;
The tutorial contains the following apps:
- Clients - WPF app which has information about clients and visualizes a grid with very little details;
- Contacts - WPF app which has a grid with contacts;
- Portfolio - WPF app visualizing a client's profile in detail;
- Notifications - WPF app which can raise notifications by clicking a button;
So, now you have four apps that must be integrated with io.Connect Desktop in order to maximize the working efficiency and to improve the user experience. We can start with copying the skeleton projects from /skeleton to /start. Then, in the configuration folder, you will find JSON files which are the pre-made configuration files for your apps. To start your apps from io.Connect Desktop, you should update the path properties (they must point to the location of the app on your machine) in all of them and copy the JSON files in the app definition folder (<installation_location>/interop.io/io.Connect Desktop/Desktop/config/apps). The folder is monitored dynamically, so your apps will appear instantly. Now, you can start all apps through the io.Connect launcher. In the io.Connect launcher, all apps will have Tutorial prefixed to their titles to make them easier to find.
Here are some common issues that you may encounter:
- App is missing from the io.Connect launcher - check its configuration file: it must be a valid
JSON. - App doesn't start after being clicked - make sure that the
pathproperty of the configuration file of the app points to the folder which contains the EXE. - The
Clientsapp doesn't visualize any data - the data provider EXE must be running, so make sure that thepathin its configuration file is valid and that port 8083 is free (this is where the data is hosted). - Some/All of my projects won't build - make sure that all projects reference the
ioConnectNET.dlllocated in the<installation_location>/interop.io/io.Connect Desktop/SDK/.NET/lib/net45folder.
Initializing the io.Connect Library
To use io.Connect library in your .NET app, you must first initialize it. This is accomplished by invoking the Initialize method of a Glue42 object:
// You can find similar initialization in the App class of all apps
var appName = "SampleName";
var io = new Glue42();
io.Initialize(appName);
It's best that this happens at the first possible moment so that io.Connect is always available. In all apps, the initialization is done OnStartup in the App.xaml.cs files. In most cases, it will be enough to just pass your app name in the io.Connect initialization method, however if you want better performance or to tinker with the advanced options you can check out the How to... > Interop-Enable Your Apps documentation.
1. Window Management
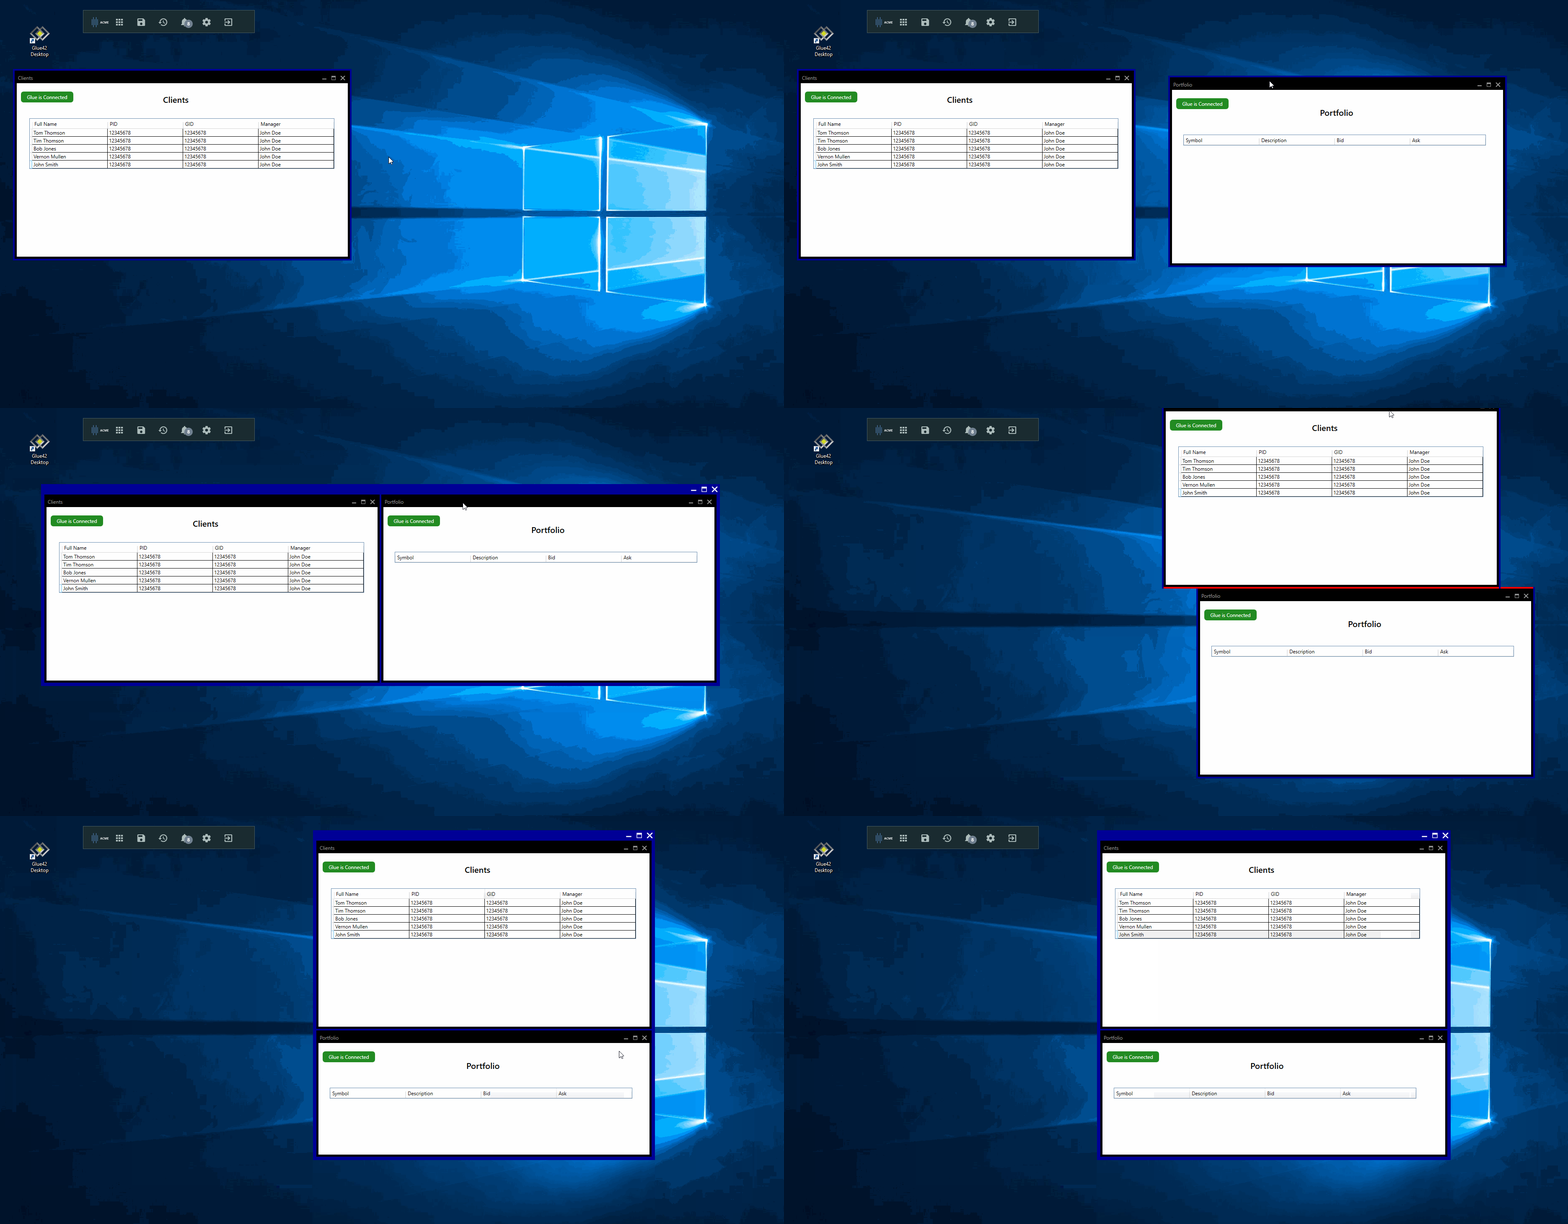
Users of desktop apps start to face issues with window management when they have to work with many apps and their desktop gets cluttered with random windows. io.Connect has a solution for this - the Window Management API. With this API you can make your app sticky which gives your users the opportunity to organize their desktops. To make the app windows sticky, find all RegisterToStickyWindows() methods in your apps and implemented them so that all apps are flat windows and their titles are the same as their names. You can use the given bounds objects in the configuration. For more details on how to do this, see the .NET Window Management documentation.
ℹ️ For each task you will find hints and guidelines as comments in the code.

2. Shared Contexts
io.Connect offers many ways to share data between apps, the easiest one being the Shared Contexts API. The Shared Contexts API can pass data globally to all currently running apps. This data can be updated by everyone and everyone can listen for the updates.
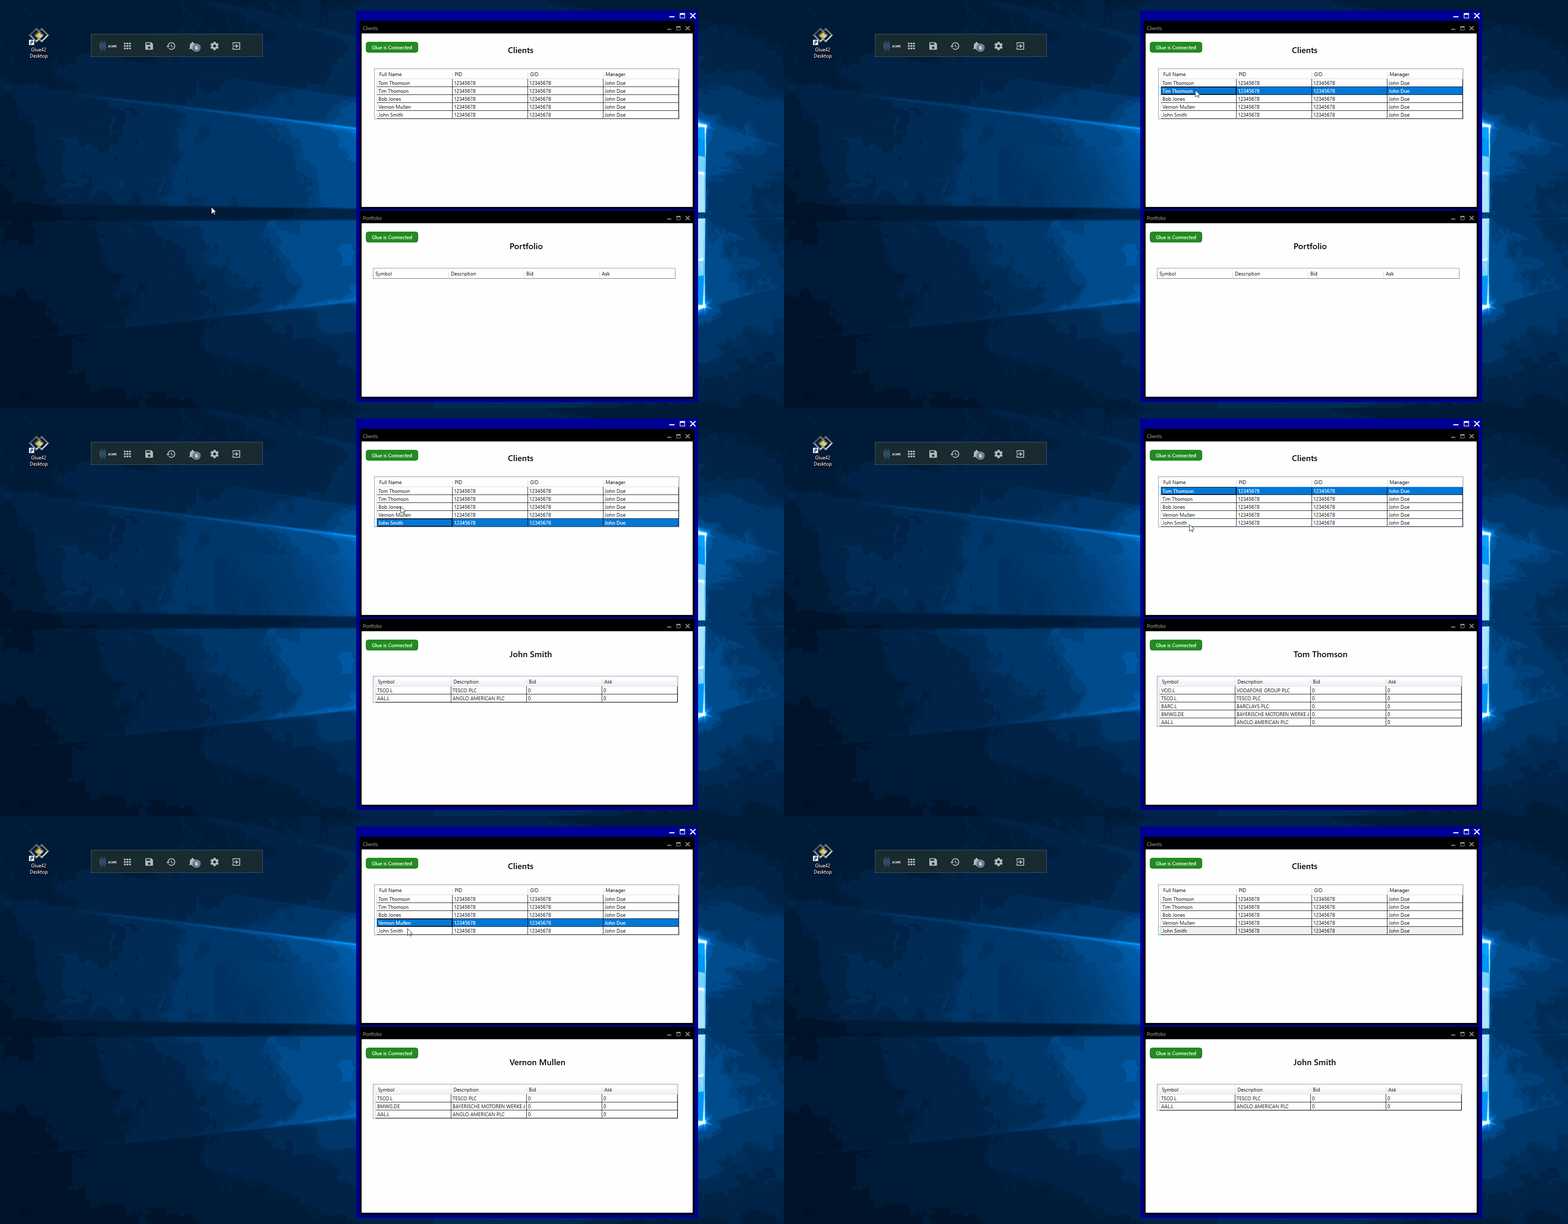
First, we will start from the Clients project. In the code you can find the ClientList_MouseDoubleClick() method. The CurrentParty context in it should be updated, so that every time the user clicks on a row, the context is updated. The Portfolio app should listen for changes and display the data. You should now follow the instructions in the code and implement this functionality. More information about the Shared Contexts API can be found here.
⚠️ Note that despite not being required, the instructions suggest that you should strongly type your context with an interface instead of using it as a
Dictionary<string,object>.

3. Interop - Declarative Model
The io.Connect .NET API has two Interop APIs - declarative and imperative. This tutorial covers only the declarative Interop model. If you want to use the imperative API, see here.
3.1 Method Registration
The Interop API is another way through which you can share data with other apps. In this case, it's a better form of communication, so you should comment out your context code. The Portfolio app is responsible for visualizing data, so it should register a method PopulatedData() which accepts the needed data and updates the Portfolio UI. You can find more information on how to register a method here.
3.2 Method Invocation
The Clients app has data for visualization so it must invoke PopulateData() on every row click (don't forget to check if the service exists, because a row might be clicked when Portfolio is closed). When you implement this, you will see the same result as the one from the Shared Contexts. You can find more information on how to invoke a method here.
4. Notifications
4.1 Raising Notifications
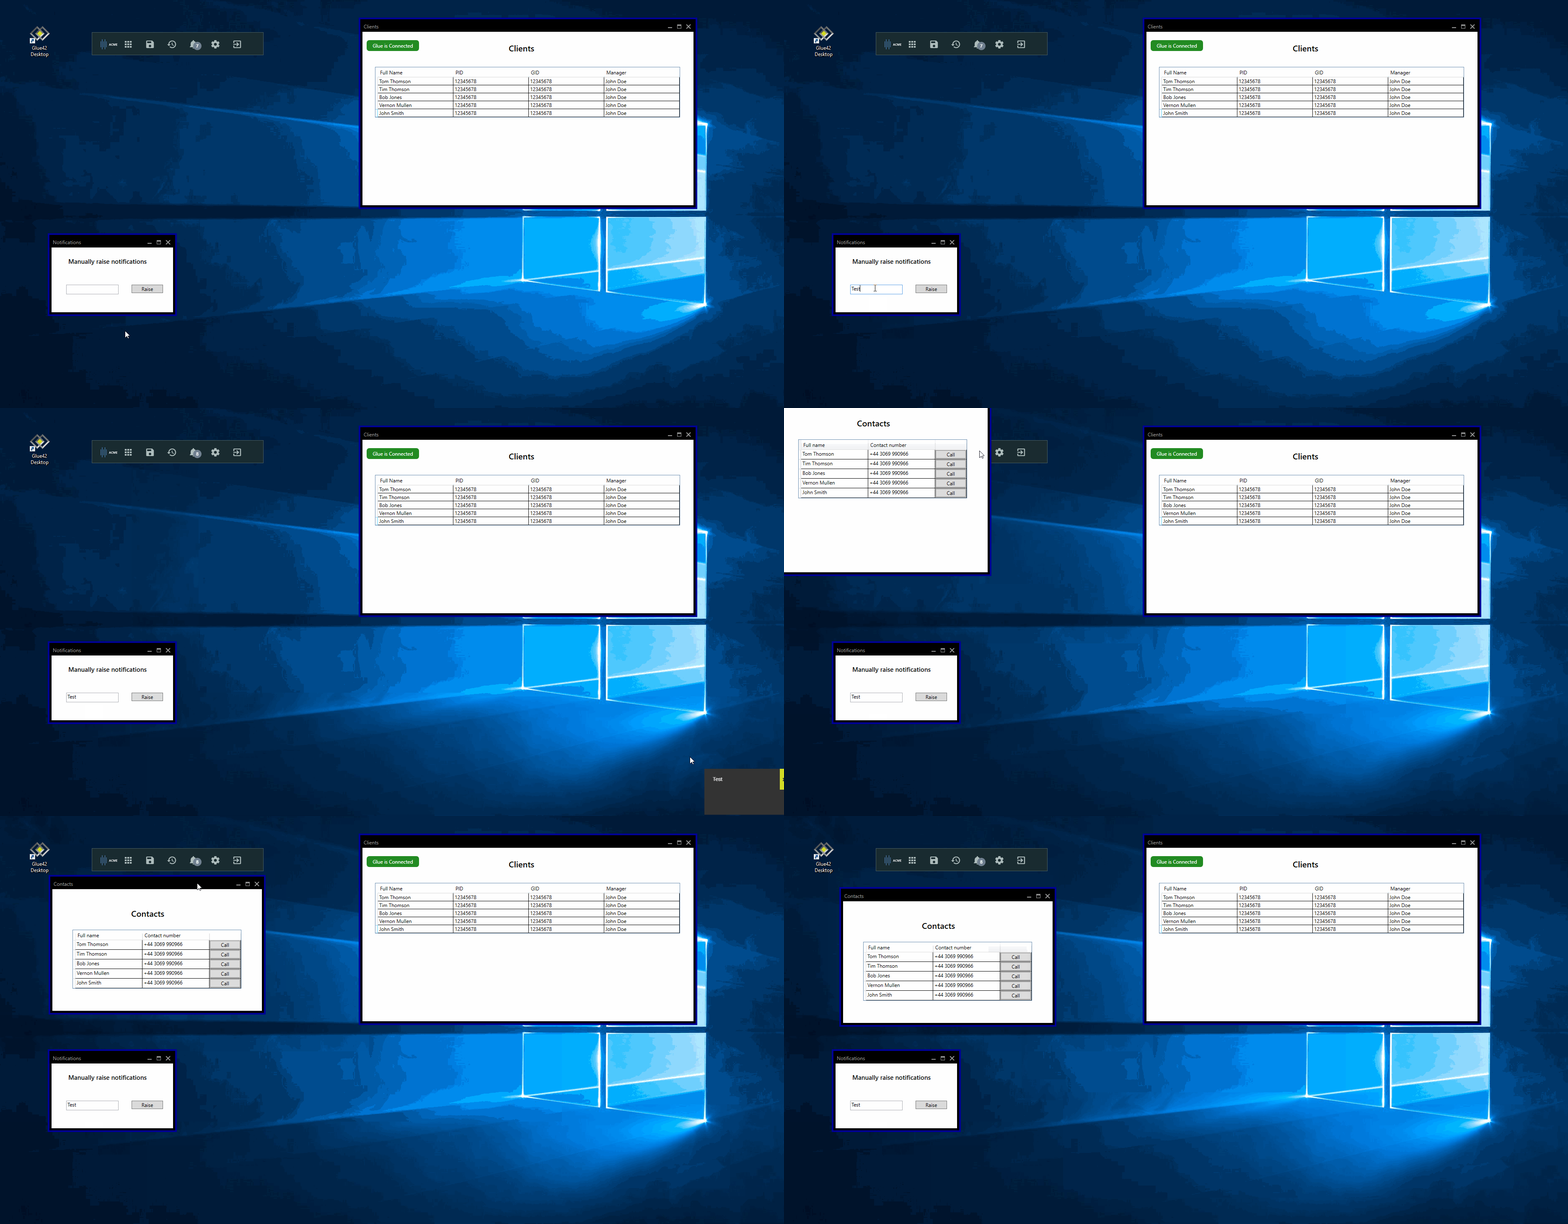
io.Connect has a notification API which is accessible via io.Notifications. It can publish notifications with information and possible actions on them in the form of toasts which appear in the bottom right corner of the screen. Your next task is to implement the RaiseButton_Click() method in the Notifications project. When you are done, the raise button should raise a basic notification with the same title as the text in the text box of the app. For more information on notifications, see here.
4.2 io.Connect Routing
If you click on a notification, a default screen will be opened with further information. Nevertheless, io.Connect can be configured so that a custom Interop method will be executed when a notification is clicked. The name of the method is passed in the notification constructor. You must register a service in the Clients app which has a method that opens the Contacts app. For more information on io.Connect routing, see here. To see how to open an app, continue to the next chapter.
5. App Management
io.Connect has an App Management API through which you can execute all kinds of app management commands. For the current scenario you will only need to start a new instance of the Contacts app in the ShowContacts() method. To see how to use the App Management API, click here. Keep in mind that the Clients app must be open when you click on a notification, if you want the ShowContacts() method to be invoked.
So, now the Contacts app is opened, but you still need to have data in it. You can get your data from the Clients app. Go to the ContactsService class in Clients, implement the FindWhoToCall() method, invoke it from Contacts and use the result to update the UI. Don't forget to check if the service exists.

6. Metrics
The Metrics API of io.Connect is used to track information provided from any app. You can record the current state of the app, the current user, is the app running, what is its CPU usage and more.
Your task will be to add metrics in the DataReceiver class in the Clients project. There are no restrictions to what you can measure, but it makes most sense to log the URL that is used to contact the server, the time it takes the server to respond and log any exceptions thrown from the request. To see more about the Metrics API, click here.
Congratulations!
You have completed the .NET tutorial. You are now ready to integrate all your .NET apps with io.Connect Desktop!
