
Notifications
Overview
The Notifications API is accessible via the io.notifications object.
Configuration
Available since io.Connect Browser 3.2
To specify global notification settings dynamically, use the configure() method. It accepts a Configuration object as an argument with the following properties:
| Property | Type | Description |
|---|---|---|
clearNotificationOnClick |
boolean |
If true (default), will remove the notification from the notification list when the user clicks on it or on an action in it. |
enable |
boolean |
If true (default), will enable all notifications - notification toasts and notifications in the Notification Panel. |
enableToasts |
boolean |
If true (default), will enable notification toasts. |
showNotificationBadge |
boolean |
If true, a notification badge will be shown on the Notification Panel icon of the Home App for new notifications. Available since io.Connect Browser 4.0. |
sourceFilter |
object |
Filter with names of apps that are allowed or not allowed to raise notifications. |
The sourceFilter object has the following properties:
| Property | Type | Description |
|---|---|---|
allowed |
string[] |
Names of apps allowed to raise notifications. Defaults to ["*"]. |
blocked |
string[] |
Names of apps not allowed to raise notifications. Defaults to []. |
To disable all notifications:
const config = { enable: false };

await io.notifications.configure(config);
To disable only toast notifications:
const config = { enableToasts: false };

await io.notifications.configure(config);
To retrieve the current global notification settings, use the getConfiguration() method:
const config = await io.notifications.getConfiguration();Raising Notifications
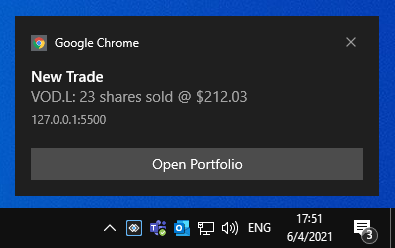
To raise a notification from your app, use the raise() method of the API. The method accepts as an argument a required RaiseOptions object with settings for the notification you want to raise:
const options = {
    title: "New Trade",
    body: "VOD.L: 23 shares sold @ $212.03",
    actions: [
        {
            action: "openClientPortfolio",
            title: "Open Portfolio"
        }
    ]
};

// Raising a notification.
const notification = await io.notifications.raise(options);
⚠️ Note that to be able to raise notifications with actions, your Main app must register a Service Worker. For more details, see the Notifications > Setup > Configuration section.
Notification Options
The RaiseOptions object extends the standard web NotificationDefinition object with several additional properties:
| Property | Type | Description |
|---|---|---|
actions |
object[] |
Array of NotificationAction objects. |
clickInterop |
object |
Accepts an InteropActionSettings object as a value. Use this property to invoke an Interop method when the user clicks on the notification. You can specify arguments for the method and an Interop target. |
focusPlatformOnDefaultClick |
boolean |
If true, will focus the Main app when a notification is clicked. Defaults to false. |
severity |
"Low" | "Medium" | "High" | "Critical" | "None" |
Defines the urgency of the notification which is represented visually by different colors in the notification UI. |
showInPanel |
boolean |
If true (default), will show the notification in the Notification Panel. |
showToast |
boolean |
If true (default), will show a native notification toast for a browser notification. |
state |
"Active" | "Acknowledged" | "Seen" | "Closed" | "Stale" | "Snoozed" | "Processing" |
Notification state. Defaults to "Active". |
title |
string |
Required. The title of the notification. |
Notification Click
Standard Click Handler
The raise() method resolves with a Notification object. Use its onclick property to specify a callback that will be invoked when the notification is shown or when the user clicks on the notification:
const options = {
    title: "New Trade",
    body: "VOD.L: 23 shares sold @ $212.03",
    actions: [
        {
            action: "openClientPortfolio",
            title: "Open Portfolio"
        }
    ]
};

const notification = await io.notifications.raise(options);

notification.onclick = () => console.log("Notification was clicked.");
Interop Click Handler
You can also use the clickInterop property of the RaiseOptions object to specify an Interop method that will be invoked when the user clicks on the notification. For instance, when another app has registered an Interop method:
const methodName = "HandleNotificationClick";
const handler = args => console.log(args);

await io.interop.register(methodName, handler);
To invoke this Interop method for handling the notification click, define an InteropActionSettings object and assign it as a value to the clickInterop property of the notification options object:
const interopSettings = {
    // The only required property is the method name.
    method: "HandleNotificationClick",
    arguments: {
        name: "Vernon Mullen",
        id: "1"
    }
};

const options = {
    title: "New Trade",
    body: "VOD.L: 23 shares sold @ $212.03",
    actions: [
        {
            action: "openClientPortfolio",
            title: "Open Portfolio"
        }
    ],
    clickInterop: interopSettings
};

const notification = await io.notifications.raise(options);
Notification Actions
You can create action buttons for the notification. When the user clicks on an action button, the specified callbacks will be invoked.

To define action buttons, use the actions property of the RaiseOptions object when creating a notification. The actions property accepts an array of InteropActionSettings objects:
const options = {
    title: "New Trade",
    body: "VOD.L: 23 shares sold @ $212.03",
    actions: [
        {
            action: "callClient",
            title: "Call Client"
        },
        {
            action: "openClientPortfolio",
            title: "Open Portfolio"
        }
    ]
};
⚠️ Note that the action buttons in an io.Connect Notification are limited to two, as the web browsers currently support a maximum of two actions.
Interop Actions
The NotificationAction object provides an interop property which you can use to invoke Interop methods when the user clicks an action button in the notification.
First, register an Interop method from another app:
const methodName = "HandleNotificationClick";
const handler = args => console.log(args);

await io.interop.register(methodName, handler);
After that, in your app define an InteropActionSettings object and assign it as a value to the interop property of the action object in the actions array:
const interopSettings = {
    // The only required property is the method name.
    method: "HandleNotificationClick",
    arguments: {
        name: "Vernon Mullen",
        id: "1"
    }
};

const notificationOptions = {
    title: "New Trade",
    body: "VOD.L: 23 shares sold @ $212.03",
    actions: [
        {
            action: "openClientPortfolio",
            title: "Open Portfolio",
            interop: interopSettings
        }
    ]
};

const notification = await io.notifications.raise(notificationOptions);
Listing Notifications
To retrieve a list of all available notifications, use the list() method:
const allNotifications = await io.notifications.list();Clearing Notifications
To clear all notifications, use the clearAll() method:
await io.notifications.clearAll();To clear a specific notification, use the clear() method and pass the ID of the notification to clear:
await io.notifications.clear(notification.id);Available since io.Connect Browser 3.2
To clear all notifications seen by the user, use the clearOld() method:
await io.notifications.clearOld();Clicking Notifications
To click a notification or a notification action programmatically, use the click() method and pass either only the notification ID, or the notification ID and the name of the action to click:
const id = notification.id;
const action = "openClientPortfolio";

// Clicking a notification.
await io.notifications.click(notification.id);

// Clicking a notification action.
await io.notifications.click(notification.id, action);
Notification State
Available since io.Connect Browser 3.2
Notifications have the following states describing their lifetime:
| State | Description |
|---|---|
"Acknowledged" |
A notification can be marked as acknowledged when the user has interacted with it by clicking on the notification or on an action in it. |
"Active" |
A notification can be marked as active when it is raised, but the user hasn't seen it, or interacted in any way with it yet. |
"Closed" |
A notification can be marked as closed when the user has closed the notification in the Notification Panel. |
"Processing" |
A notification can be marked as "Processing" when its state is in the process of changing (e.g., the user interacts with a notification from the UI, you make a request to a remote service to update the notification state, and you are still waiting for a response). |
"Seen" |
A notification can be marked as seen when the user has seen it (e.g., by opening the Notification Panel). |
"Snoozed" |
A notification can be marked as snoozed when the user snoozes it from the UI. |
"Stale" |
A notification can be marked as stale after a predefined period of time. |
To set the state of a notification, use the setState() method:
const id = notification.id;
const state = "Acknowledged";

await io.notifications.setState(id, state);
Notification Filters
Available since io.Connect Browser 3.2
Notifications can be filtered programmatically based on lists of allowed and blocked apps.
To set a notification filter, use the setFilter() method and pass a NotificationFilter object as an argument:
const filter = {
    allowed: ["*"],
    blocked: ["app-one", "app-two"]
};

await io.notifications.setFilter(filter);
The NotificationFilter object has the following properties:
| Property | Type | Description |
|---|---|---|
allowed |
string[] |
Names of apps allowed to raise notifications. Use * to allow all apps. |
blocked |
string[] |
Names of apps not allowed to raise notifications. Use * to block all apps. |
Using a combination of both lists enables you to create various filters:
// Allows all apps to raise notifications.
const allowAll = {
    allowed: ["*"]
};

// Allows only the specified apps to raise notifications.
const allowOnly = {
    allowed: ["app-one", "app-two"]
};

// Allows all except the blocked apps to raise notifications.
const allowAllExcept = {
    allowed: ["*"],
    blocked: ["app-one", "app-two"]
};

// Blocks all apps from raising notifications.
const blockAll = {
    blocked: ["*"]
};
To get the current notification filter, use the getFilter() method:
const filter = await io.notifications.getFilter();Events
The Notifications API provides methods for subscribing for notification events. All methods return a function you can use to unsubscribe from the respective event.
Raised
To get notified when a notification is raised, use the onRaised() method:
const handler = notification => console.log(`Notification with ID "${notification.id}" was raised.`);

const unsubscribe = io.notifications.onRaised(handler);
Closed
To get notified when a notification is closed, use the onClosed() method:
const handler = notification => console.log(`Notification with ID "${notification.id}" was closed.`);

io.notifications.onClosed(handler);
State Changed
Available since io.Connect Browser 3.2
To get notified when the state of a notification is changed, use the onStateChanged() method:
const handler = notification => console.log(`The state of notification with ID "${notification.id}" was changed.`);

io.notifications.onStateChanged(handler);
Active Notifications Changed
Available since io.Connect Browser 3.2
To get notified when the number of active notifications changes, use the onActiveCountChanged() method:
const handler = info => console.log(`Notifications with state "Active": ${info.count}.`);

io.notifications.onActiveCountChanged(handler);
Configuration Changed
Available since io.Connect Browser 3.2
To get notified when the global notification settings change, use the onConfigurationChanged() method:
const handler = config => console.log(`Notification settings updated: ${config}.`);

io.notifications.onConfigurationChanged(handler);
Requesting permission
An often neglected UX element is the notification permission request. Usually websites ask for notifications permission as soon as the user lands on the site which in most cases leads to a rejection by the user, because they don't know whether they'll be interested in receiving notifications from the site. Generally, users avoid notifications if they aren't absolutely sure they want to receive them. To make matters worse, once a user declines the request, undoing the rejection becomes complicated as it can't be done programmatically and requires the user to manually find the relevant browser setting, find the site in question and unblock it from sending notifications.
This is the reason why io.Connect Browser won't request a permission on startup. A permission will be requested when a raise() call is made or when the dedicated requestPermission() method is used:
// Returns a boolean value.
const hasPermission = await io.notifications.requestPermission();
API Reference
For a complete list of the available Notifications API methods and properties, see the Notifications API Reference Documentation.