
Salesforce
Overview
The Salesforce Adapter can be installed from Salesforce AppExchange or via a package installation link.
In some cases, to upgrade your Salesforce Adapter, you may need to uninstall the package first and then install the latest version.
When the installation is completed, you must configure the Custom Metadata Types in order for the Salesforce Adapter to function properly. After that you can attach the Adapter to a Salesforce Lightning app and begin using it. All other settings, like Default Settings or Object & Field Mappings, are optional, as they are to be used only in specific cases.
Installation
From AppExchange
The Salesforce Adapter is pre-packaged and uploaded as a Salesforce Component which you can install for your organization from Salesforce AppExchange:

Click the "Get It Now" button and choose whether to install the Salesforce Adapter in production or in a sandbox:
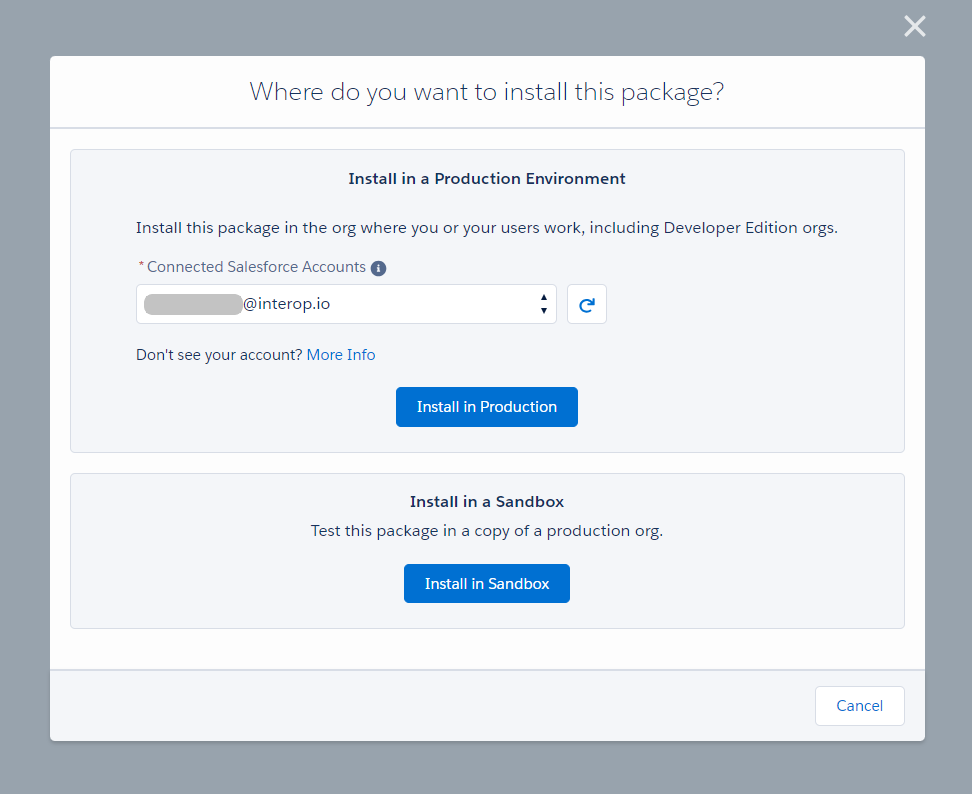
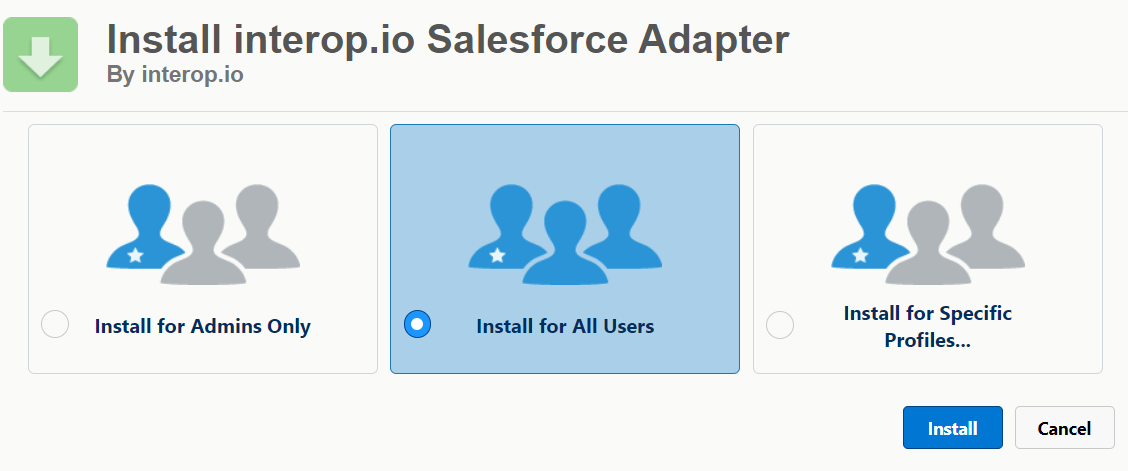
Accept the terms and conditions and click the "Confirm and Install" button. Enter your Salesforce credentials when prompted in order to continue the installation. Select for which users you want to install the Adapter and click the "Install" button:
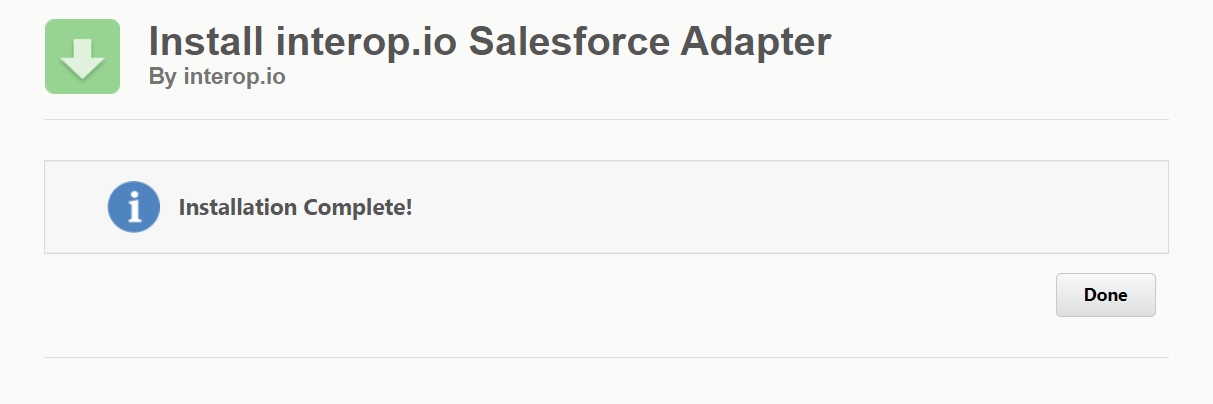
Wait for the installation to complete and press the "Done" button when the screen for successful installation appears:
From a Link
In some cases (for instance, when testing a beta version of the Salesforce Adapter), you may need to install the package from a link.
The installation process is almost identical to the one when installing from AppExchange. The only difference is that the step for choosing whether to install in production or in a sandbox is skipped, because the specific link provided to you will determine this option.
To install from a link, simply click the link and follow the rest of the installation steps already described above.
Enabling the Adapter
To enable the Salesforce Adapter, you must:
set up a custom domain name for your organization. This step is required to be able to use the Salesforce Lightning Utility Bar and custom Salesforce Lightning Components;
configure the Custom Metadata Types, if you are using your own domain pointing to Salesforce;
attach the Salesforce Adapter to any Salesforce Lightning app of your choice;
Custom Domain Name
⚠️ If your organization domain name has already been set up, skip this step.
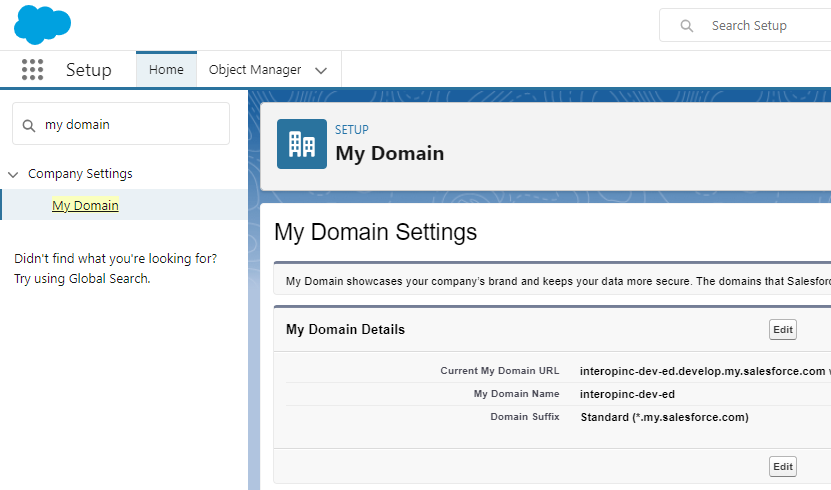
To enable a Custom Domain, go to SETTINGS > Company Settings > My Domain (or search for "My Domain" in the Quick Find bar) and follow the steps for setting up a unique domain name for your organization. You have to choose and register an available domain name, login with your new domain name and deploy it to your users.
Custom Metadata Types
⚠️ If you are using a Salesforce domain, skip this step. These settings are necessary only if you are using your own domain that points to Salesforce.
Next, you must update the value for the "VisualURL" field in the IFrameMeta metadata type. Go to PLATFORM TOOLS > Custom Code > Custom Metadata Types (or search for "Custom Metadata Types" in the Quick Find bar). Click the "Manage Records" link and on the next screen click the "New" button to go to the page for creating a new record:
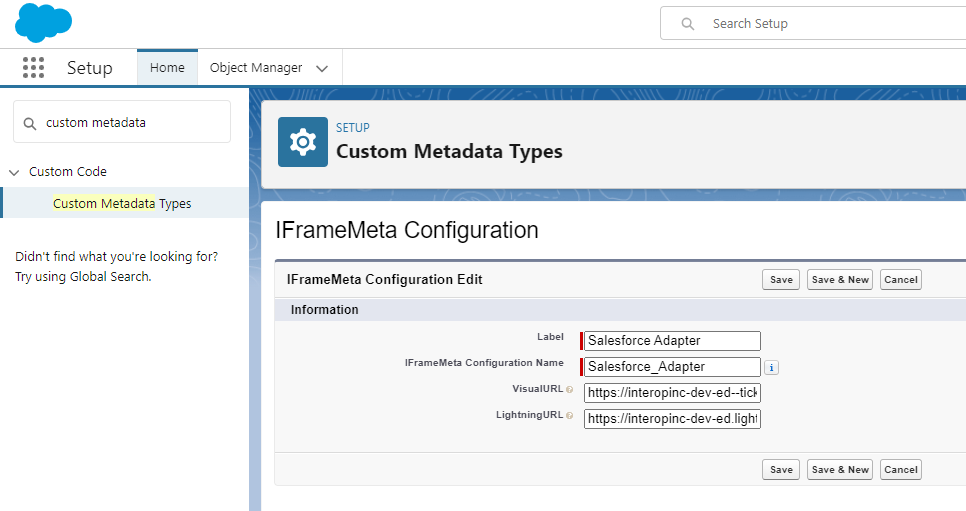
Add a label and a name for the new record.
To get the value for the "VisualURL" field, go to PLATFORM TOOLS > Custom Code > Visualforce Pages (or search for "Visualforce Pages" in the Quick Find bar), click on the "Adapter" list item and click the "Preview" button on the next screen:
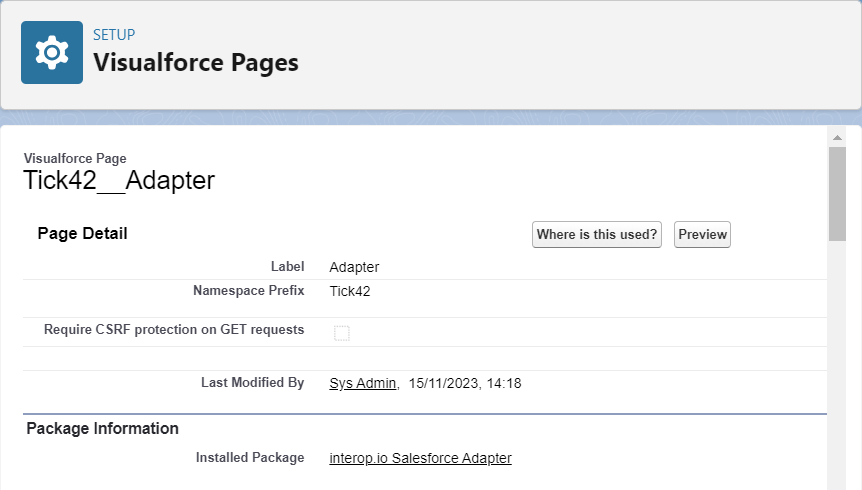
Copy only the domain part of the link from the address bar of the newly opened page and don't include the trailing slash:

Go back to the Custom Metadata Types section, and set this address as a value for the "VisualURL" field. Click the "Save" button to save the changes.
The link for the "LightningURL" field must be in the https://{your-org-domain-name}.lightning.force.com format.
Attaching the Adapter
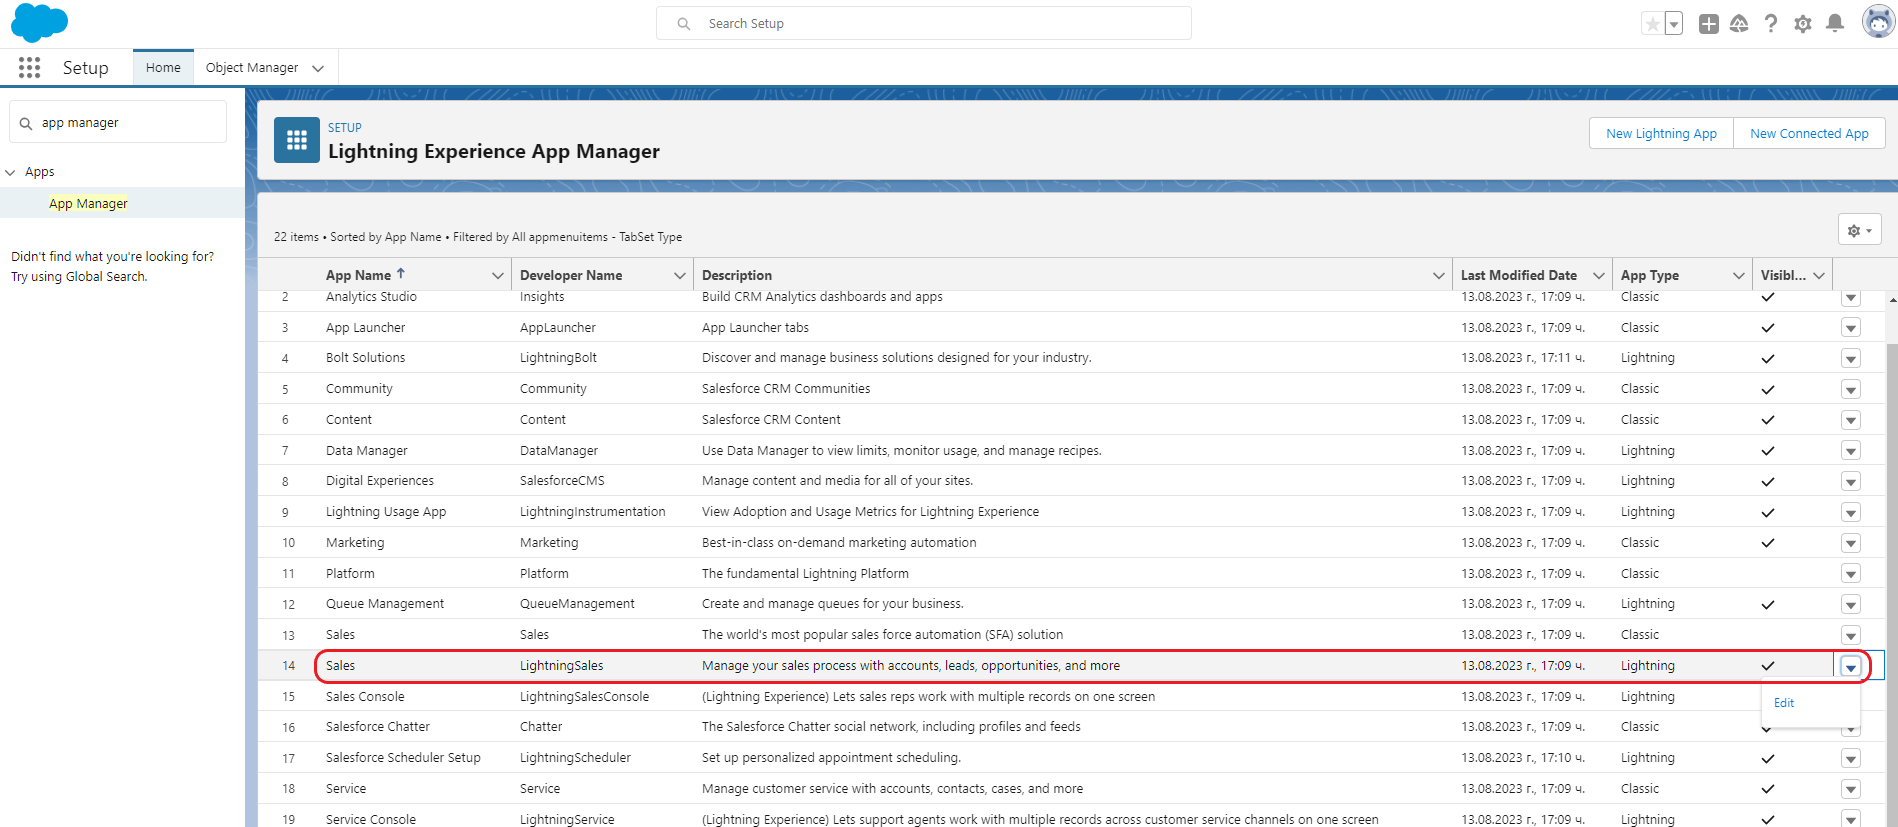
To begin using the Salesforce Adapter, you must attach it to a Lightning App. Go to PLATFORM TOOLS > Apps > App Manager (or search for "App Manager" in the Quick Find bar) and choose an app. For instance, use the "Sales" Lightning app and click on the arrow at the end of its row. Click the "Edit" button from the dropdown menu:
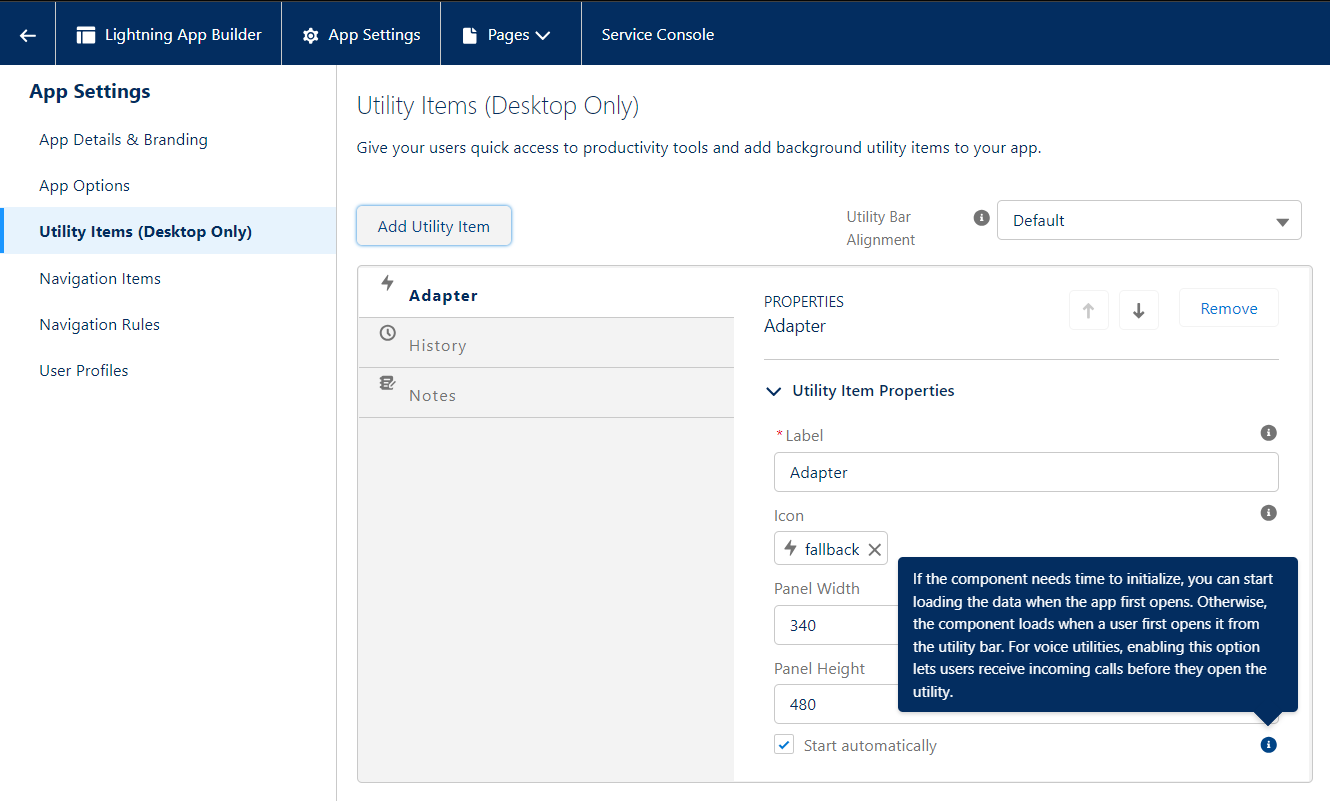
In the newly opened page, go to App Settings > Utility Items and click the "Add Utility Item" button. Search for "Adapter" and click on the "Adapter" item from the item list:
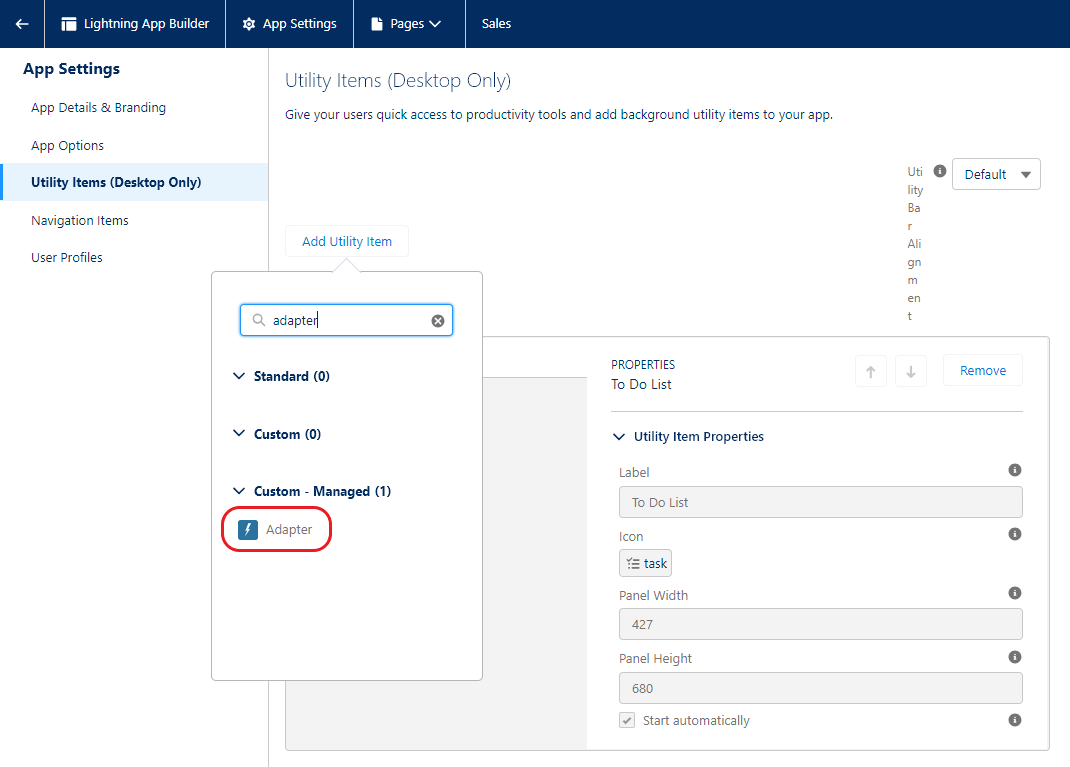
It's recommended to use the default settings for the Salesforce Adapter. You can select the "Start automatically" checkbox to enable the Adapter to load and establish a connection automatically. Otherwise, the user will have to click on it to activate it:
Click the "Save" button to save your changes.
If you have done everything correctly, the Salesforce Adapter will be available as a utility item in the Utility Bar of the "Sales" Lightning app:
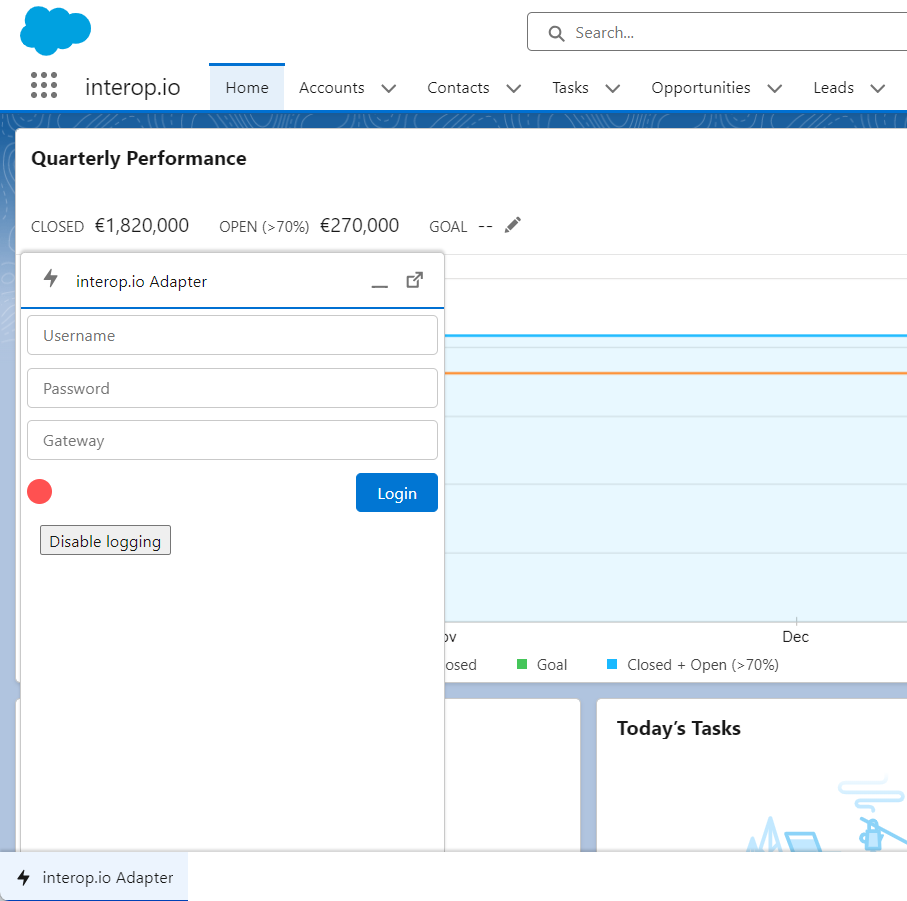
Establishing a Connection
Enter a username, password and an io.Connect Gateway address to establish a connection. The default Gateway address is ws://localhost:8385.
⚠️ Note that the username you supply to the Salesforce Adapter must be the same as the one used by io.Connect Desktop, otherwise the Salesforce Adapter won't be able to see the Interop methods your apps have registered in io.Connect Desktop under a different username. By default, io.Connect Desktop uses the Windows username of the currently logged in user which you can see by right-clicking on the io.Connect Desktop tray icon or by running the
echo %USERNAME%command in a command prompt.
Default Settings
You can configure default settings that the Salesforce Adapter will use to establish a connection when the page is reloaded or if the user clicks the "Login" button without entering an io.Connect Gateway address, username or password. These settings can be set up on an organization level and also per user or user profile.
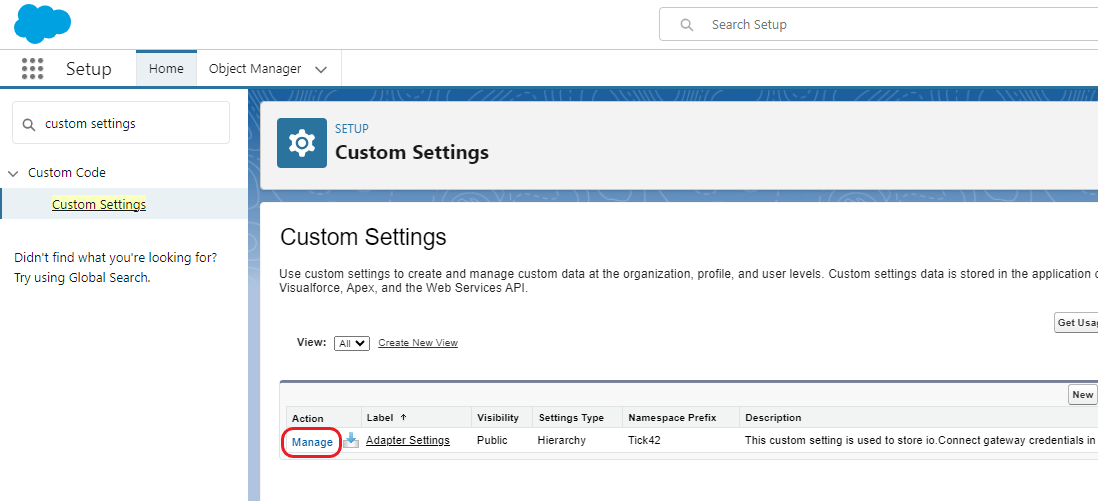
To open the page from where you can specify default connection settings, go to PLATFORM TOOLS > Custom Code > Custom Settings (or search for "Custom Settings" in the Quick Find bar) and click the "Manage" button of the "Adapter Settings" list entry:
The following fields are available for configuration on an organization level and per user or user profile:
| Field | Description |
|---|---|
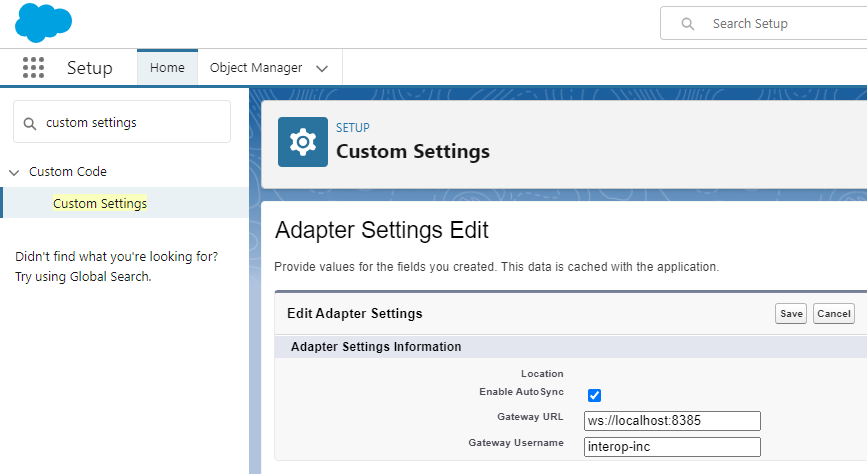
| Enable Auto Sync | Checkbox specifying whether to trigger automatic synchronization between all io.Connect apps when a record is changed in Salesforce. |
| Gateway URL | Address pointing to a running io.Connect Gateway. By default, this is ws://localhost:8385. |
| Gateway Username | Username that must be the same as the one used by the running instance of io.Connect Desktop to which a connection is established. By default, io.Connect Desktop uses the Windows username of the currently logged in user which you can see by right-clicking on the io.Connect Desktop tray icon or by running the echo %USERNAME% command in a command prompt. |
⚠️ Note that these settings will be used only if Salesforce is running in a browser and you want to connect to io.Connect Desktop. If Salesforce is running in a container, these settings will be ignored.
Organization Level
To specify the organization level defaults, click on the "New" button above the "Default Organization Level Value" section and enter the desired settings:
Click the "Save" button to save the changes.
⚠️ Note that any missing setting in the "Adapter Settings" are going to be replaced by the organization level defaults. This way you can specify the default Gateway for all users, and all user credentials can be specified later per user or user profile.
User & Profile Level
To specify user or profile level defaults, click on the "New" button under the "Default Organization Level Value" section and enter the desired settings. Select either "User" or "Profile" from the dropdown menu of the "Location" field and find the respective user or profile in the input field next to it:
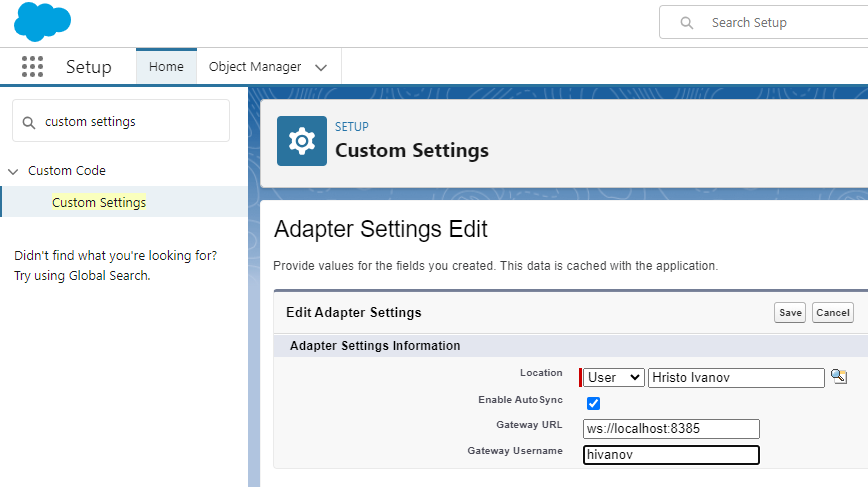
Click the "Save" button to save the changes.
Object & Field Mappings
⚠️ Note that you must exercise utmost caution when modifying the values for the existing field mappings, as all existing registered listeners will start receiving different data.
To be able to modify object or field mappings, you must have the interop.io Salesforce Adapter - Administrator User permission set assigned.
Permission Sets
The interop.io Salesforce Adapter - Administrator User permission set is required for users who want to view or modify mappings between io.Connect and Salesforce objects.
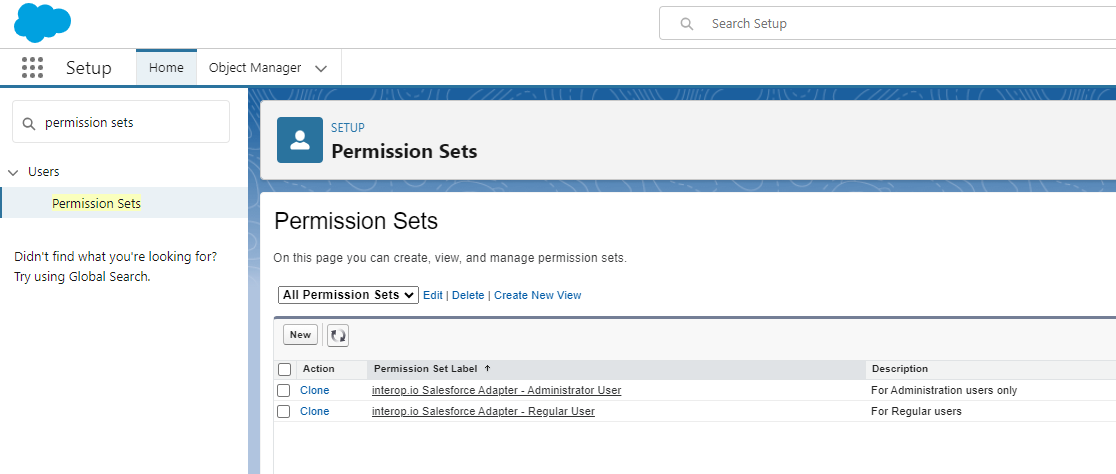
To assign permission sets, go to ADMINISTRATION > Users > Permission Sets (or search for "Permission Sets" in the Quick Find bar). You can assign the interop.io Salesforce Adapter - Administrator User permission set to administrator users, and the interop.io Salesforce Adapter - Regular User permission set to regular users.
Click on the desired permission set (e.g., interop.io Salesforce Adapter - Administrator User) to assign it. Click the "Manage Assignments" button and on the next page click the "Add Assignment" button. Select the desired users and click "Next". Choose an expiration limit for the assignment and click the "Assign" button to assign the permission set. Click the "Done" button to complete the process.
Modifying Objects
The following example demonstrates how to modify the mapping between an io.Connect and a Salesforce object in order to synchronize it by an external field named "externalID". In this case, an input mapping for the Account object will be used:
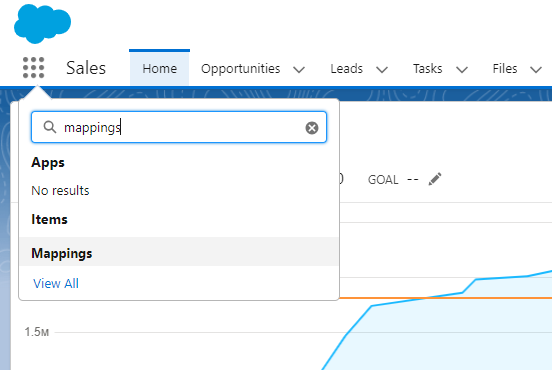
- Search for "Mappings" in the App Launcher menu:
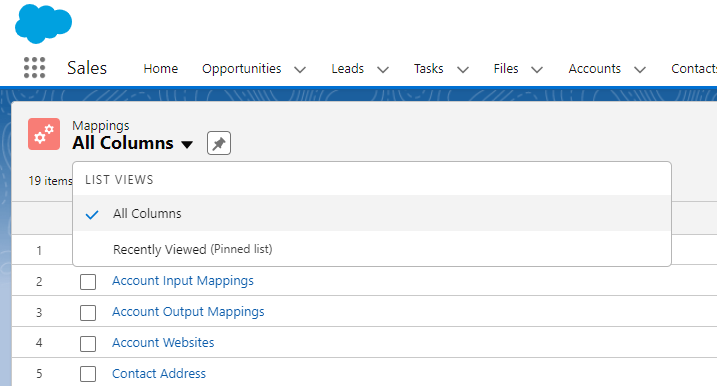
- Click on the "List Views" down arrow and select "All Columns" to view all mappings:
- Go to "Account Input Mapping" and either click on it or from the down arrow at the end of the row click the "Edit" button to open and edit the object mapping. Edit the "External Field Name" and "Salesforce Field Name" fields and click the "Save" button to save your changes:

Modifying Fields
The following example demonstrates how to modify a field mapping between an io.Connect and a Salesforce object in order to synchronize it by an external field named "info". In this case, the "Description" field of an input mapping for the Task object will be used:
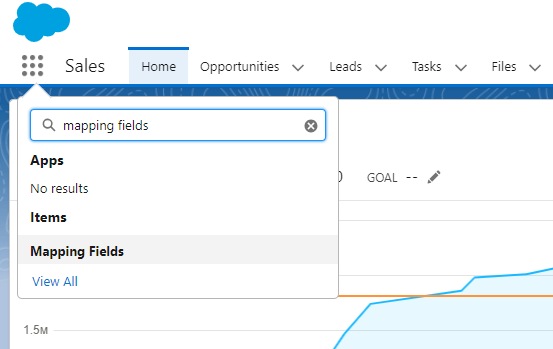
- Search for "Mapping Fields" in the App Launcher menu:
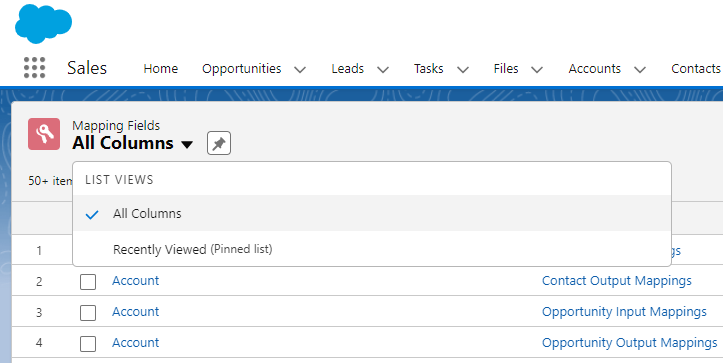
- Click on the "List Views" down arrow and select "All Columns" to view all mapped fields:
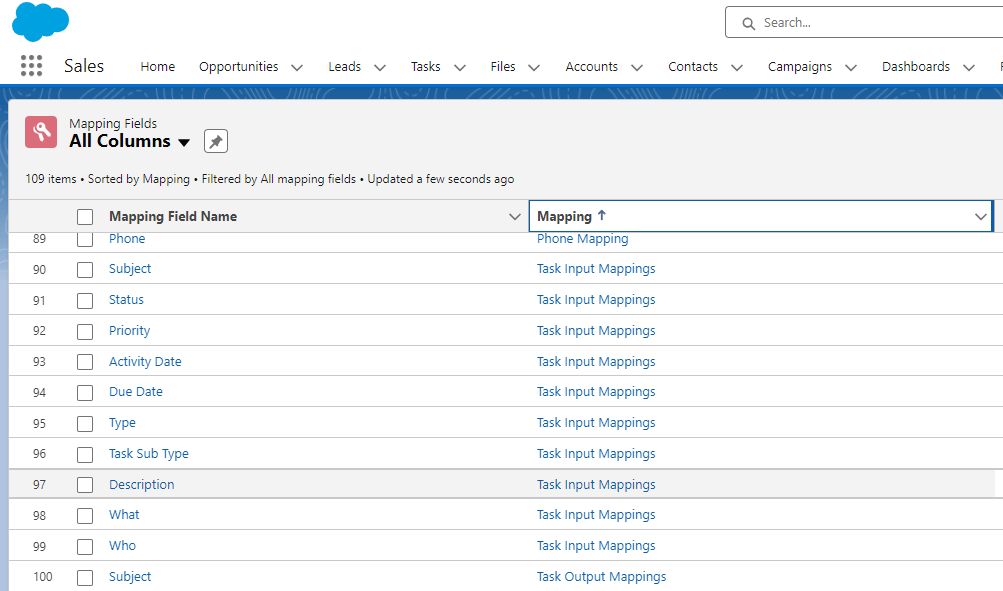
- Click on the "Mapping" column to sort the list and go to the "Description" field of the "Task Input Mappings":
- Either click on the "Description" field, or from the down arrow at the end of the row click the "Edit" button to open, edit the field mapping click the "Save" button to save your changes:

Now, the data for the "Description" field will come from an "info" property of an io.Connect object, and this data will be used as a value for the "description" field of the Salesforce object.
⚠️ Note that Salesforce database fields are case insensitive - e.g., if in the example above the value in the "Sobject Field" were "Description" instead of "description", the resulting field mapping would have been the same.