Salesforce
Installation
⚠️ Note that the following sections are relevant only for the latest versions of the Salesforce Adapter (5.0 and later). For details on the legacy versions (3.0 and 4.0), see the Legacy Adapter section.
The following sections describe the basic process for installing the Salesforce Adapter from AppExchange or from a custom link. After installation, you must further configure the Salesforce Adapter if you intend on using Salesforce in a web browser. If you intend on using Salesforce within the io.Connect platform (e.g., by defining Salesforce as an io.Connect app in io.Connect Desktop or in io.Connect Browser), then this isn't necessary.
For instructions on how to configure the Salesforce Adapter and on how to start interop-enabling your components, see the Usage > io.Connect Platform and Usage > Web Browser sections.
From AppExchange
The Salesforce Adapter is pre-packaged and uploaded as a Salesforce Component which you can install for your organization from Salesforce AppExchange:
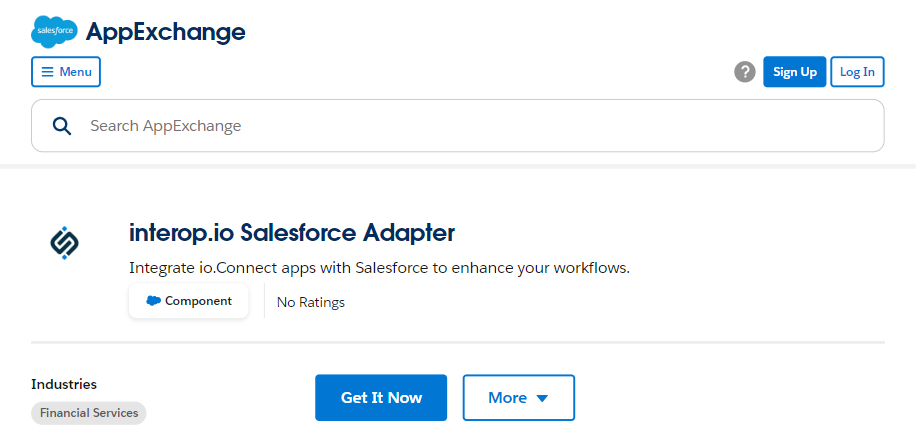
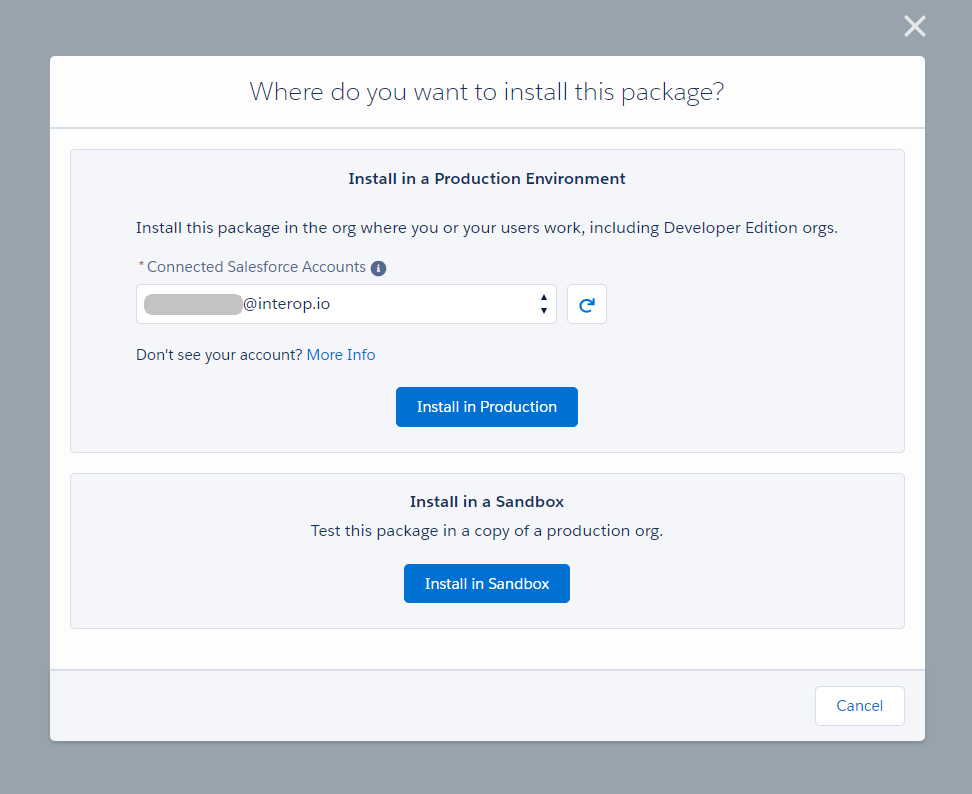
Click the "Get It Now" button and choose whether to install the Salesforce Adapter in production or in a sandbox:
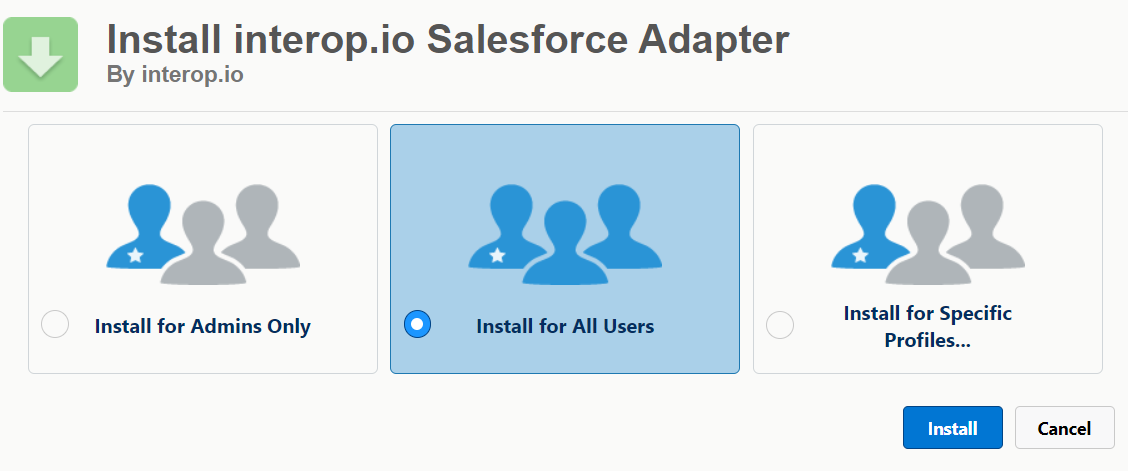
Accept the terms and conditions and click the "Confirm and Install" button. Enter your Salesforce credentials when prompted in order to continue the installation. Select for which users you want to install the Adapter and click the "Install" button:
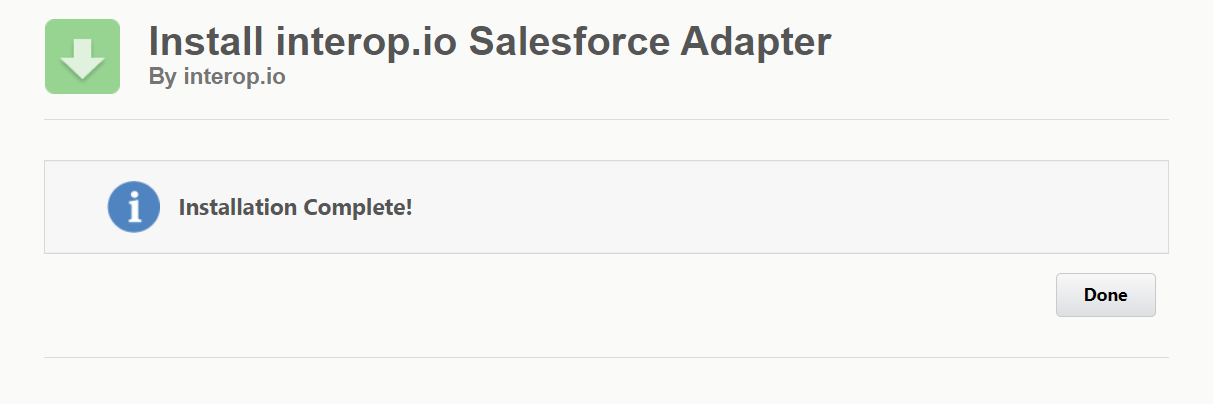
Wait for the installation to complete and press the "Done" button when the screen for successful installation appears:
From a Link
In some cases (for instance, when testing a beta version of the Salesforce Adapter), you may need to install the package from a custom link provided directly to you.
The installation process is almost identical to the one when installing from AppExchange. The only difference is that the step for choosing whether to install in production or in a sandbox is skipped, because the specific link provided to you will determine this option.
To install from a link, simply click the provided link and follow the rest of the installation steps already described above.
Connection Configuration
To be able to interoperate with the io.Connect framework, the Salesforce Adapter establishes a WebSocket connection to the io.Connect Gateway. This is valid irrespective of whether you are using the Salesforce within the io.Connect platform or in a web browser.
The following sections describe the configuration settings you must provide in your Salesforce organization after installing the Salesforce Adapter in order to ensure that the connection to the io.Connect platform will be established and will function properly.
io.Connect Desktop
For io.Connect Desktop projects, the default port for the io.Connect Gateway is 8385 and can be configured via the system.json system configuration file of io.Connect Desktop. If you are using the default port, it isn't necessary to provide any other configuration as this port is allowed by default during the installation.
⚠️ Note that you must not configure the io.Connect Gateway to use a random port on each start as this will make it impossible for the Salesforce Adapter to connect to io.Connect Desktop.
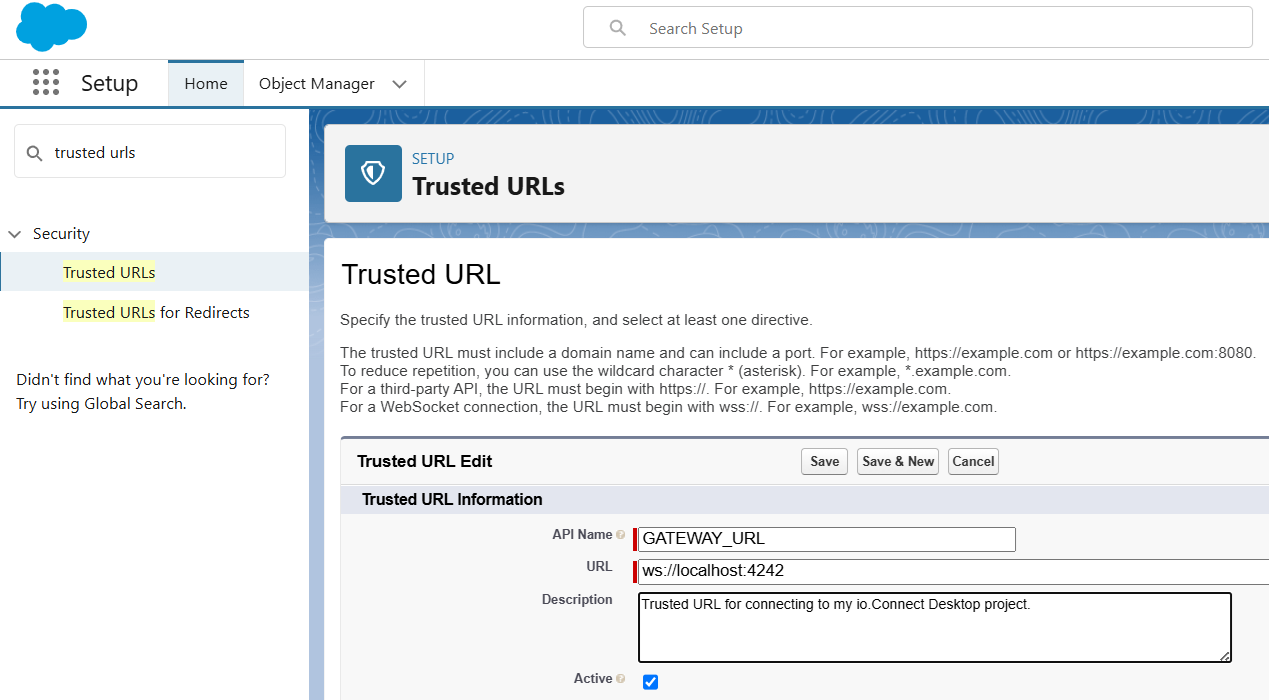
If you change the io.Connect Gateway port, you must allow it in your Salesforce organization settings. Go to Setup > Security > Trusted URLs and click the "New Trusted URL" button. Provide a name for the trusted URL and the URL itself:
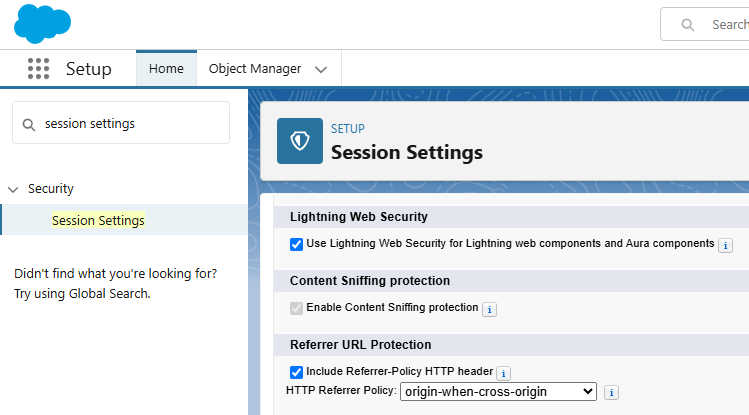
io.Connect Browser
For io.Connect Browser projects, it's necessary to provide settings for trusted domains for inline frames and set the HTTP Referrer-Policy.
- Go to
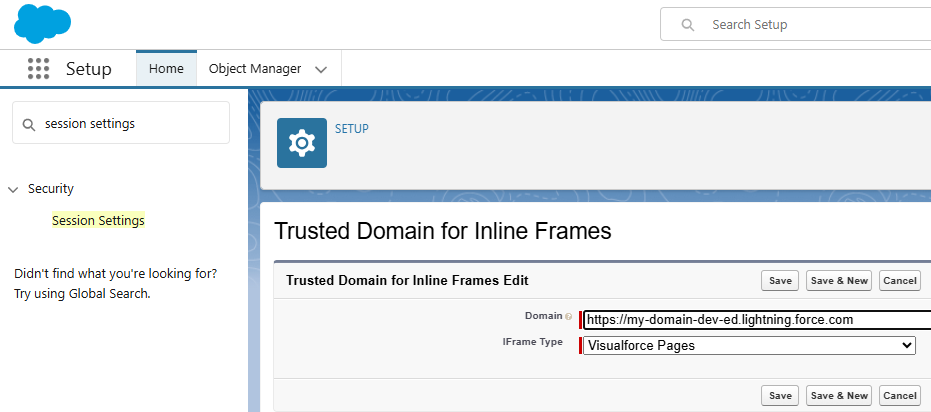
Setup > Security > Session Settings > Trusted Domains for Inline Framesand click the "Add Domain" button. Add your Salesforce Lightning domain (e.g.,https://my-domain-dev-ed.lightning.force.com):
- Go to
Setup > Security > Session Settings > Referrer URL Protectionand update the value of theHTTP Referrer Policyfield from the dropdown menu toorigin-when-cross-origin: