
Notifications
Overview
The Notifications API is accessible via the io.notifications object.
Configuration
To specify global notification settings dynamically, use the configure() method. It accepts a Configuration object as an argument with the following properties:
| Property | Type | Description |
|---|---|---|
closeNotificationOnClick |
boolean |
If true, when the user clicks on the body of a notification in the Notification Panel, the notification will be removed from the list. Set to false if you want users to be able to click on the notification body (e.g., to copy text) without the notification disappearing from the Notification Panel. Available since io.Connect Desktop 9.6. |
enable |
boolean |
If true (default), will enable all notifications - notification toasts and notifications in the Notification Panel. |
enableToasts |
boolean |
If true (default), will enable notification toasts. |
placement |
object |
Placement settings for the Notification Panel and the notification toasts. Available since io.Connect Desktop 9.2. |
sourceFilter |
object |
Filter with names of apps that are allowed or not allowed to raise notifications. |
toastExpiry |
number |
Interval in milliseconds after which the notification toasts will be hidden. Set to -1 to show the notification toasts indefinitely. Defaults to 15000. |
toasts |
object |
Settings for the notification toasts. |
The placement object has the following properties:
| Property | Type | Description |
|---|---|---|
panel |
"left" | "right" |
Sets the position of the Notification Panel on the screen - left or right. Defaults to "right". |
toasts |
"top-left" | "top-right" | "bottom-left" | "bottom-right" |
Sets the position of the notification toasts on the screen - top right, top left, bottom right or bottom left. Defaults to "bottom-right". |
The sourceFilter object has the following properties:
| Property | Type | Description |
|---|---|---|
allowed |
string[] |
Names of apps allowed to raise notifications. Defaults to ["*"]. |
blocked |
string[] |
Names of apps not allowed to raise notifications. Defaults to []. |
The toasts object has the following properties:
| Property | Type | Description |
|---|---|---|
mode |
"single" | "stacked" |
Mode for the notification toasts. Notification toasts can appear individually, or can be stacked together based on a criterion (severity or app that has raised the notification). Defaults to "single". |
stackBy |
"severity" | "application" |
Criterion for stacking the notification toasts. Defaults to "severity". |
To disable all notifications:
const config = { enable: false };

await io.notifications.configure(config);
To disable only toast notifications:
const config = { enableToasts: false };

await io.notifications.configure(config);
To set the position of the Notification Panel and the notification toasts on the screen:
const config = {
    placement: {
        panel: "left",
        toasts: "top-left"
    }
};

await io.notifications.configure(config);
To retrieve the current global notification settings, use the getConfiguration() method:
const config = await io.notifications.getConfiguration();Raising Notifications
To raise a notification from your app, use the raise() method of the API. The method accepts as an argument a required IOConnectNotificationOptions object with settings for the notification you want to raise:
const options = {
    title: "New Trade",
    body: "VOD.L: 23 shares sold @ $212.03",
    actions: [
        {
            action: "openClientPortfolio",
            title: "Open Portfolio"
        }
    ]
};

// Raising a notification.
const notification = await io.notifications.raise(options);
Notification Options
The IOConnectNotificationOptions object extends the standard web NotificationOptions object with several additional properties:
| Property | Type | Description |
|---|---|---|
actions |
NotificationAction[] |
An array of NotificationAction objects. |
clickInterop |
object |
Accepts an InteropActionSettings object as a value. Use this property to invoke an Interop method when the user clicks on the notification. You can specify arguments for the method and an Interop target. |
panelExpiry |
number |
Interval in seconds after which the notification will be removed from the Notification Panel. |
severity |
"Low" | "Medium" | "High" | "Critical" | "None" |
Defines the urgency of the notification which is represented visually by different colors in the notification UI. |
source |
string |
Overrides the source of the notification. Provide the name of the io.Connect app which you want to be displayed as a source of the notification. |
state |
"Active" | "Acknowledged" | "Closed" | "Stale" |
Notification state. Defaults to "Active". |
title |
string |
Required. The title of the notification. |
toastExpiry |
number |
Interval in seconds after which the notification toast will be hidden. Set to -1 to show the notification toast indefinitely. |
type |
"Notification" | "Alert" |
This property is meant to be used only as a way to distinguish between notification types in case you want to create different visual representations for them - e.g., the "Notification" type may be considered a general notification, while the "Alert" type may be considered a more important or urgent notification. |
Notification Click
Standard Click Handler
The raise() method resolves with a Notification object. Use its onclick property to specify a callback that will be invoked when the user clicks on the notification:
const options = {
    title: "New Trade",
    body: "VOD.L: 23 shares sold @ $212.03",
    actions: [
        {
            action: "openClientPortfolio",
            title: "Open Portfolio"
        }
    ]
};

const notification = await io.notifications.raise(options);

notification.onclick = () => console.log("Notification was clicked.");
Interop Click Handler
You can also use the clickInterop property of the IOConnectNotificationOptions object to specify an Interop method that will be invoked when the user clicks on the notification. For instance, another app has registered an Interop method:
const methodName = "HandleNotificationClick";
const handler = args => console.log(args);

await io.interop.register(methodName, handler);
To invoke this Interop method for handling the notification click, define an InteropActionSettings object and assign it as a value to the clickInterop property of the notification options object:
const interopSettings = {
    // The only required property is the method name.
    method: "HandleNotificationClick",
    arguments: {
        name: "Vernon Mullen",
        id: "1"
    }
};

const options = {
    title: "New Trade",
    body: "VOD.L: 23 shares sold @ $212.03",
    actions: [
        {
            action: "openClientPortfolio",
            title: "Open Portfolio"
        }
    ],
    clickInterop: interopSettings
};

const notification = await io.notifications.raise(options);
Notification Actions
You can create action buttons for the notification. When the user clicks on an action button, the specified callbacks will be invoked.
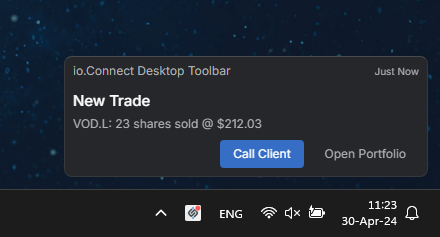
To define action buttons, use the actions property of the IOConnectNotificationOptions object when creating a notification. The actions property accepts an array of NotificationAction objects:
const options = {
    title: "New Trade",
    body: "VOD.L: 23 shares sold @ $212.03",
    actions: [
        {
            action: "callClient",
            title: "Call Client"
        },
        {
            action: "openClientPortfolio",
            title: "Open Portfolio"
        }
    ]
};
⚠️ Note that the action buttons in an io.Connect Notification are limited to two, as the web browsers currently support a maximum of two actions.
Standard Actions
Besides all properties of a standard web Notification object, the Notification object has an additional onaction property. You can use this property to assign a callback that will be invoked when the user clicks an action button in the notification. The callback receives as an argument an ActionEvent object which extends the standard web Event object. The ActionEvent object has an action property that holds the name of the triggered action.
const notificationOptions = {
    title: "New Trade",
    body: "VOD.L: 23 shares sold @ $212.03",
    actions: [
        {
            action: "openClientPortfolio",
            title: "Open Portfolio"
        }
    ]
};

const notification = await io.notifications.raise(notificationOptions);

notification.onaction = function (actionEvent) {
    if (actionEvent.action === "openClientPortfolio") {
        console.log(`Action button in notification "${this.title}" has been clicked.`);
    }
};
Interop Actions
The NotificationAction object provides an interop property which you can use to invoke Interop methods when the user clicks an action button in the notification.
First, register an Interop method in another app:
const methodName = "HandleNotificationClick";
const handler = args => console.log(args);

await io.interop.register(methodName, handler);
After that, in your app define an InteropActionSettings object and assign it as a value to the interop property of the action object in the actions array:
const interopSettings = {
    // The only required property is the method name.
    method: "HandleNotificationClick",
    arguments: {
        name: "Vernon Mullen",
        id: "1"
    }
};

const notificationOptions = {
    title: "New Trade",
    body: "VOD.L: 23 shares sold @ $212.03",
    actions: [
        {
            action: "openClientPortfolio",
            title: "Open Portfolio",
            interop: interopSettings
        }
    ]
};

const notification = await io.notifications.raise(notificationOptions);
Grouping Notification Actions
Available since io.Connect Desktop 9.6
Notification actions can be grouped. This enables you to assign multiple actions to a single notification button. Nested actions are displayed as a dropdown menu:
To group notification actions, use a combination of the displayId and displayPath properties of the NotificationAction object when defining an action. The displayId property must be set to a unique ID for the action. This ID can be used as a value in the displayPath property of another notification action to determine the position of the latter within the notification action menu.
The following example demonstrates how to create a notification with a single action button that will have two nested actions as sub-items:
const notificationOptions = {
    title: "New Trade",
    body: "VOD.L: 23 shares sold @ $212.03",
    actions: [
        {
            action: "edit",
            title: "Edit",
            onClick: () => { },
            // Unique ID for the action.
            displayId: "1",
        },
        {
            action: "copy",
            title: "Copy",
            onClick: () => { },
            // Using the ID of another action to specify the position
            // of this action within the notification action menu.
            displayPath: ["1"],
        },
        {
            action: "paste",
            title: "Paste",
            onClick: () => { },
            // Using the ID of another action to specify the position
            // of this action within the notification action menu.
            displayPath: ["1"],
        }
    ]
};

const notification = await io.notifications.raise(notificationOptions);
Listing Notifications
To retrieve a list of all available notifications, use the list() method:
const allNotifications = await io.notifications.list();Clearing Notifications
To clear all notifications, use the clearAll() method:
await io.notifications.clearAll();To clear a specific notification, use the clear() method and pass as a required argument the ID of the notification to clear:
await io.notifications.clear(notification.id);To clear all notifications seen by the user, use the clearOld() method:
await io.notifications.clearOld();Available since io.Connect Desktop 9.5
To clear multiple notifications at a time, use the clearMany() method and pass as a required arguments a list of IDs of the notifications to clear:
const notificationIDs = notifications.map(notification => notification.id);

await io.notifications.clearMany(notificationIDs);
Clicking Notifications
To click a notification or a notification action programmatically, use the click() method and pass either only the notification ID, or the notification ID and the name of the action to click:
const id = notification.id;
const action = "openClientPortfolio";

// Clicking a notification.
await io.notifications.click(id);

// Clicking a notification action.
await io.notifications.click(id, action);
Available since io.Connect Desktop 9.3
The click() method accepts a ClickOptions object as a third argument:
const id = notification.id;
// The notification will be closed when clicked.
const options = { close: true };

await io.notifications.click(id, null, options);
The ClickOptions object has the following properties:
| Property | Type | Description |
|---|---|---|
close |
boolean |
If true, the notification will be closed when clicked. |
Snoozing Notifications
Available since io.Connect Desktop 9.3
To snooze notifications programmatically, use the snooze() method and pass as required arguments the ID of the notification to snooze and the duration in milliseconds for which to snooze it:
io.notifications.snooze(notification.id, 60000);Available since io.Connect Desktop 9.5
To snooze multiple notifications at a time, use the snoozeMany() method and pass as required arguments a list of IDs of the notifications to snooze and the duration in milliseconds for which to snooze them:
const notificationIDs = notifications.map(notification => notification.id);
const snoozeDurationMS = 600000;

await io.notifications.snoozeMany(notificationIDs, snoozeDurationMS);
Updating Notification Data
Available since io.Connect Desktop 9.1
To update the arbitrary data associated with the notification which is available in its data property, use the updateData() method and provide the ID of the notification and the new data:
const id = notification.id;
const data = { io: 42 };

await io.notifications.updateData(id, data);
Importing Notifications
Available since io.Connect Desktop 9.6
Importing notifications can be useful if you want to persist the notification history between user sessions. Even if the user shuts down the platform, you can dynamically import the previously saved batch of existing notifications when the user logs in again. All imported notifications will be visible in the Notification Panel and will be available in the notification list that can be accessed programmatically, but only notifications with state set to "Active" will be displayed as notification toasts to the user. An event for a raised notification will be triggered for all imported notifications.
To import a notification, use the import() method and provide a list of IOConnectNotificationOptions objects as a required argument:
const notifications = [
    {
        title: "New Trade",
        body: "VOD.L: 23 shares sold @ $212.03",
        state: "Active"
        actions: [
            {
                action: "openClientPortfolio",
                title: "Open Portfolio"
            }
        ]
    },
    {
        title: "New Trade",
        body: "VOD.L: 42 shares bought @ $211.73",
        state: "Seen"
    }
];

await io.notifications.import(notifications);
Notification State
Notifications can have the following states describing their lifetime:
| State | Description |
|---|---|
"Acknowledged" |
A notification can be marked as acknowledged when the user has interacted with it by clicking on the notification or on an action in it. |
"Active" |
A notification can be marked as active when it's raised, but the user hasn't seen it, or interacted in any way with it yet. |
"Closed" |
A notification can be marked as closed when the user has closed the notification in the Notification Panel. |
"Processing" |
A notification can be marked as "Processing" when its state is in the process of changing (e.g., the user interacts with a notification from the UI, you make a request to a remote service to update the notification state, and you are still waiting for a response). Available since io.Connect Desktop 9.3. |
"Seen" |
A notification can be marked as seen when the user has seen it (e.g., by opening the Notification Panel). Available since io.Connect Desktop 9.3. |
"Snoozed" |
A notification can be marked as snoozed when the user snoozes it from the UI. Available since io.Connect Desktop 9.3. |
"Stale" |
A notification can be marked as stale after a predefined period of time. |
To set the state of a notification, use the setState() method and pass as required arguments the ID of the notification whose state to set and the State value to which to set it. To retrieve the state of a notification, use the state property of the Notification object:
const id = notification.id;
const state = "Acknowledged";

// Setting the notification state.
await io.notifications.setState(id, state);

// Retrieving the notification state.
const notificationState = notification.state;

console.log(`Notification with ID "${id}" is in state "${notificationState}".`);
Available since io.Connect Desktop 9.5
To set the states of multiple notifications at a time, use the setStates() method and pass as required arguments a list of IDs of the notifications whose states to set and the State value to which to set them:
const notificationIDs = notifications.map(notification => notification.id);
const notificationState = "Seen";

await io.notifications.setStates(notificationIDs, notificationState);
Notification Filters
Notifications can be filtered programmatically based on lists of allowed and blocked apps.
To set a notification filter, use the setFilter() method and pass a NotificationFilter object as an argument:
const filter = {
    allowed: ["*"],
    blocked: ["app-one", "app-two"]
};

await io.notifications.setFilter(filter);
The NotificationFilter object has the following properties:
| Property | Type | Description |
|---|---|---|
allowed |
string[] |
List of the names of the apps which will be allowed to raise notifications. Use * to allow all apps. |
blocked |
string[] |
List of the names of the apps which won't be allowed to raise notifications. Use * to block all apps. |
Using a combination of both lists enables you to create various filters:
// Allows all apps to raise notifications.
const allowAll = {
    allowed: ["*"]
};

// Allows only the specified apps to raise notifications.
const allowOnly = {
    allowed: ["app-one", "app-two"]
};

// Allows all except the blocked apps to raise notifications.
const allowAllExcept = {
    allowed: ["*"],
    blocked: ["app-one", "app-two"]
};

// Blocks all apps from raising notifications.
const blockAll = {
    blocked: ["*"]
};
To get the current notification filter, use the getFilter() method:
const filter = await io.notifications.getFilter();Events
The Notifications API provides methods for subscribing for notification events. All methods return a function you can use to unsubscribe from the respective event.
To get notified when a notification is raised, use the onRaised() method:
const handler = notification => console.log(`Notification with ID "${notification.id}" was raised.`);

const unsubscribe = io.notifications.onRaised(handler);
To get notified when a notification is closed, use the onClosed() method:
const handler = notification => console.log(`Notification with ID "${notification.id}" was closed.`);

io.notifications.onClosed(handler);
To get notified when the state of a notification is changed, use the onStateChanged() method:
const handler = notification => console.log(`The state of notification with ID "${notification.id}" was changed.`);

io.notifications.onStateChanged(handler);
To get notified when the number of active notifications changes, use the onCounterChanged() method:
const handler = info => console.log(`Notifications with state "Active": ${info.count}.`);

io.notifications.onCounterChanged(handler);
To get notified when the global notification settings change, use the onConfigurationChanged() method:
const handler = config => console.log(`Notification settings updated: ${config}.`);

io.notifications.onConfigurationChanged(handler);
Available since io.Connect Desktop 9.1
To get notified when the data property of a notification is updated, use the onDataChanged() method:
const handler = data => console.log(`Notification data: ${data}`);

io.notifications.onDataChanged(handler);
Notification Panel
The Notification Panel can be controlled programmatically - show, hide or toggle its visibility. The Notification Panel API is accessible via the io.notifications.panel object.
Operations
To check whether the Notification Panel is visible, use the isVisible() method:
const isPanelVisible = await io.notifications.panel.isVisible();To show the Notification Panel, use the show() method:
await io.notifications.panel.show();To hide the Notification Panel, use the hide() method:
await io.notifications.panel.hide();To toggle the visibility of the Notification Panel, use the toggle() method:
await io.notifications.panel.toggle();Events
To get notified when the visibility of the Notification Panel changes, use the onVisibilityChanged() method:
io.notifications.panel.onVisibilityChanged(isVisible => console.log(`The Notification Panel is ${isVisible ? "visible": "hidden"}.`));API Reference
For a complete list of the available Notifications API methods and properties, see the Notifications API reference documentation.