Changelog
io.Connect Desktop 9.3
Release date: 15.05.2024
| Components | Version |
|---|---|
| Electron | 29.2.0 |
| Chromium | 122.0.6261.156 |
| Node.js | 20.9.0 |
New Features
Notifications
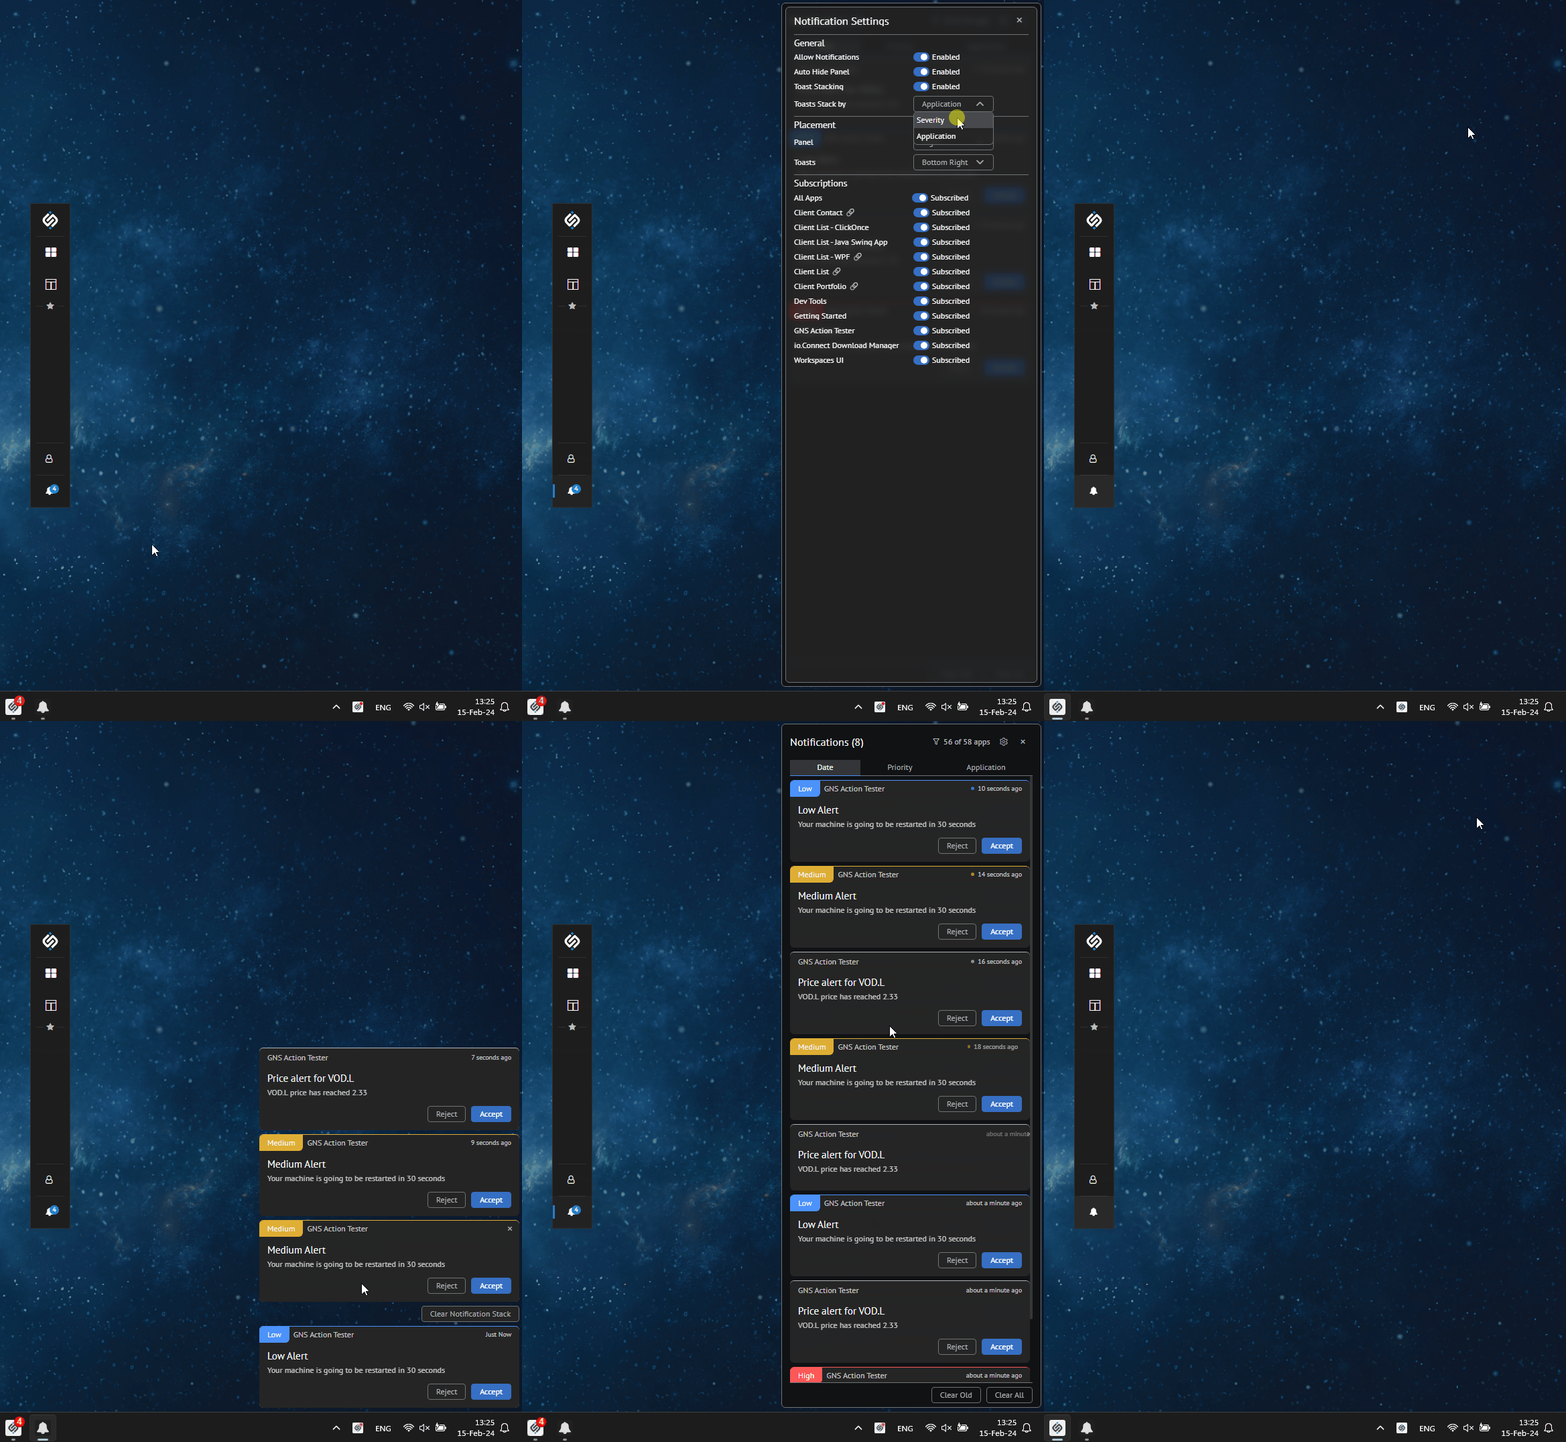
Notifications UI
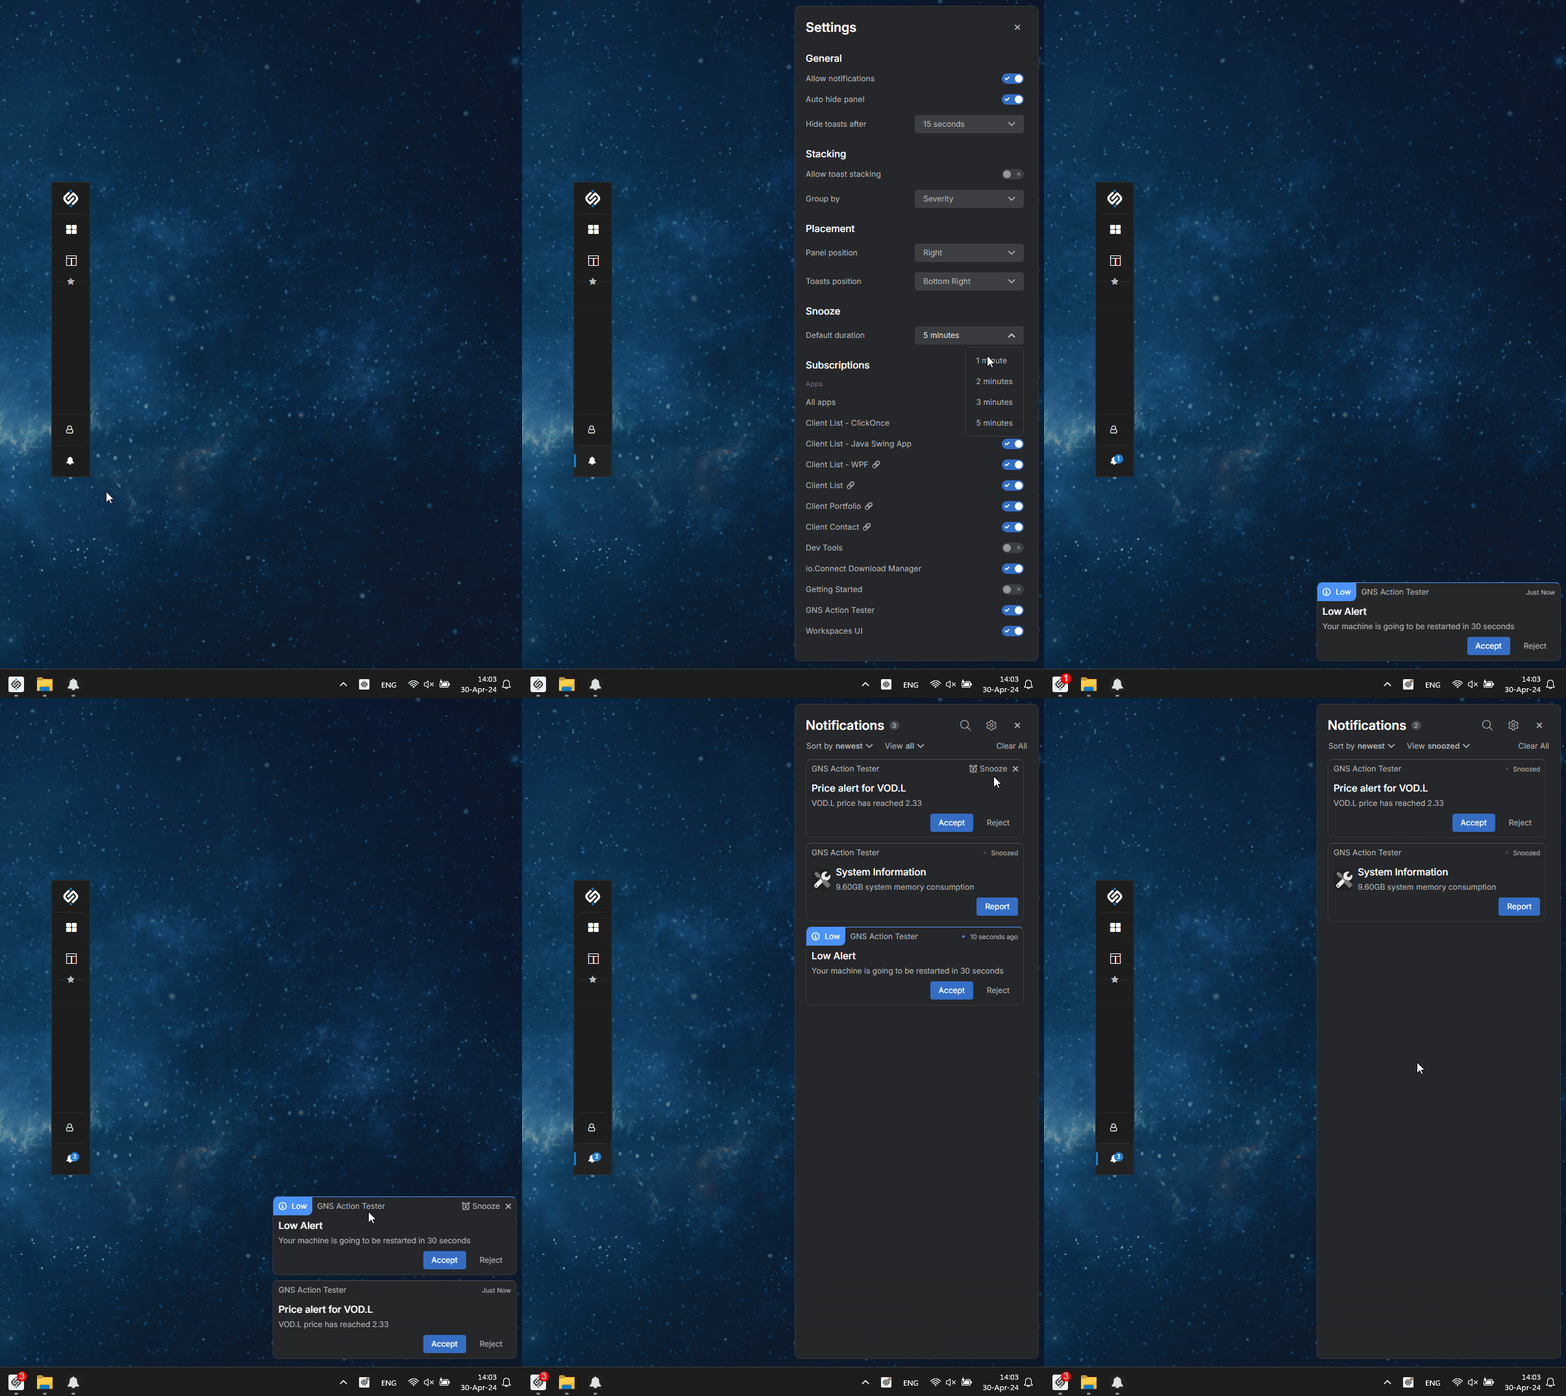
The Notification Panel and the notification toasts are updated with a new UI design:
Snoozing Notifications
It's now possible to snooze notifications from the UI and also programmatically:
Snoozed notifications will be shown to the user again as notification toasts after the specified snooze duration has elapsed.
To provide global settings for snoozing notifications, use the
"snooze"property of the"notifications"top-level key in thesystem.jsonsystem configuration file of io.Connect Desktop:{ "notifications": { "snooze": { "enabled": true, "duration": 300000 } } }To snooze notifications programmatically, use the
snooze()method of the Notifications API and pass the ID of the notification to snooze and the duration in milliseconds for which to snooze it:io.notifications.snooze(notification.id, 60000);Notification Click
The
click()method of the Notifications API now accepts aClickOptionsobject as a third argument. Currently, this object has only one property -close, which you can use to specify whether the notification will be closed when clicked:const id = notification.id; // The notification will be closed when clicked. const options = { close: true }; await io.notifications.click(id, null, options);Notification States
New notification states have been added to the Notifications API. The
Stateenumeration now contains the following notification states:
State Description "Acknowledged"A notification can be marked as acknowledged when the user has interacted with it by clicking on the notification or on an action in it. "Active"A notification can be marked as active when it's raised, but the user hasn't seen it, or interacted in any way with it yet. "Closed"A notification can be marked as closed when the user has closed the notification in the Notification Panel. "Processing"A notification can be marked as "Processing"when its state is in the process of changing (e.g., the user interacts with a notification from the UI, you make a request to a remote service to update the notification state, and you are still waiting for a response)."Seen"A notification can be marked as seen when the user has seen it (e.g., by opening the Notification Panel). "Snoozed"A notification can be marked as snoozed when the user snoozes it from the UI. "Stale"A notification can be marked as stale after a predefined period of time.
Channels
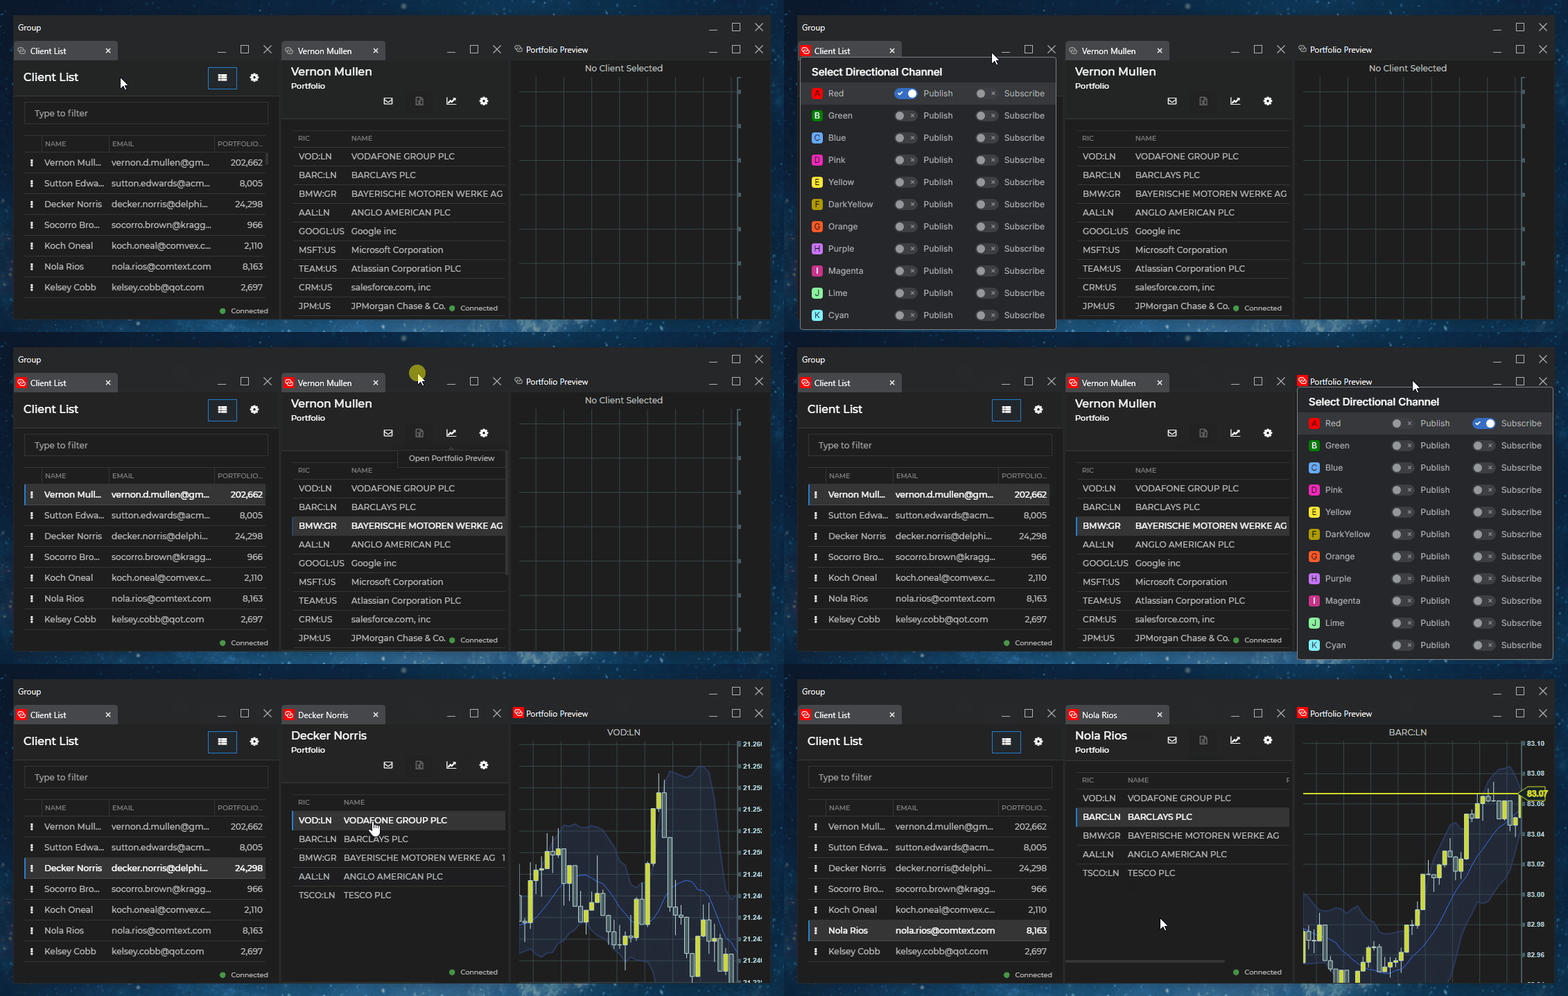
Directional Channels
io.Connect Desktop now supports directional Channels. When the directional Channel Selector is enabled, users can manually join an app to a Channel and specify whether it should only publish or subscribe to the selected Channel:
Channel Selector
To configure the Channel Selector globally, use the
"channelSelector"property of the"windows"top-level key in thesystem.jsonsystem configuration file of io.Connect Desktop:{ "windows": { "channelSelector": { "enabled": true, "type": "directionalSingle" } } }To configure the Channel Selector per app, use the
"channelSelector"property of the"details"top-level key in the app definition:{ "details": { "channelSelector": { "enabled": true, "type": "single", "channelId": "Black" } } }The
"channelSelector"object has the following properties:
Property Type Description "enabled"booleanIf true, will allow showing the Channel Selector. Defaults tofalse."channelId"stringName of the Channel to which the window will be joined by default when it's started. "readOnly"booleanIf true, the Channel Selector will be visible, but the user won't be able to switch between Channels from it. Defaults tofalse."type""single"|"directionalSingle"Type of the Channel Selector to show on the io.Connect Windows. A single Channel Selector (default) allows the window to join a single Channel to which it can subscribe and publish data unrestrictedly. A directional single Channel Selector allows the window to join a single Channel, but also enables the user to restrict the window from publishing or from subscribing to the current Channel. Defaults to "single".⚠️ Note that the
"allowChannels","channelId"and"readOnlyChannelSelector"properties found under the"details"top-level key in the app definition have been deprecated. To provide settings for the Channel Selector in your apps, use the"channelSelector"object instead.Inheriting Channels
It's now possible to specify in the app definition whether apps opened from your app will inherit its current Channel. To make apps opened from your app inherit its current Channel, use the
"childrenInheritChannel"top-level property in the app definition. It accepts a Boolean value or a list of app names specifying the child apps that will inherit the current Channel:{ "childrenInheritChannel": true } // Or: { "childrenInheritChannel": ["my-app", "my-other-app"] }⚠️ Note that if the definition of the child app contains a
"channelId"property, it will be joined to the Channel specified in its definition and not to the current Channel of the parent.Channel Restrictions
It's now possible to restrict windows from publishing or subscribing to Channels. To apply Channel restrictions to the current or a specific window, use the
restrict()andrestrictAll()methods. To retrieve the applied Channel restrictions for a window, use thegetRestrictions()method:// Restricting a specific window from publishing to a Channel. const restrictions = { name: "Red", read: true, write: false, // ID of the window you want to restrict. windowId: win.id }; await io.channels.restrict(restrictions); // Retrieving the Channel restrictions for the current window. const restrictions = await io.channels.getRestrictions();
Creating & Closing Window Groups
The Window Management API now offers methods for creating and closing window groups.
To create window groups, use the
create()method and pass aCreateGroupsOptionsobject as a required argument. The following example demonstrates creating a minimized group consisting of two windows with specified bounds, one of which is tabbed and contains two apps, and the other is flat. Two of the loaded apps will be joined to a Channel and a context object will be attached to the created group:const options = { // List of window groups that will be created. groups: [ { title: "My Group", state: "minimized", // List of io.Connect Windows that will participate in the group. frames: [ { mode: "tab", bounds: { top: 0, left: 0, width: 500, height: 700 }, // Apps to be loaded in the io.Connect Windows. It's only required to provide the app name, // but you can also specify additional window settings. applications: [ { name: "my-app", channelId: "Red" }, { name: "my-other-app"} ] }, { mode: "flat", bounds: { top: 0, left: 500, width: 400, height: 700 }, applications: [ { name: "my-third-app", channelId: "Red" } ] } ] } ], // Context that will be attached to all created groups. context: { io: 42 } }; const groups = await io.windows.groups.create(options);To close a window group, use the
close()method on top level of the Groups API and pass as a required argument either theGroupobject, or the ID of the group to be closed. Alternatively, you can use theclose()method of theGroupinstance:const myGroup = io.windows.groups.my; // Closing a group by ID. await io.windows.groups.close(myGroup.id); // Closing a group from its instance. await myGroup.close();
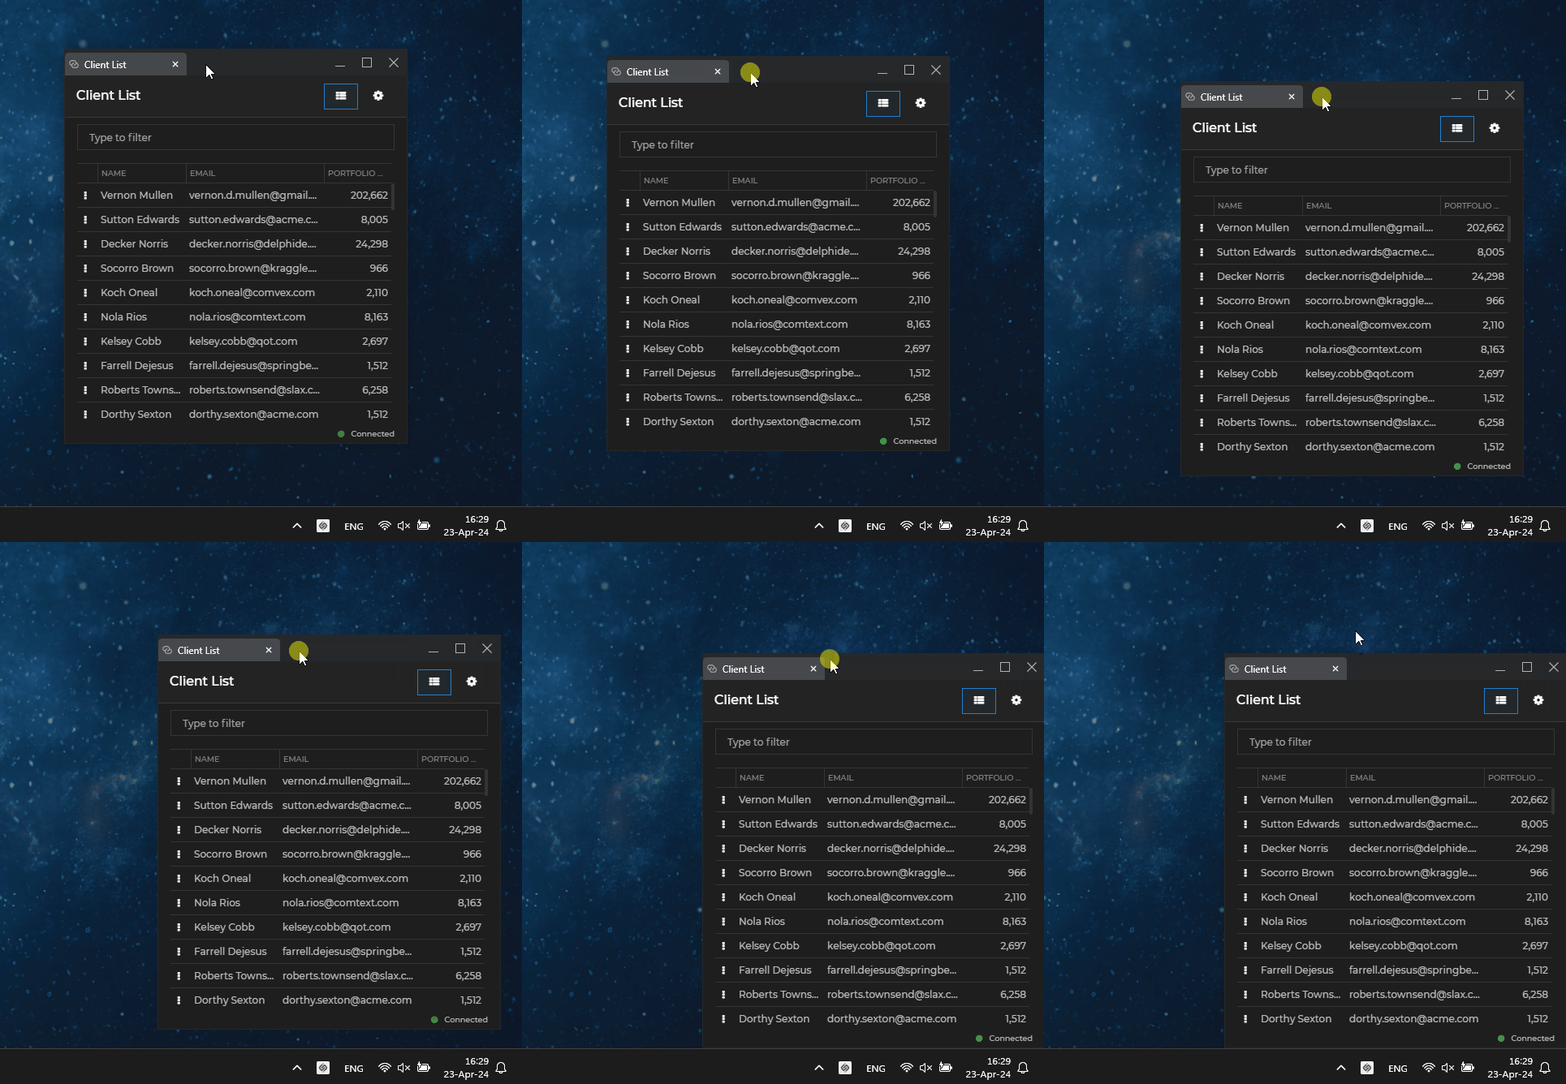
Handling the Browser window.open()
New Options
New options are now supported when opening child windows as io.Connect Windows via the browser native
window.open()method:
Property Type Description maxHeightnumberMaximum height in pixels for the new window. maxWidthnumberMaximum width in pixels for the new window. minHeightnumberMinimum height in pixels for the new window. minWidthnumberMinimum width in pixels for the new window. Grouping
To group child windows with the parent window when using the browser native
window.open()method to open windows as io.Connect Windows, use the"grouping"property of the"nativeWindowOpen"object.The following example demonstrates how to configure io.Connect Desktop to snap newly opened child windows to the left of the parent window:
{
    "windows": {
        "nativeWindowOpen": {
            "mode": "window",
            "grouping": {
                "snap": true,
                "snappingOptions": {
                    "direction": "left"
                }
            }
        }
    }
}
The
"grouping"object has the following properties:
Property Type Description "addToTabGroup"booleanIf true, will add the new child window to the tab group of the parent. Valid only when both the parent and the child are io.Connect tab windows."snap"booleanIf true, the child window will be snapped to the parent window. To specify a relative direction for the snapped window, use the"direction"property of the"snappingOptions"object. If no direction is specified, the child window will be snapped to the right side of the parent window."snappingOptions"objectOptions for snapping the child window to the parent window. The
"snappingOptions"object has the following properties:
Property Type Description "direction""right"|"left"|"bottom"|"top"Direction (bottom, top, left or right) for positioning the child window relatively to the parent window. Considered only if "snap"is set totrue.
Details About Started App Instances
Added a
startedBy()method to theInstanceobject describing an app instance. Use this method to retrieve details about how the app instance was started:const startDetails = await io.appManager.myInstance.startedBy(); console.log(startDetails);The
startedBy()method resolves with aStartedByInfoobject with the following properties:
Property Type Description applicationNamestringName of the app that started the current app instance. instanceIDstringID of the app instance that started the current app instance. startedBy"application"|"intent"|"autoStart"Indicates how the current app instance was started. Apps can be started by other apps, by a raised Intent, or can be auto started by the system.
Restoring Workspaces by Reference
You can now specify whether Workspaces saved in a Global Layout will be restored in their original (unmodified) state when the Global Layout is restored, or in the exact state in which they were when the Global Layout was saved. Use the
"restoreWorkspacesByReference"property of the"details"top-level key in the app definition for your Workspaces App. Set it totrueto restore Workspaces by reference (i.e., in their original state), or tofalse(default) to restore them in the state in which they were saved in the Global Layout:{ "details": { "restoreWorkspacesByReference": true } }
Snapping to Screen Edges
To provide global settings for snapping windows to screen edges, use the
"snapToScreenEdges"property of the"windowManagement"top-level key in thesystem.jsonsystem configuration file of io.Connect Desktop:{ "windowManagement": { "snapToScreenEdges": { "enabled": true, "distance": 30 } } }To override the global settings for snapping to screen edges per app, use the
"snapToScreenEdges"property of the"details"top-level key in the app definition.
Hardware Acceleration
To enable globally hardware acceleration for web apps, use the
"hardwareAcceleration"property of the"windowManagement"top-level key in thesystem.jsonsystem configuration file of io.Connect Desktop:{ "windowManagement": { "hardwareAcceleration": { "enabled": true } } }
Injecting Styles
It's now possible to inject CSS files in your web apps, the Workspaces App, and the Web Group App. Styles will be injected after the DOM content has been loaded. To define globally styles to inject, use the
"injectedStyles"property of the"windows"top-level key in thesystem.jsonsystem configuration file of io.Connect Desktop:{ "windows": { "injectedStyles": { "replace": false, "styles": [ { "url": "https://my-org.com/my-styles.css", "fallback": "https://my-org.com/my-fallback-styles.css", "timeout": 20000 }, { "url": "https://my-org.com/my-other-styles.css", } ] } } }To override the injected styles per app, use the
"injectedStyles"property of the"details"top-level key in the app definition.
Environment Variables for Native Apps
You can now define environment variables for apps of type
"exe"by using the"env"property of the"details"top-level key in the app definition. It accepts an object in which you can specify the necessary environment variables as key/value pairs. The provided environment variables will be merged with theprocess.envobject when spawning a new process for an executable app from the Node.js environment:{ "details":{ "env": { "myEnvVar": "myEnvVar", "myOtherEnvVar": "myOtherEnvVar" } } }To specify environment variables dynamically for native apps, use the
envproperty of theApplicationStartOptionsobject when starting apps:const options = { env: { myEnvVar: "myEnvVar", myOtherEnvVar: "myOtherEnvVar" } }; const app = io.appManager.application("my-native-app"); await app.start(null, options);
Persisting Environment Variables in Layouts for Native Apps
To persist the environment variables for native apps in Layouts, use the
"env"property of the"saveInLayout"object found under the"windows"top-level key in thesystem.jsonsystem configuration file of io.Connect Desktop, as well as under the"details"top-level key in the app definition.The following example demonstrates how to configure io.Connect Desktop globally to persist the environment variables with which native apps are started when they are saved in a Layout:
{
    "windows": {
        "saveInLayout": {
            "env": true
        }
    }
}
Dynamic Command Line Arguments for Native Apps
To specify command line arguments dynamically when starting native apps, use the
parametersproperty of theApplicationStartOptionsobject:const options = { parameters: "param1 param2" }; const app = io.appManager.application("my-native-app"); await app.start(null, options);
Command Line Options for Node.js Apps
To specify command line options for the Node.js environment in which your Node.js app will run, use the
"nodeCLIOptions"property of the"details"top-level key in the app definition:{ "details": { "nodeCLIOptions": "--tls-min-v1.3" } }⚠️ Note that this release of io.Connect Desktop updates the embedded Node.js environment used for running client Node.js apps to version 18.19.1. Since Node.js 18 and up, the DNS results are no longer reordered to put IPv4 addresses before IPv6. To avoid breaking client Node.js app running in io.Connect Desktop, the
"nodeCLIOptions"property by default is set to"--dns-result-order=ipv4first".
Appending Query Strings to App URLs
It's now possible to add a query string to the app URL when starting the app. Use the
"queryString"property of the"urlLoadOptions"object under the"details"top-level key in the app definition:{ "details": { "urlLoadOptions": { "queryString": "?my%20url-encoded%20query%20string" } } }You can also append a query string programmatically by using the
ApplicationStartOptionsobject when starting apps:const options = { urlLoadOptions: { queryString: "?my%20url-encoded%20query%20string" } }; const app = io.appManager.application("my-app"); await app.start(null, options);
Handling DPI Changes for Native Apps
To allow your native apps to receive the
WM_DPICHANGEDevent by the platform when the screen resolution changes, use the"emulateDPIChangedMessage"message property of the"compatibility"object under the"details"top-level key in the app definition:{ "details": { "compatibility": { "emulateDPIChangedMessage": true } } }This will allow your native windows to handle resolution changes properly.
Handling System Log Files
To specify settings for handling system log files, use the
"files"property of the"logging"top-level key in thesystem.jsonsystem configuration file of io.Connect Desktop:{ "logging": { "files": { "onStartup": "archive", "moveOldTo": "%LocalAppData%/my-org/logs" } } }The
"files"object has the following properties:
Property Type Description "moveOldTo"stringAbsolute path pointing to the location where the log files from the previous session (if any) will be moved on startup of io.Connect Desktop. You can use environment variables. Defaults to "%GLUE-USER-DATA%/logs/archive"."onStartup"stringSpecifies how to handle the log files on system startup. Set to "archive"to archive the existing log files. Set to"delete"to delete the existing log files. Set to"keep"(default) to leave the existing log files intact.
Handling Dump Files for Crash Reports
To instruct io.Connect Desktop how to handle the dump files from the crash reporter, use the
"dumps"property of the"output"object under the"crashReporter"top-level key in thesystem.jsonsystem configuration file:{ "crashReporter": { "output": { "dumps": { "deleteOnSent": true, "limit": 10 } } } }The
"dumps"object has the following properties:
Property Type Description "deleteOnSent"booleanIf true, when a dump file is sent, it will be deleted instead of moved to the/sentfolder."limit"numberLimit for the number of dump files to keep. When a new dump file is created, the oldest one will be deleted to conform with the file limit.
Proxy Settings
The proxy settings for io.Connect Desktop are now fully aligned with the Electron proxy settings. The legacy settings are still supported and you can use them if you are experiencing problems with the Electron ones.
The proxy settings can be changed from the
"proxy"top-level key in thesystem.jsonsystem configuration file of io.Connect Desktop:{ "proxy": { "mode": "pac_script", "pacScript": "https://my-pac-script.js" } }The
"proxy"object has the following properties:
Property Type Description "legacy"objectLegacy io.Connect proxy settings. "mode""direct"|"auto_detect"|"pac_script"|"fixed_servers"|"system"Proxy mode. "pacScript"stringURL pointing to a proxy auto-configuration script (PAC). "proxyBypassRules"stringRules indicating which URLs should bypass the proxy settings. "proxyRules"stringRules indicating which proxies to use.
.NET API
Retrieving the Current Layout
To get the currently restored Global Layout, use the
GetCurrentLayout()method:ILayout currentLayout = await io.Layouts.GetCurrentLayout();Window Z-Order
To set a window on top of the z-order, use the
WithOnTopState()method when supplying options for registering your window in the io.Connect framework:var options = new GlueWindowOptions(); options.WithOnTopState(GlueWindowOnTopState.Yes); IGDWindow myWindow = await io.GlueWindows.RegisterWindow(this, options);⚠️ Note that using the
GlueWindowOnTopState.Yesoption will allow the io.Connect Window to be on top only until the window is visible and not joined to an io.Connect Window group. If the window is hidden programmatically or the user snaps it to another io.Connect Window or window group, it will no longer be on top of the z-order when it becomes visible or when the user tears it off from the group.To instruct the window to remain permanently on top of the z-order, regardless of changes to its visibility or whether it joins or leaves an io.Connect Window group, use the
GlueWindowOnTopState.Alwaysoption:var options = new GlueWindowOptions(); options.WithOnTopState(GlueWindowOnTopState.Always); IGDWindow myWindow = await io.GlueWindows.RegisterWindow(this, options);You can also use the
SetOnTop()andSetAlwaysOnTop()methods when updating the window dynamically:// The window will be on top of the z-order only until it's visible and not joined to an io.Connect Window group await myWindow.Update(update => update.SetOnTop(options => options.OnTop = true)); // The window will remain permanently on top of the z-order, // regardless of changes to its visibility or whether it joins or leaves an io.Connect Window group. await myWindow.Update(update => update.SetAlwaysOnTop());Snapping Windows
To snap the current window to another io.Connect Window, use the
Snap()method when updating the window:await myWindow.Update(update => update.Snap(options => { // ID of the io.Connect Window to which to snap the current window. options.TargetWindowId = targetWindow.Id; // Snap to the bottom edge of the target window. options.SnapToEdge = SnappingEdge.Bottom; }));Ungrouping Windows
To extract a window from an io.Connect Window group, use the
Ungroup()method when updating the window. Optionally specify bounds for the ungrouped window and whether it will be on focus when ungrouped:await myWindow.Update(update => update.Ungroup(options => { // Specify whether the window will be on focus when ungrouped. options.Focus = true; // Bounds for the ungrouped window. options.Bounds = new Bounds { Top = 0, Left = 0, Width = 500, Height = 500 }; }));
Java API Click Stream Metrics
Recording Click Stream metrics is now available for Java apps. Click Stream metrics are enabled by default, but you can use the library configuration file (e.g.,
glue.conf,glue.json, etc.) located in your app classpath to enable or disable these metrics explicitly. The following example demonstrates enabling the Click Stream metrics in aglue.conffile:glue { metrics: { click-stream: true } }By default, when the Click Stream metrics are enabled and the user clicks on an app component, its name will be recorded in the respective Click Stream metric. You can override this behavior by using the
withClickStreamMetrics()method when initializing the io.Connect Java library to provide a function for extracting the text from the clicked app component:// Function for extracting text from the clicked component. public String getComponentText(Object object) { if (object instanceof AbstractButton) { return ((AbstractButton) object).getText(); } else if (object instanceof JEditorPane) { return ((JEditorPane) object).getText(); } else if (object instanceof JLabel) { return ((JLabel) object).getText(); } else { return null; } } Glue io = Glue.builder() // Providing a function for extracting text. .withClickStreamMetrics(getComponentText) .build();
.NET FDC3 Implementations
io.Connect .NET implementations of the FDC3 standards are now available for .NET Standard and .NET Framework on NuGet.
Both .NET FDC3 libraries depend on the respective io.Connect .NET library, provide identical APIs that strictly follow the FDC3 standards, and are initialized in the same way.
The following example demonstrates initializing the .NET FDC3 library:
// Initialize the .NET io.Connect library or provide an already initialized instance.
Glue42 io = await Glue42.InitializeGlue();

// Optional Desktop Agent configuration.
var configuration = new DesktopAgent.Configuration
{
    // Providing a `Dispatcher`.
    Dispatcher = new GlueDispatcher(Dispatcher.CurrentDispatcher),
    // Enabling your app to receive its own context updates.
    HearOwnBroadcasts = true,
    // Describe how your custom context is loaded.
    ContextLoader = loader => { };
}

// Creating a Desktop Agent.
DesktopAgent desktopAgent = new DesktopAgent(io, configuration);
⚠️ Note that both .NET FDC3 implementations follow strictly the FDC3 API standards. For examples on using the FDC3 APIs, see the FDC3 official documentation.
Improvements & Bug Fixes
Upgraded to Electron 29.2.0 (Chromium 122).
Updated the embedded Node.js environment used for running client Node.js apps to version 18.19.1. You should be aware that since Node.js 18 and up, the DNS results are no longer reordered to put IPv4 addresses before IPv6. To avoid breaking client Node.js app running in io.Connect Desktop, the
"nodeCLIOptions"property of the"details"top-level key in the app definition files by default is set to"--dns-result-order=ipv4first".Optimized the low-level composition of classic groups and Workspaces in order to reduce the CPU usage of the Desktop Window Manager process in cases of frequent or heavy updates of client apps.
Improved scaling behavior when using
showPopup().Fixed
iodesktop.clearCache()throwing an error when used in preload scripts.Fixed not showing a dialog when the io.Connect Gateway crashes.
Fixed adding a trailing slash to URL for custom dialogs.


