
How to...
Install
As of io.Connect Desktop 10.0, the io.Connect platform is available for Windows and macOS as publicly accessible components which you can configure, customize, and package as installable artifacts or as a bundle (ZIP archive) by creating a seed project via the io.Connect CLI.
ℹ️ For details on how to obtain a trial version of io.Connect Desktop 10.0 and a license key, contact us.
⚠️ Note that the io.Connect Desktop installation folder can be placed at any location. The io.Connect platform runs independently of its location in the file system. However, you should consider the path length limitations on Windows which allow for a maximum of a 256-character path string. The longest path in the io.Connect Desktop installation is 91 characters. You should consider this when deciding on a location for the installation bundle when using a bundle deployment, or if you decide to move the default installation folder to a new location when using an installer.
Deploy
Available since io.Connect Desktop 10.0
As of io.Connect Desktop 10.0, the io.Connect platform is available for Windows and macOS as publicly accessible components which you can configure, customize, and package as installable artifacts or as a bundle (ZIP archive) by creating a seed project via the io.Connect CLI.
ℹ️ For details on how to create a seed project for retrieving, customizing, and packaging io.Connect Desktop, see the Developers > Seed Project section.
9.0 Version Stream
If you are still using the io.Connect Desktop 9.0 version stream, io.Connect Desktop can be delivered to you as an installer app or as a bundle. The bundle is delivered via a repository or an archive file (ZIP).
Online & Offline Installers
Deployment via an installer app is the usual way of delivering io.Connect Desktop. Two types of installers are available: online and offline (or "embedded"). They are identical in functionality, but the online installer downloads the necessary io.Connect Artifacts from the io.Connect CDN, while the embedded installer contains them all as resources. The advantage of this is that the online installer is much smaller, but requires a connection to the Internet and permission to download files. If you encounter networking or permission issues, try the offline installer.
Both types of installer can be used interchangeably to create online and offline repackaged installers respectively. In fact, you could repackage both and let your deployment team or users decide which one to use.
The io.Connect installers can be customized with extensibility options. This enables you to completely modify and control the installation process to suit your specific needs and requirements.
ℹ️ For more details on how to customize an installer deployment, see the How to... > Rebrand io.Connect > Installer section.
Bundles
Using a bundle may be the preferred option for you depending on your deployment infrastructure and strategy. Sometimes installers may raise security issues within your enterprise systems which will require additional time and effort for reconfiguring your security procedures to allow pushing the installer to your users. To a large extent this can be avoided by using the bundle option, as many deployment systems already expect to work with archived (ZIP) files.
Customizing a bundle deployment is possible by directly modifying or replacing the existing io.Connect Desktop assets and configuration files.
ℹ️ For more details on how to customize a bundle deployment, see the How to... > Rebrand io.Connect > Functionality and the How to... > Rebrand io.Connect > User Interface sections.
⚠️ Note that using a bundle as a deployment option is recommended only if your internal deployment infrastructure absolutely prevents you from using an installer. Deployment via a bundle may require you to invest additional time and effort for configuring and running post-installation scripts for some of the Application Adapters you may have purchased in order to install them.
Upgrade
Upgrading your io.Connect Desktop project may include all or some of the following processes, depending on your specific platform implementation:
- Upgrading the io.Connect Desktop platform.
- Upgrading any customized io.Connect system apps you may be using, such as a Workspaces App or a Web Group App.
- Upgrading the io.Connect libraries used in your interop-enabled client apps.
- Preserving any user data files or migrating the Electron cache.
ℹ️ For details on upgrading from the legacy Glue42 Enterprise platform to io.Connect Desktop, see the How to... > Migrate to io.Connect Desktop section.
Benefits
Upgrading your io.Connect platform, custom system apps, and interop-enabled client apps is always recommended. The latest versions of the io.Connect platform and the io.Connect libraries offer valuable benefits like new features, improvements, and bug fixes, some of which you may have requested as a client. New releases also provide upgrades of the underlying Electron framework, as well as security improvements due to internal framework upgrades and library dependency audits.
New Features
New features are usually introduced because of client requests, or because of the evolving industry demands and technology advances. All new features are described in detail in the io.Connect changelog. New functionalities in io.Connect Desktop sometimes require implementation in the platform itself, as well as in the respective io.Connect library. For instance, a new io.Connect API method may not work unless the respective feature is explicitly enabled in the system configuration or in the app definition; or a new io.Connect API method may be based on new functionality introduced in the underlying Electron framework. This means that in order to be able to use that new feature, you have to upgrade both the platform and the respective io.Connect library.
Improvements & Bug Fixes
Each platform and library release brings in various internal optimizations and improvements of existing functionalities. The releases also contain important bug fixes found through internal testing or reported by clients.
Electron Upgrades
Almost every platform release comes with an upgraded version of Electron, which comes with upgraded Chromium and Node.js too. These regular updates of the underlying framework ensure that you can benefit from the most recent features and security improvements introduced in Electron, Chromium, and Node.js.
Improved Security
Security vulnerabilities in library dependencies and any potential security issues within the io.Connect framework are addressed for each release. The regular upgrades of the underlying Electron framework ensure that you will receive the latest security improvements and fixes in Electron, Chromium, and Node.js.
General Upgrade Guide
Upgrading can be done by skipping versions. It isn't required to upgrade in steps from version to version. For instance, if your current version is 9.2, you can upgrade directly to 9.5 or later. The same is valid for all io.Connect libraries.
⚠️ Note that, generally, the io.Connect platform and the io.Connect libraries are backwards and forwards compatible with each other. This means that you can use an older platform version with the latest library version and vice versa, unless a breaking change has been explicitly specified in the io.Connect changelog.
Before commencing an upgrade process, read through the io.Connect changelog, starting from your current version to the version to which you want to upgrade. This is highly recommended for several reasons:
- Get acquainted with all new features (new platform configurations, app definition options, APIs, and more) and decide whether you want to use them in your project. Sometimes, to be able to use a new feature, you will have to upgrade both the platform and your client libraries. This is due to the fact that the implementation of that feature may have required changes both in the platform and in the client libraries.
- See if any configuration or API defaults have been changed and whether this will affect your project.
- See if there are any breaking changes in the platform, in the underlying Electron framework, or in any of the libraries you use, and assess their impact on your project.
- See if there are any deprecated features that you need to remove from your project. Unless explicitly stated otherwise, there's usually backwards support for a deprecated feature, but this doesn't guarantee that it won't be completely removed in a future release.
Platform
The new platform release will be available for Windows and macOS as publicly accessible components which you can configure, customize, and package as installable artifacts or as a bundle (ZIP archive) by creating a seed project via the io.Connect CLI. After retrieving the new components, you can re-apply your customization, build a new version via the io.Connect CLI, and distribute it via your internal mechanisms.
You can also configure the auto update functionality of io.Connect Desktop which allows the platform that's already installed on the user machine to check for updates and apply them automatically once you have published them to your update service.
ℹ️ For details on how to create a seed project for retrieving, customizing, and packaging io.Connect Desktop, see the Developers > Seed Project section.
9.0 Version Stream
Depending on your deployment strategy, the new platform release will be delivered to you as an installer app or as a bundle, which you can deploy via your internal mechanisms.
If you are using extensibility configurations for your installer app, you have to re-apply them to the new installer before distributing it. Don't forget to also re-apply the necessary signing procedures. It isn't required to uninstall the platform before installing the new version. If you decide to uninstall first, keep in mind that only an interactive uninstallation process will offer the option for preserving the user data files.
If you are using a bundle and have customized the user interface or the functionality of the platform, you will have to re-apply your customizations by re-running your custom scripts on the new bundle delivery. Don't forget to also re-apply the necessary signing procedures.
Application Adapters
If you have purchased any Application Adapters in addition to the platform, you will receive their updated versions as additional packages which you have to distribute via your internal deployment mechanisms.
9.0 Version Stream
If you have purchased any Application Adapters in addition to the platform, you will receive their updated versions with the installer app, or as additional packages in case you are using a bundle deployment. The Salesforce Adapter is always delivered separately, regardless of whether you are using an installer or a bundle deployment.
The installer app will automatically install the new Application Adapter versions. If you are using a bundle deployment, you will have to run your custom post-installation scripts to upgrade your Application Adapters.
Libraries
The new versions of the io.Connect libraries can be retrieved from:
- The new versions of the io.Connect web libraries are published in NPM under the
@interopioscope. - The io.Connect .NET libraries are published in NuGet in the interop.io profile.
- The io.Connect Java libraries are published in the Maven Central Repository.
The latest versions of the @interopio/desktop, the io.Connect .NET, the io.Connect Java, the io.Connect COM, and the @glue42/office libraries are also available in the platform delivery and are located in the <installation_location>/interop.io/io.Connect Desktop/SDK directory.
If you are using auto injection, the latest version of the @interopio/desktop library contained in the platform delivery will be auto injected in your web apps. This means that you will automatically get all new library features when you upgrade your platform. If you aren't using auto injection, you will have to manually update the version of the @interopio/desktop library in your web apps.
Preserving Files
During upgrade, it's possible to preserve the user data and the Electron cache from your previous platform version. This may help for a better user experience, as all user-specific settings will be preserved.
The user data files by default are located in the %LocalAppData%/interop.io/io.Connect Desktop/UserData folder on Windows and in the ~Library/Application Support/interop.io/io.Connect Desktop/UserData folder on macOS unless you have specified a custom location in the system configuration. If you are using an installer, the user data files will be automatically preserved during installation.
There are different options available regarding handling the Electron cache from previous versions. You can configure io.Connect Desktop to remove it, preserve it, or copy it to the cache for the upgraded platform version.
ℹ️ For more details on the available options for the Electron cache, see the Developers > Configuration > System > Folders section.
9.0 Version Stream
The user data files by default are located in the <installation_location>/interop.io/io.Connect Desktop/UserData directory unless you have specified a custom location in the system configuration. If you are using an installer, the user data files will be automatically preserved during installation. If you decide to uninstall the platform before upgrading, keep in mind that only an interactive uninstallation process will offer the option for preserving the user data files. If using a hidden or unattended uninstallation, both the platform and the associated user data files will be removed. If using a bundle, you will have to consider your specific installation location on the user machine and whether it will affect the user data files.
There are different options available regarding handling the Electron cache from previous versions. You can configure io.Connect Desktop to remove it, preserve it, or copy it to the cache for the upgraded platform version.
ℹ️ For more details on the available options for the Electron cache, see the Developers > Configuration > System > Folders section.
Version to Version Upgrade
Upgrading can be done by skipping versions. It isn't required to upgrade in steps from version to version. For instance, if your current version is 9.2, you can upgrade directly to 9.5 or later. The same is valid for all io.Connect libraries.
The following sections outline the process of upgrading your platform in steps from version to version. Each section describes any specific actions outside the scope of the general upgrade guide you may need to take due to breaking changes in the platform, in the underlying Electron framework, or in any of the io.Connect libraries. If there are no breaking changes, follow the general upgrade guide.
Upgrading from 10.2 to 10.3
Follow the general upgrade guide.
Upgrading from 10.1 to 10.2
Platform Service Objects
The following io.Connect service objects injected in the global window object of the io.Connect platform apps (e.g., dialogs, alerts, splash screen, and more) are now exposed with the following aliases:
| Legacy Name | New Alias |
|---|---|
glue42about |
ioAbout |
glue42alert |
ioAlert |
glue42basicAuth |
ioBasicAuth |
glue42dialog |
ioDialog |
glue42selectCertificate |
ioSelectCertificate |
glue42splash |
ioSplash |
The legacy names have been preserved for backwards compatibility. It's highly recommended to use the new aliases in any custom platform apps you may have.
For all else, follow the general upgrade guide.
Upgrading from 10.0.4 to 10.1
io.Insights
The "defaultMetricsEnabled" property of the "metrics" object under the "otel" top-level key in the system.json system configuration file of io.Connect Desktop has been renamed to "platformMetricsEnabled":
{
    "otel": {
        "enabled": true,
        "metrics": {
            "enabled": true,
            "platformMetricsEnabled": true
        }
    }
}
For all else, follow the general upgrade guide.
Upgrading from 10.0.3 to 10.0.4
Follow the general upgrade guide.
Upgrading from 10.0.2 to 10.0.3
Follow the general upgrade guide.
Upgrading from 10.0 to 10.0.2
⚠️ Note that due to internal reasons, version 10.0.1 of io.Connect Desktop was skipped and io.Connect Desktop 10.0.2 is the direct successor of io.Connect Desktop 10.0.
Follow the general upgrade guide.
Upgrading to 10.0
The following is a general step-by-step guide on how to migrate from the 9.0 platform stream to io.Connect Desktop 10.0. For more detailed information about the processes described in each step, follow the respective links:
- Seed Project
io.Connect Desktop 10.0 introduces an entirely new approach for delivering the platform to clients and handling client customizations. The io.Connect seed project is now the main approach for retrieving, customizing, building, testing, and packaging the io.Connect Desktop platform which eliminates the need for delivering individual installers and bundles and all client-specific platform configuration and UI customizations can now be handled on the client side. This means that the seed project is a required tool for migrating to io.Connect Desktop 10.0.
io.Connect Desktop 10.0 also requires a valid license key to operate.
ℹ️ For details on how to obtain a license key for io.Connect Desktop 10.0, contact us.
To start migrating your platform to io.Connect Desktop 10.0, install the io.Connect CLI and setup a seed project.
ℹ️ For details on how to install the io.Connect CLI and setup a seed project, see the Developers > Seed Project > Quick Start section.
- Customizations
Assets & Configurations
The seed project enables you to apply modifications to the platform components by placing assets and configuration files inside the /modifications folder of the seed project per component. Different modifications can be applied in development and in production mode and you can also supply base modifications that will be applied in all modes.
ℹ️ For more details on the different modification options, see the Developers > Seed Project > Customization > Modifications section.
Transfer your custom assets as base platform modifications to the respective folders inside the /modifications/base/iocd/assets folder of the seed project. All files in this folder will be merged with the the assets folder of the platform component when you run your project in development mode or build for production. The following examples demonstrate where to transfer some of the main customizable assets like icons, images, splash screen, and Layouts loader:
- icons and images - transfer your custom files to the
/modifications/base/iocd/assets/imagesfolder; - splash screen - transfer your custom files to the
/modifications/base/iocd/assets/splashfolder (alternatively, you can modify the splash screen as a custom system app); - Layouts loader - transfer your custom files to the
/modifications/base/iocd/assets/loaderfolder;
Transfer your custom system configuration settings as base platform modifications to the system.json.merge file located in the /modifications/base/iocd/assets/config folder. This file will be merged with the system.json file of the platform component when you run your project in development mode or build for production.
⚠️ Note that io.Connect Desktop no longer has a gilding executable file and a
gilding.jsonconfiguration file respectively. The settings for custom environment variables and for fetching remote configurations that were previously provided by the gilding configuration aren't available in io.Connect Desktop 10.0, but are planned to be added to the system configuration settings in a future release.
⚠️ Note that the
channels.jsonfile for defining default system Channels, thelogger.jsonfile for defining custom log appenders and categories, and thestickywindows.jsonfile for configuring the io.Connect Windows have been deprecated. All settings from these files have been moved to thesystem.jsonfile. For more details, see the Breaking Changes > Platform Configuration Files section in the changelog for io.Connect Desktop 10.0.
⚠️ Note that the
"nodePath"top-level key used for specifying the path to the default Node.js environment has been removed from the defaultsystem.jsonfile distributed with io.Connect Desktop. If you are migrating your existingsystem.jsonfile and you don't plan on using your own Node.js environment with io.Connect Desktop 10.0, make sure to remove this property from yoursystem.jsonfile too.
Custom System Apps & Custom In-House Apps
If you are hosting your customized system apps and your own custom apps and you don't want to bundle them with the distribution package, you can skip this step.
The seed project allows you to customize the default system apps of io.Connect Desktop (Workspaces App, Web Group App, Launchpad, and more) and even add your own custom apps to the project.
All customized system apps and any of your own custom apps must be placed in the /apps folder in order to be available when you run your project in development mode and to be bundled with your package when you build for production.
Place the app definitions for all your custom apps (system and in-house) in the /modifications/base/iocd/assets/config/apps folder.
ℹ️ For more details on how to customize the default platform apps and add your own custom apps, see the Developers > Seed Project > Customization > Apps section.
Installer
⚠️ Note that since the entire platform customization process has changed with the introduction of the seed project and the deprecation of distributing individual client installers, the installers produced via the seed project no longer provide extensibility options. Many of the customization options can be substituted with the features provided by the seed project (e.g., custom assets, configuration overrides, selecting platform components to install, customizing the product name, artifact names and icons, and more), but other options may not be available.
ℹ️ For more details on the available customization options provided by the seed project, see the Developers > Seed Project > Configuration and the Developers > Seed Project > Customization sections.
- Platform Mode
io.Connect Desktop 10.0 introduces two platform modes of operation - default and advanced mode. To be able to decide which platform mode is best for you, you must consider the advantages and limitations of both platform modes.
The platform modes provide different experiences depending on your specific business needs and requirements:
Default platform mode
- Windows - Supports only web groups, lacks support for classic groups and visual integration of native apps.
- macOS - Supports only web groups, lacks support for classic groups and visual integration of native apps. OS limitations may prevent the usage of certain features.
Advanced platform mode
- Windows advanced - Supports classic groups and visual integration of native apps.
To switch from the default platform mode to the advanced platform mode, use the "advancedMode" top-level key in the system.json file:
{
    "advancedMode": true
}
ℹ️ For more details on the advantages and limitations of the different platform modes, see the Developers > Configuration > System > Platform Modes section.
- Breaking Changes
io.Connect Desktop 10.0 comes with a variety of improvements, new mechanism for delivery, customization, and deployment, support for macOS, and many other new features. All of this necessitated introducing a considerable amount of breaking changes to the platform, the most notable of which being:
- Required license key.
- Seed project for delivery, customization, and deployment.
- Platform modes of operation.
- Changes to the platform configuration files.
- Web groups are now the default implementation for handling window groups.
- The gilding executable and its configuration have been removed.
You should explore the entire list of breaking changes in the io.Connect Desktop 10.0 changelog and address any of them that may affect your specific platform implementation.
- Development Build & Testing
To run your seed project in development mode in order to test your platform and your interop-enabled apps, execute the following command:
npm run devℹ️ For more details on running the seed project in development mode, see the Developers > Seed Project > Development section.
The seed project provides a test template which you can use to start writing your own platform and app tests. The tests are based on the WebdriverIO framework and the test template and the test configurations are located in the /tests folder of the seed project.
ℹ️ For more details on writing and executing tests, see the Developers > Seed Project > Testing section.
- Production Build & Packaging
After customizing and testing your platform project, you can produce build artifacts both for Windows and for macOS by executing the following command:
npm run buildThe build command comes with various options for fine-tuning the build process.
The seed project also provides options for:
- configuring the signing process for the produced artifacts;
- CI/CD automation with GitHub actions - a pre-configured sample workflow for building signed artifacts for Windows and macOS is available in the
.github/workflowsfolder which you can customize and extend; - auto update options for the platform which you can configure in the
system.json.merge-autoUpdatefile located in the/modifications/base/iocd/assets/configfolder;
⚠️ Note that if you change the name of the produced executable file, you must make sure that the file isn't blocked by any antivirus software. The same is valid if you change the installation directory.
⚠️ Note that the io.Connect Desktop installation folder can be placed at any location. The io.Connect platform runs independently of its location in the file system. However, you should consider the path length limitations on Windows which allow for a maximum of a 256-character path string. The longest path in the io.Connect Desktop installation is 91 characters. You should consider this when deciding on a location for the installation bundle when using a bundle deployment, or if you decide to move the default installation folder to a new location when using an installer.
Upgrading from 9.13 to 9.14
Follow the general upgrade guide.
Upgrading from 9.12.1 to 9.13
Follow the general upgrade guide.
Upgrading from 9.12 to 9.12.1
Follow the general upgrade guide.
Upgrading from 9.11 to 9.12
Follow the general upgrade guide.
Upgrading from 9.10.2 to 9.11
Follow the general upgrade guide.
Upgrading from 9.10.1 to 9.10.2
Follow the general upgrade guide.
Upgrading from 9.10 to 9.10.1
io.Connect Desktop 9.10.1 comes with an upgraded version of Electron. This upgrade was made to address security issues related to the underlying Electron framework.
This Electron upgrade also brings in a notable change related to the transparency for frameless windows - transparent frameless windows now can't have resizing areas and can't be resized manually via dragging the window edges. This change was introduced with Electron 38.3.0 and is present in all Electron versions that have been released since then, which means that all io.Connect Desktop releases that use any of the affected Electron versions will be affected too.
In the context of io.Connect Desktop, this Electron change means that the "hasSizeAreas" property of the "details" top-level key in the app definition won't have any effect for transparent frameless windows:
{
   "name": "my-frameless-app",
   "type": "window",
   "details": {
       "url": "https://example.com/my-frameless-app",
       "mode": "frameless",
       // Making the frameless window transparent.
       "transparent": true,
       // This won't have any effect and the window won't have resizing areas.
       "hasSizeAreas": true
   }
}
⚠️ Note that the
"hasSizeAreas"property still works for non-transparent frameless windows.
For all else, follow the general upgrade guide.
Upgrading from 9.9.4 to 9.10
Deprecated Platform Apps
Application Monitor & Performance Report
The Application Monitor and the Performance Report apps that were previously part of the io.Connect Dev Tools have been deprecated. Fixes for these app won't be available and they won't be distributed as part of the io.Connect platform starting from this release onward. If you are using an extensible installer configuration that includes these apps, you must make sure to remove them from the configuration file when upgrading to io.Connect Desktop 9.10 or later.
The Application Monitor and the Performance Report tools will still work in all minor and fix versions that are part of the io.Connect Desktop 9.0 stream, but may stop working with later major version streams.
Legacy Application Monitor:
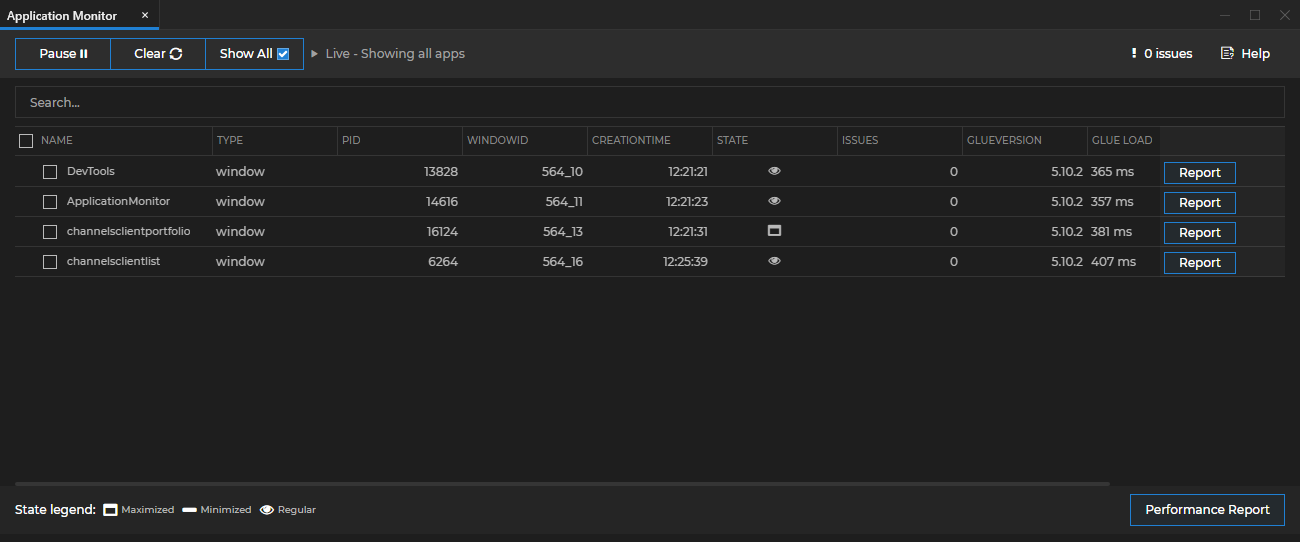
Legacy Performance Report:

For all else, follow the general upgrade guide.
Upgrading from 9.9.3 to 9.9.4
Follow the general upgrade guide.
Upgrading from 9.9.2 to 9.9.3
Follow the general upgrade guide.
Upgrading from 9.9.1 to 9.9.2
Follow the general upgrade guide.
Upgrading from 9.9 to 9.9.1
Follow the general upgrade guide.
Upgrading from 9.8.1 to 9.9
Workspaces
The io.Connect Workspaces have been redesigned with the goal of improving the UI and providing smoother user experience, which necessitated introducing breaking changes in the @interopio/workspaces-ui-react library.
⚠️ Note that the following changes will be breaking for you only if you upgrade to version 4.0 or later of the
@interopio/workspaces-ui-reactlibrary and:
- You have a custom Workspaces App in which you are using any of the affected default components provided by the
@interopio/workspaces-ui-reactlibrary. In this case, your app won't build when you upgrade to the latest version of the library.- You are using the default Workspaces UI app and you have only customized it with CSS. In this case, your styles won't be applied when you upgrade to the latest version of the
@interopio/workspaces-ui-reactlibrary.This is due to the fact that some legacy components have been deprecated, the HTML structure of others has been modified, and a new system with CSS variables has been introduced for styling the Workspaces App. If you have completely customized your Workspaces App (entirely replaced the affected default components with your own custom components), you shouldn't experience any issues when migrating to the latest version of the
@interopio/workspaces-ui-reactlibrary.If you don't upgrade the
@interopio/workspaces-ui-reactlibrary, your Workspaces App will still work in newer versions of io.Connect Desktop.
The following breaking changes have been made to the @interopio/workspaces-ui-react library:
- The
<WorkspaceTabV2 />component has been renamed to<WorkspaceTab />and the legacy<WorkspaceTab />(version 1) has been removed. - The "Add Apps" button ("+" button) in the Workspace window group header has been moved to the left of the header, after the window tabs.
- The legacy Glue42 CSS files have been removed.
- The legacy
<GlueLogo />component has been removed. - The legacy "Save Workspace" system popup has been removed. The "Save Workspace" popup has been replaced by a dialog that's part of the
<WorkspaceTab />component and can be customized by customizing that component. - Changed the CSS classes for the
<Logo />component, for the background of an empty Workspace, and for the<WorkspaceTab />component. - Changed the tab sizing strategy.
- Completely restructured the HTML and CSS of the "Add Apps" popup.
- Completely restructured the HTML and CSS of the "Add Workspace" popup.
Deprecated Platform Apps
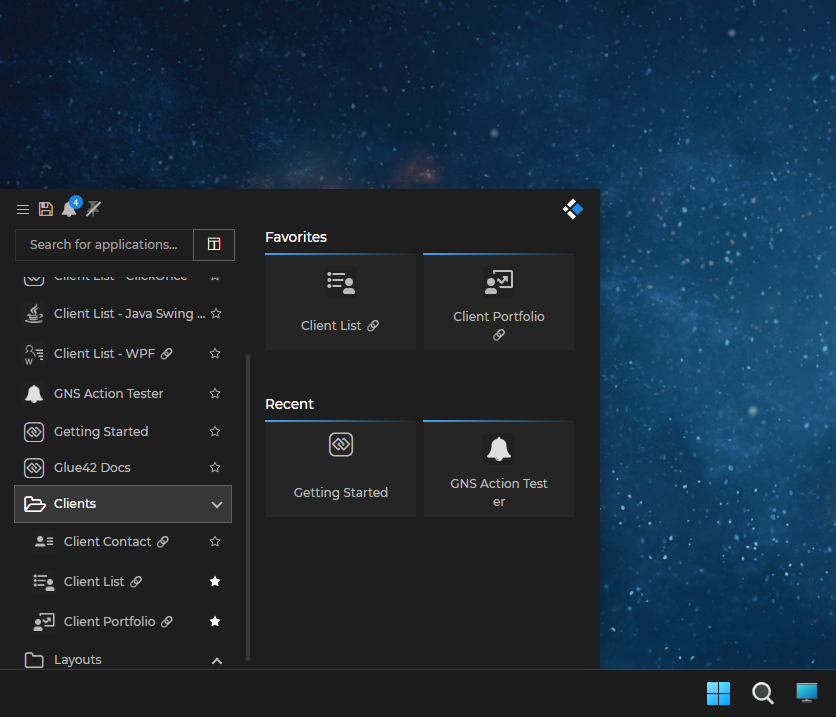
Launchpad
The legacy Windows style io.Connect launcher known as the io.Connect Launchpad is now deprecated.
⚠️ Note that a new io.Connect launcher which is also called the io.Connect Launchpad is introduced in io.Connect Desktop 9.9. The new Launchpad is a conceptually different app from the legacy Launchpad and isn't meant to be its descendent despite the name coincidence.
Global Search App
The legacy Global Search App is now deprecated.
For all else, follow the general upgrade guide.
Upgrading from 9.8 to 9.8.1
Defining Move Areas for the Workspaces App via CSS
The @interopio/workspaces-ui-react library now supports using the -webkit-app-region: drag and -webkit-app-region: no-drag styles for any elements of your custom Workspaces App in order to define them as custom draggable areas. This enables you to define any area of your custom Workspaces App as a move area.
The following demonstrates how using the -webkit-app-region: drag style for the Logo element of the Workspaces App transforms the Logo element into a move area:
⚠️ Note that as of io.Connect Desktop 9.8.1 and
@interopio/workspaces-ui-react3.5.2, the<MoveArea />component is deprecated. To define move areas in your custom Workspaces App, you must now use the-webkit-app-region: dragand-webkit-app-region: no-dragstyles. The<MoveArea />component is still available for the older versions of io.Connect Desktop and the@interopio/workspaces-ui-reactlibrary.
For all else, follow the general upgrade guide.
Upgrading from 9.7.1 to 9.8
- Added support for directional Channels in multi Channel mode.
⚠️ Note that all other considerations for working with multiple Channels remain the same.
For all else, follow the general upgrade guide.
Upgrading from 9.7 to 9.7.1
Follow the general upgrade guide.
Upgrading from 9.6 to 9.7
- Added experimental support for working with multiple Channels simultaneously. If you decide to use the Channels API in multi Channel mode, you should consider the following:
⚠️ Note that this functionality is still experimental and you should take into consideration the following:
- There may be hidden bugs.
- Currently, there is only a JavaScript API for working with multiple Channels.
- Using multiple Channels is available only for web groups.
- There isn't backwards compatibility between the versions of the
@interopio/desktoplibrary that support only single Channels and the ones that support both single and multiple Channels. If you want to use multiple Channels, all apps using Channels must be upgraded to the latest version of the@interopio/desktoplibrary.- Currently, directional Channels aren't supported in multi Channel mode.
- Supplementary methods for working with multiple Channels have been added to the io.Connect JavaScript FDC3 implementation. These methods are specific io.Connect implementations and are outside the scope of the FDC3 standard. Their purpose is to enable working with multiple Channels in FDC3 apps.
For all else, follow the general upgrade guide.
Upgrading from 9.5 to 9.6
- The
"preventModifyingRestrictionsFor"property of the"channelSelector"object under the"details"top-level key in the app definition now accepts an array of objects instead of an array of strings as a value. Each object in the array now allows you to specify the name of the Channel whose restrictions the user or the app won't be able to modify, as well as the type of the restriction - read or write.
The following example demonstrates how to prevent the user and the app from modifying the read and write restrictions for the specified Channel:
{
    "details": {
        "channelSelector": {
            "preventModifyingRestrictionsFor": [
                {
                    "name": "Red",
                    "read": false,
                    "write": false
                }
            ]
        }
    }
}
For all else, follow the general upgrade guide.
Upgrading from 9.4 to 9.5
Follow the general upgrade guide.
Upgrading from 9.3 to 9.4
- io.Connect Desktop has been upgraded with Node.js v20.15.0 and you should consider the following:
⚠️ Note that spawning BAT and CMD files on Windows has been disabled since Node.js v20 due to security concerns related to argument parsing. To avoid this issue, set the
"useShellExecute"property totrueunder the"details"top-level key in the app definitions for your BAT and CMD files.
- The
"contextMenuEnabled"and"contextMenuMode"properties found under the"details"top-level key in the app definition have been deprecated. To provide settings for the context menu, use the"contextMenu"object instead:
{
    "name": "web-group-app",
    "type": "webGroup",
    "hidden": true,
    "details": {
        "url": "http://localhost:3000/",
        "contextMenu": {
            "enabled": false
        }
    }
}
For all else, follow the general upgrade guide.
Upgrading from 9.2 to 9.3
- The
"allowChannels","channelId"and"readOnlyChannelSelector"properties found under the"details"top-level key in the app definition have been deprecated. To provide settings for the Channel Selector in your apps, use the"channelSelector"object instead:
{
    "details": {
        "channelSelector": {
            "enabled": true,
            "type": "single",
            "channelId": "Black"
        }
    }
}
For all else, follow the general upgrade guide.
Upgrading from 9.1 to 9.2
Follow the general upgrade guide.
Upgrading from 9.0 to 9.1
Follow the general upgrade guide.
Upgrading from Glue42 Enterprise to io.Connect Desktop
See the How to... > Migrate to io.Connect Desktop section.