
Changelog
io.Connect Desktop 10.0
Release date: 26.11.2025
| Components | Version |
|---|---|
| Electron | 39.2.3 |
| Chromium | 142.0.7444.175 |
| Node.js | 22.21.1 |
The following libraries are bundled with io.Connect Desktop 10.0 and will be used for auto injection:
| Injected Library | Version |
|---|---|
@interopio/desktop |
6.16 |
@interopio/fdc3 |
2.7 |
⚠️ Note that this is a major version release of io.Connect Desktop which introduces many new features and breaking changes which improve the platform security, delivery, deployment, and update mechanisms, introduce support for macOS, and enhance the overall user experience. For a summarized step-by-step guide on how to migrate to io.Connect Desktop 10.0, see the How to... > Install, Deploy, Upgrade section.
ℹ️ For details on how to obtain a trial version of io.Connect Desktop 10.0 or a license key, contact us.
Breaking Changes
Licensing
io.Connect Desktop now requires a valid license key to operate. It's possible to acquire a paid license key or a trial one with an expiration date. If you try to run the platform without a valid license key or with an expired trial license key, it won't initialize.
ℹ️ For details on how to obtain a license key for io.Connect Desktop 10.0, contact us.
The license key can be provided to the platform in the following ways:
- via a
license.keyfile that must be located next to theio-connect-desktop.exefile or in the<installation_location>/resourcesfolder;- by using the
IOCD_LICENSE_KEYenvironment variable during CI/CD automation;- via the license key prompt when creating a seed project with the io.Connect CLI. After the seed project has been created, you can manage your license key via the automatically created
iocd.license.keyfile in the/configurationfolder of the seed project;
Seed Project
The io.Connect seed project is now the main approach for retrieving, customizing, building, testing, and packaging the io.Connect Desktop platform. The seed project can be created, configured, and used via the io.Connect CLI.
The seed project approach eliminates the need for delivering individual installers and bundles to clients and all client-specific platform configuration and UI customizations can now be handled on the client side. This reduces the time for adopting new versions and clients now have full control over the customization and packaging processes.
The seed project provides the following benefits:
- installing the latest or a specific version of the platform components;
- integrating the platform license key;
- customizing the platform system configuration;
- customizing the platform assets like logos, icons, splash screen, loader, and more;
- customizing various branding features via the CLI configuration (the product name and description, the names and icons of the produced artifacts);
- development and production modes that support different configuration settings;
- templates for the customizable system apps (e.g., Workspaces App, Web Group App, Launchpad);
- adding your own custom apps to be packaged with your platform build;
- test templates for writing and executing your own tests;
- producing artifacts (installers, bundles) for Windows and macOS;
- code signing settings;
- publishing and auto update settings;
- CI/CD integration settings;
Platform Modes
The io.Connect Desktop platform can now operate in two modes - default and advanced. Both platform modes have certain advantages and limitations which must be considered before choosing which one to use.
The platform modes provide different experiences depending on your specific business needs and requirements:
Default platform mode
- Windows - Supports only web groups, lacks support for classic groups and visual integration of native apps.
- macOS - Supports only web groups, lacks support for classic groups and visual integration of native apps. OS limitations may prevent the usage of certain features.
ℹ️ For details on the specifics of running io.Connect Desktop on macOS, see the macOS Support section.
Advanced platform mode
- Windows advanced - Supports classic groups and visual integration of native apps.
Default
The default platform mode is the only option if you want to run io.Connect Desktop on macOS. It's also the recommended option for Windows if your business use case doesn't require you to have visual integration for native apps or support for classic groups.
The default platform mode has the following advantages and limitations:
- OS-independent - provides support for both Windows and macOS;
- only web groups are supported;
- web groups can use the default OS system buttons instead of the system buttons provided by the
@interopio/groups-ui-reactlibrary;- visual integration of native apps isn't supported (e.g., Java, .NET app windows can't be snapped to other io.Connect windows, can't participate in Workspaces and Layouts, and can't use the default Channel Selector app). However, interoperability with native apps is supported (e.g., Java, .NET app windows can use Channels, Interop methods, shared contexts, and more to share data);
- empty spaces in non-rectangular window groups aren't transparent, but are filled with background color instead;
- due to structural changes related to the z-order in the Workspaces App and the Web Group App, if you have custom popup window implementations in your Workspaces or web groups that don't work as expected in the default platform mode, you will have to replace them with the external popup windows provided by the
@interopio/workspaces-ui-reactlibrary and the external popup windows provided by the@interopio/groups-ui-reactlibrary respectively. Both libraries export theuseExternalWindowPopup()hook which you can use to migrate your existing popup windows;- the
"SendFeedback"command that can be sent from io.Manager to the platform isn't currently supported;You should also consider the following list of features that haven't been implemented yet in the default platform mode:
⚠️ Note that any of the features listed here can be implemented upon client request.
- HTML windows currently don't have a move area and HTML buttons;
- flydown windows;
- jump lists;
- window group visibility operations;
- window stickiness operations;
- web page search with
CTRL + Fin PDF files;- resizing of external borders of window groups with
ALTand double clicking on the window border to align to the nearest border;ℹ️ For details on the limitations specific to web groups (the only supported mechanism for managing window groups in the default mode), see the Capabilities > Windows > Window Management section.
Advanced
The advanced platform mode has the following advantages and limitations:
- can be used only on Windows (no support for macOS);
- web groups can't use the default OS system buttons instead of the system buttons provided by the
@interopio/groups-ui-reactlibrary;- supports classic groups and web groups (it's highly recommended to migrate to web groups as classic groups have been deprecated and will be entirely removed in a future release);
- supports visual integration of native apps (e.g., Java, .NET app windows can be snapped to other io.Connect windows and can participate in Workspaces);
To switch from the default platform mode to the advanced platform mode, use the
"advancedMode"top-level key in thesystem.jsonfile:{ "advancedMode": true }
Window Groups
Web groups are now the default implementation for managing io.Connect Windows. Web groups are the only implementation that is supported both on Windows and on macOS via the default platform mode.
Classic groups have been deprecated and it's highly recommended to migrate to web groups.
Window Groups System Buttons
The system buttons in the window group header, on windows participating in a group, and on individual windows are now available as follows:
- Window groups with a visible group header: the group header contains all system buttons ("Minimize", "Maximize", and "Close") while the windows participating in the window group contain only "Minimize" and "Close" buttons.
- The windows participating in a window group with a hidden group header contain only "Minimize" and "Close" buttons.
- Individual windows contain all system buttons ("Minimize", "Maximize", and "Close").
Platform Configuration Files
The
channels.jsonfile for defining default system Channels, thelogger.jsonfile for defining custom log appenders and categories, and thestickywindows.jsonfile for configuring the io.Connect Windows have been deprecated. All settings from these files have been moved to thesystem.jsonfile.The
themes.jsonfile used for customizing the io.Connect classic groups has also been deprecated due to deprecating the classic groups, but backwards compatibility is still available in the advanced platform mode (if athemes.jsonfile is available, it will be processed by the platform). If you are still using classic groups, it's highly recommended to migrate to the io.Connect web groups as the support for thethemes.jsonfile will be dropped when classic groups are entirely removed in a future release.Channel Definitions
To define any number of default system Channels in io.Connect Desktop to be used by your apps, use the
"channels"top-level key in thesystem.jsonsystem configuration file of io.Connect Desktop.The following example demonstrates adding a custom black Channel to the already existing default list of Channels:
{
    "channels": {
        "definitions": [
            // Other default Channel definitions.
            {...}, {...},
            // Custom Channel definition.
            {
                "name": "Black",
                "meta": {
                    "color": "black"
                }
            }
        ]
    }
}
The
"channels"object has the following properties:
Property Type Description "enabled"booleanIf true(default), the io.Connect Channels defined here will be available as system Channels to all interop-enabled apps."definitions"object[]Array of Channel definition objects describing the default system Channels. You can define as many Channels as you need. Each object in the
"definitions"array has the following properties:
Property Type Description "meta"objectRequired. Metadata associated with the Channel. This object may contain any data related to the respective Channel. "name"objectRequired. Unique name for the io.Connect Channel. The
"meta"object has the following properties:
Property Type Description "color"stringRequired. The Channel color displayed on the Channel Selector UI and on each app using that Channel. Can be either an HTML color name or a hexadecimal color code. Logging Configuration
To define custom log appenders and categories, use the
"configuration"property of the"logging"top-level key in thesystem.jsonsystem configuration file of io.Connect Desktop.The following example demonstrates defining a custom log appender and a custom category:
{
    "logging": {
        "configuration": {
            "appenders": {
                "logstash": {
                    "type": "%IO_CD_ROOT_DIR%/assets/logstash-http",
                    "url": "http://localhost:9200/_bulk",
                    "application": "My App",
                    "logType": "application",
                    "logChannel": "node"
                }
            },
            "categories": {
                "my-custom-category": {
                    "appenders": ["logstash"],
                    "level": "info"
                }
            }
        }
    }
}
io.Connect Window Configuration
To define global settings for the internal window management mechanisms, use the
"windowManagement"top-level key in thesystem.jsonsystem configuration file of io.Connect Desktop.The following properties have been moved from the
stickywindows.jsonconfiguration to the"windowManagement"top-level key in thesystem.jsonfile:
Property Type Description "editWindowTitle"booleanIf truedefault, the user will be able to edit the title of the window. Valid only for tab and flat windows."flydownWindows"objectSettings for the io.Connect flydown windows. "snapping"objectSettings for window snapping. "transparencyControl"objectSettings for specifying how to achieve transparency in Workspaces and web groups. The following properties have been moved from the
stickywindows.jsonconfiguration to the"group"property under the"windowManagement"top-level key in thesystem.jsonfile:
Property Type Description "externalResizeMode""Fill"|"Proportional"Defines the behavior of windows with size restrictions that will be violated during resize operations with Windows mouse and keyboard gestures. If set to "Fill"(default), the group will be resized in a way that all windows unrestricted in size will fill as much space as possible left free by any size-restricted window. Currently, only rectangular groups without holes are supported in"Fill"mode. If set to"Proportional", the proportions of all windows in the group will be preserved relatively to the size of the restricted window."header"objectSettings for the window group header. Defaults to {}."type""Web"|"Classic"Specifies the implementation type of the io.Connect Window group. If set to "Web", decorations are implemented via HTML elements and the theme properties are set via CSS. This is the only available window group type in the default platform mode. If set to"Classic", decorations like headers, tabs, captions, etc., are implemented via WPF components and the theme properties (colors, sizes, etc.) are set via thethemes.jsonfile. Classic groups are available only in the advanced platform mode. Defaults to"Classic"in the advanced platform mode.The following properties have been moved from the
stickywindows.jsonconfiguration to the"tabs"object under the"group"property of the"windowManagement"top-level key in thesystem.jsonfile:
Property Type Description "defaultTaskbarTitle"stringText that will be used in the Windows taskbar for single tab groups (tab groups that aren't snapped to other windows or groups) unless "showSelectedTabTitleInTaskbar"is set totrue. Defaults to"Group"."flatWhenSingle"booleanIf true, the tab window will look as a flat window (without a tab header) when it's single. The tab header will appear automatically when you add one or more tab windows to the current window. Defaults tofalse.The
"groupInnerSizingMode"property of the"windowManagement"top-level key has been deprecated.The following properties previously available in the
stickywindows.jsonconfiguration file have been deprecated:"autoCollapse","autoRemoveWindows","groupBorderSize", and"groupCaptionHeight".Themes Configuration
To configure the default and any custom themes, use the
"themes"top-level key in thesystem.jsonsystem configuration file of io.Connect Desktop:{ "themes": { "availableThemes": [ // Default values for the built-in io.Connect themes. { "name": "dark", "displayName": "Dark", "description": "Dark theme for the io.Connect platform." }, { "name": "light", "displayName": "Light", "description": "Light theme for the io.Connect platform." }, // Adding a custom theme. { "name": "my-custom-theme", "displayName": "My Custom Theme", "description": "Custom theme for my platform.", "background": "#E30B5D", "loadingAnimation": "./assets/my-custom-loader/loader.xaml" } ] } }The following properties have been added to the
"themes"object:
Property Type Description "availableThemes"object[]List of objects describing the available platform themes. "convertThemesConfigToCSS"booleanIf true, the theme settings for the io.Connect classic groups defined in thethemes.jsonfile will be converted to CSS variables and injected in the Web Group App. Set totrueif you are using classic groups instead of web groups and want to automatically migrate your custom theme styles to the Web Group App. This is necessary, because, as of io.Connect Desktop 10.0, web groups are the default mechanism for handling io.Connect windows in the default platform mode. Defaults tofalse.
io.Connect Gateway Security Configuration
The default origin filters specified under the
"origin_filters"property of the io.Connect Gateway configuration object in thesystem.jsonsystem configuration file of io.Connect Desktop have been changed. The"non_matched"property is now set to"blacklist"and the"whitelist"array is no longer set to["*"]by default.The new default values are introduced to improve the platform security by enabling only the built-in launcher and the various demo apps distributed with the trial version to connect to the io.Connect Gateway. You should change these values to suit the needs of your project environment and improve the security of your platform.
The following example demonstrates the default io.Connect Desktop origin filters:
{
    "gw": {
        "configuration": {
            "security": {
                "origin_filters": {
                    // Allow apps that don't set the `Origin` header (e.g., Java, Node.js demo apps).
                    "missing": "whitelist",
                    "whitelist": [
                        // Allow apps loaded by the platform from local files (e.g., the built-in launcher).
                        "#file://.*",
                        // Allow apps that use the WebSocket protocol (e.g., .NET demo apps).
                        "#ws://.*",
                        // Allow apps loaded in the browser from local files.
                        "null",
                        // Allow apps hosted at `localhost`.
                        "#http(s)?://localhost:\\d+",
                        // Allow other demo apps hosted at the specified domains.
                        "#https://(.*\\.)?interop\\.io",
                        "#https://(.*\\.)?glue42\\.com",
                        "#https://(.*\\.)?tick42\\.com",
                        "#https://(.*\\.)?finos\\.org"
                    ],
                    // All other origins will be blocked.
                    "non_matched": "blacklist"
                }
            }
        }
    }
}
Gilding Executable & Configuration
Due to improvements of the platform deployment process, io.Connect Desktop no longer has a gilding executable file and a
gilding.jsonconfiguration file respectively.The settings for custom environment variables and for fetching remote configurations that were previously provided by the gilding configuration aren't available in io.Connect Desktop 10.0, but are planned to be added to the system configuration settings in a future release.
⚠️ Note that the functionality for fetching remote configurations that will be added back in a future release will have slightly different requirements for the properties that must be present in the local system configuration file. This is due to the fact that the gilding executable has been removed and the remote configuration will be fetched by the main process instead. The absence of the gilding executable requires that the properties related to the Electron configuration be present in the local system configuration for the platform to operate properly.
Layouts Default Mode
The default mode for the Layouts API has been set to
"slim". This reduces the unnecessary streaming of Layout data across the platform, but may affect you if your apps are working programmatically with Layout operations (import, export, and more) which require"full"mode.If this is the case, you must explicitly enable
"full"mode of the Layouts API by using thelayoutsproperty of theConfigobject when initializing the@interopio/desktoplibrary:const config = { layouts: { // Enabling all Layout operations. mode: "full" } }; const io = await IODesktop(config);
Workspace Windows Default Drag Mode
The default drag mode for Workspace windows has been changed to
"keepInside". Now, when the user drags a window inside a Workspace, by default, the window won't be ejected from the Workspace. This change was made to enhance the user experience since most window dragging operations are executed in order to modify the Workspace arrangement.If you want users to be able to drop windows outside the Workspace, you have to explicitly set the drag mode to
"autoEject"in the Workspaces App definition:{ "details": { "windowDragMode": "autoEject" } }You can also set the window drag mode programmatically:
// Windows will be ejected from the Workspace when the user drags them.
await myWorkspace.setWindowDragMode("autoEject");
App Definition Overrides
Overriding of the
"url"property for web apps and the"command"property for native apps is now disabled by default in order to improve the platform security. It's highly recommended to leave these overrides disabled, but if your specific use case requires it, you can enable them explicitly via the app definition files.The following example demonstrates how to allow overriding the
"url"property of a web app:{ "details": { "url": "https://my-org.com/my-app", "allowOverrides": { // This is set to `false` by default and it's highly recommended to keep it that way. "url": true } } }The following example demonstrates how to allow overriding the
"command"property of a native app:{ "details": { "command": "MyApp.exe", "allowOverrides": { // This is set to `false` by default and it's highly recommended to keep it that way. "command": true } } }
In-Memory App Store
The in-memory app store of io.Connect Desktop is now disabled by default in order to improve the platform security.
This change will affect you if you are using native multi window apps registered as io.Connect windows. For your main app window to be able to register its child windows as io.Connect windows, the in-memory store must be enabled.
The in-memory store can be enabled and configured by using the
"appStores"top-level key in thesystem.jsonsystem configuration file of io.Connect Desktop. As an additional security measure, you can also specify a list apps that will be allowed to use the in-memory app store:{ "appStores": [ { "type": "in-memory", "details": { "allowedApps": ["my-app", "my-other-app"] } } ] }The in-memory app store object has the following properties:
Property Type Description "appDefinitionOverrides"objectValid app definition properties that will override the ones in all app definitions from the app store. Top-level app definition properties can be specified directly in the "appDefinitionOverrides"object. The properties that are found under the"details"top-level key for each app definition type must be specified in a top-level object with the same name as the app type -"window","exe","node","workspaces","webGroup","clickonce","citrix"or"childWindow"."details"objectSpecific details about the app store. "isRequired"booleanIf true(default), the app store will be required. If the app store can't be retrieved, io.Connect Desktop will throw an error and shut down. Iffalse, io.Connect Desktop will initiate normally, without apps from that store."type"stringRequired. Type of the app store. Must be set to "in-memory"for the in-memory app store.The
"details"object has the following properties:
Property Type Description "allowedApps"string[]List of app names, as defined in the io.Connect framework, that will be allowed to use the in-memory app store. Provide "*"as a value to allow all apps to use the in-memory store (e.g.,["*"]). Defaults to["*"]
Popup Windows
Popup windows displayed via the
showPopup()method of the Window Management API now can be only frameless windows. This means that when your define or create dynamically a window to be used as a popup, its mode must be set to"frameless".The following example demonstrates defining a frameless window to be used as a popup:
{
    "name": "my-popup",
    "type": "window",
    "details": {
        "url": "https://example.com/my-popup",
        "mode": "frameless",
        "width": 200,
        "height": 100
    }
}
The following example demonstrates creating a frameless window to be used as a popup:
const name = "my-popup";
const url = "https://example.com/my-popup";
// The popup window must be a frameless window. You must explicitly set the `mode` property to `"frameless"`.
const options = { hidden: true, mode: "frameless" };

// Creating a popup window.
const myPopupWindow = await io.windows.open(name, url, options);

const popupOptions = {
    windowId: myPopupWindow.id,
    targetBounds: { left: 42, top: 42, width: 42, height: 42 },
    size: {
        width: 100,
        height: 200
    },
    targetLocation: "bottom"
};

// Displaying the popup window.
const popup = await myWindow.showPopup(popupOptions);
Environment Variables
The following environment variables have been introduced:
Environment Variable Description IO_CD_APP_DATA_DIRPoints to %LocalAppData%on Windows and to~/Library/Application Supporton macOS. Available since io.Connect Desktop 10.0.IO_CD_ASSETS_DIRPoints to the io.Connect Desktop <installation_location>/assetsfolder. Available since io.Connect Desktop 10.0.IO_CD_CONFIG_DIRPoints to the io.Connect Desktop <installation_location>/configfolder. Available since io.Connect Desktop 10.0.IO_CD_CRASH_DUMPS_DIRPoints to the %LocalAppData%/interop.io/io.Connect Desktop/UserData/<ENV>-<REG>/crashesfolder on Windows and the~Library/Application Support/interop.io/io.Connect Desktop/UserData/<ENV>-<REG>/crashesfolder on macOS where<ENV>-<REG>represents the environment and region of io.Connect Desktop (e.g.,DEMO-INTEROP.IO). Available since io.Connect Desktop 10.0.IO_CD_ENVThe environment in which io.Connect Desktop is running (e.g., "DEMO"). Available since io.Connect Desktop 10.0.IO_CD_LOGS_DIRPoints to the %LocalAppData%/interop.io/io.Connect Desktop/UserData/<ENV>-<REG>/logsfolder on Windows and the~Library/Application Support/interop.io/io.Connect Desktop/UserData/<ENV>-<REG>/logsfolder on macOS where<ENV>-<REG>represents the environment and region of io.Connect Desktop (e.g.,DEMO-INTEROP.IO). Available since io.Connect Desktop 10.0.IO_CD_REGIONThe region in which io.Connect Desktop is running (e.g., "INTEROP.IO"). Available since io.Connect Desktop 10.0.IO_CD_ROOT_DIRPoints to the root folder of io.Connect Desktop where the executable file is located. Available since io.Connect Desktop 10.0. IO_CD_USER_DATA_DIRPoints to the %LocalAppData%/interop.io/io.Connect Desktop/UserDatafolder on Windows and the~Library/Application Support/interop.io/io.Connect Desktop/UserDatafolder on macOS. Available since io.Connect Desktop 10.0.Currently, the following legacy environment variables are also supported and are still used throughout the io.Connect schemas. It's highly recommended to migrate to the environment variables introduced in io.Connect Desktop 10.0. The io.Connect schemas will be updated with the new environment variables in a future release. The support for the legacy environment variables may be removed in a future version:
Environment Variable Description GDDIRSet to the root directory where the io.Connect Desktop executable file is located (e.g., "C:\Users\<username>\AppData\Local\interop.io\io.Connect Desktop\Desktop").GLUE-ENVSet to the environment in which io.Connect Desktop is running (e.g., "DEMO").GLUE-REGIONSet to the region in which io.Connect Desktop is running (e.g., "INTEROP.IO").GLUE-USER-DATASet to the location of the /UserDatafolder of io.Connect Desktop (e.g.,"C:\Users\<username>\AppData\Local\interop.io\io.Connect Desktop\UserData\DEMO-INTEROP.IO").
Platform Auto Start Settings for Apps
The
"autoStart"property in thesystem.jsonsystem configuration file of io.Connect Desktop for defining app start priority has been deprecated.To specify start priority for your apps and to provide other app initialization settings, use the available boot sequence settings in the app definition.
Legacy Proxy Settings
The legacy proxy settings located under the
"legacy"property of the"proxy"top-level key in thesystem.jsonsystem configuration file of io.Connect Desktop have been deprecated. Instead, use the proxy settings that were introduced in io.Connect Desktop 9.3 and that are fully aligned with the Electron proxy settings.
Preventing Apps from Modifying Channel Restrictions
The logic for preventing apps from modifying the Channel restrictions was inconsistent between the Channel Selector and the Channels API. In order to align the behavior of the Channel Selector and the Channels API, a breaking change was introduced in the Channel Selector configuration for preventing apps from modifying the Channel restrictions.
Now, when the
"read"and"write"properties of the object describing the permissions for modifying the Channel restrictions are set totrue, the app won't be able to modify the Channel restrictions neither via the Channel Selector, nor via the Channels API. Respectively, if these properties are set tofalse, the app will be able to modify the Channel restrictions.The following example demonstrates how to prevent an app from modifying the restrictions for a Channel:
{
    "details": {
        "channelSelector": {
            "enabled": true,
            "type": "single",
            "preventModifyingRestrictionsFor": [
                {
                    "name" : "Red",
                    "read": true,
                    "write": true
                }
            ]
        }
    }
}
Preload Scripts
The default value of the
"useBase64PreloadScripts"property of the"preloadScripts"object used for defining preload scripts is nowfalse.
SSO App Definition Priority
Now, the standalone SSO app definition takes precedence over the system SSO configuration provided in the
system.jsonfile. This means that if you have defined an SSO app both as a standalone app and via the system configuration, the platform will launch the app specified in the standalone app definition.
Node.js Environment
io.Connect Desktop now uses the Node.js version distributed with the Electron framework. The default Node.js executable file
node.exethat was previously distributed with the platform inside the<installation_location>/assets/nodefolder has been removed.Because of this change, the
"showConsole"property of the"details"top-level key in the app definition of Node.js apps doesn't work by default and the recommended workaround is to enable logging thestdoutandstderrstream outputs of your Node.js apps.If your use case absolutely requires you to be able to show the consoles of your Node.js apps, you can provide your own Node.js version and explicitly instruct the platform to use it for your apps. This will allow you to use the
"showConsole"property as before.⚠️ Note that if you decide to use your own Node.js version, you must add it to your seed project modifications and include it in your distribution build.
⚠️ Note that the
"nodePath"top-level key used for specifying the path to the default Node.js environment has been removed from the defaultsystem.jsonfile distributed with io.Connect Desktop. If you are migrating your existingsystem.jsonfile and you don't plan on using your own Node.js environment with io.Connect Desktop 10.0, make sure to remove this property from yoursystem.jsonfile too.
App Management API
The JavaScript App Management API accessible via the
io.appManagerobject is now considered a legacy API. A new and fully asynchronous Apps API accessible via theio.appsobject has been introduced.⚠️ Note that the Apps API is still an experimental feature. This means that it may have hidden issues and may be subject to changes in future releases.
The Apps API is designed to replace the legacy App Management API accessible via the
io.appManagerobject. The legacy App Management API is still supported, but will be entirely removed in a future release. It's highly recommended to migrate to the new Apps API.The following example demonstrates retrieving all available apps by using the
getMany()method of the Apps API:const apps = await io.apps.registry.getMany(); apps.forEach(app => console.log(`App name: "${app.name}"`));ℹ️ For more details on using the Apps API and a complete API reference, see the Capabilities > App Management section and the Apps API reference documentation documentation.
Docking Windows
Docking for HTML windows has been deprecated and is now available only for frameless windows.
Deprecated Platform Apps
Floating Toolbar
The Floating Toolbar shell app has been deprecated. Fixes for this app won't be available and it won't be distributed as part of the io.Connect platform starting from this release onward. The Floating Toolbar will still work in all minor and fix versions that are part of the io.Connect Desktop 9.0 stream, but may stop working with later major version streams.
Classic Groups
io.Connect Desktop now uses web groups by default and the classic groups have been deprecated. Backwards compatibility is still available via the advanced platform mode, but it's highly recommended to migrate to web groups if you are still using classic groups. Fixes for classic groups won't be available and they will be entirely removed in a future release. The classic groups will still work in all minor and fix versions that are part of the io.Connect Desktop 9.0 stream.
New Features
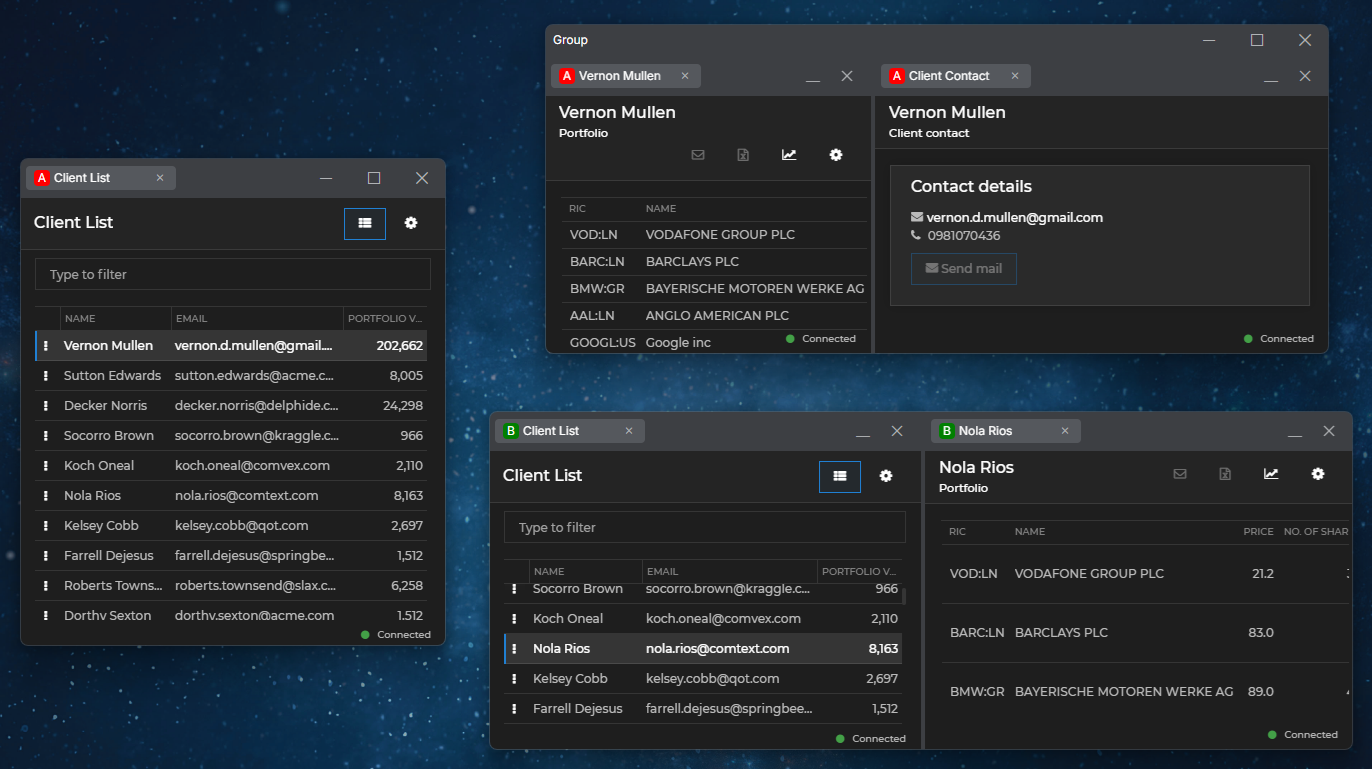
macOS Support
io.Connect Desktop 10.0 introduces two platform modes of operation which provide different platform experiences depending on your specific business needs and requirements.
Until now, the only supported OS was Windows, but the new default platform mode transforms io.Connect Desktop into an OS-independent platform enabling it to run on macOS. Now, your enterprise users can experience the powerful io.Connect interoperability features on macOS too:
ℹ️ For more details on running io.Connect Desktop on macOS and on the advantages and limitations of the default platform mode, see the Developers > macOS Support and the Developers > Configuration > System > Platform Modes sections.
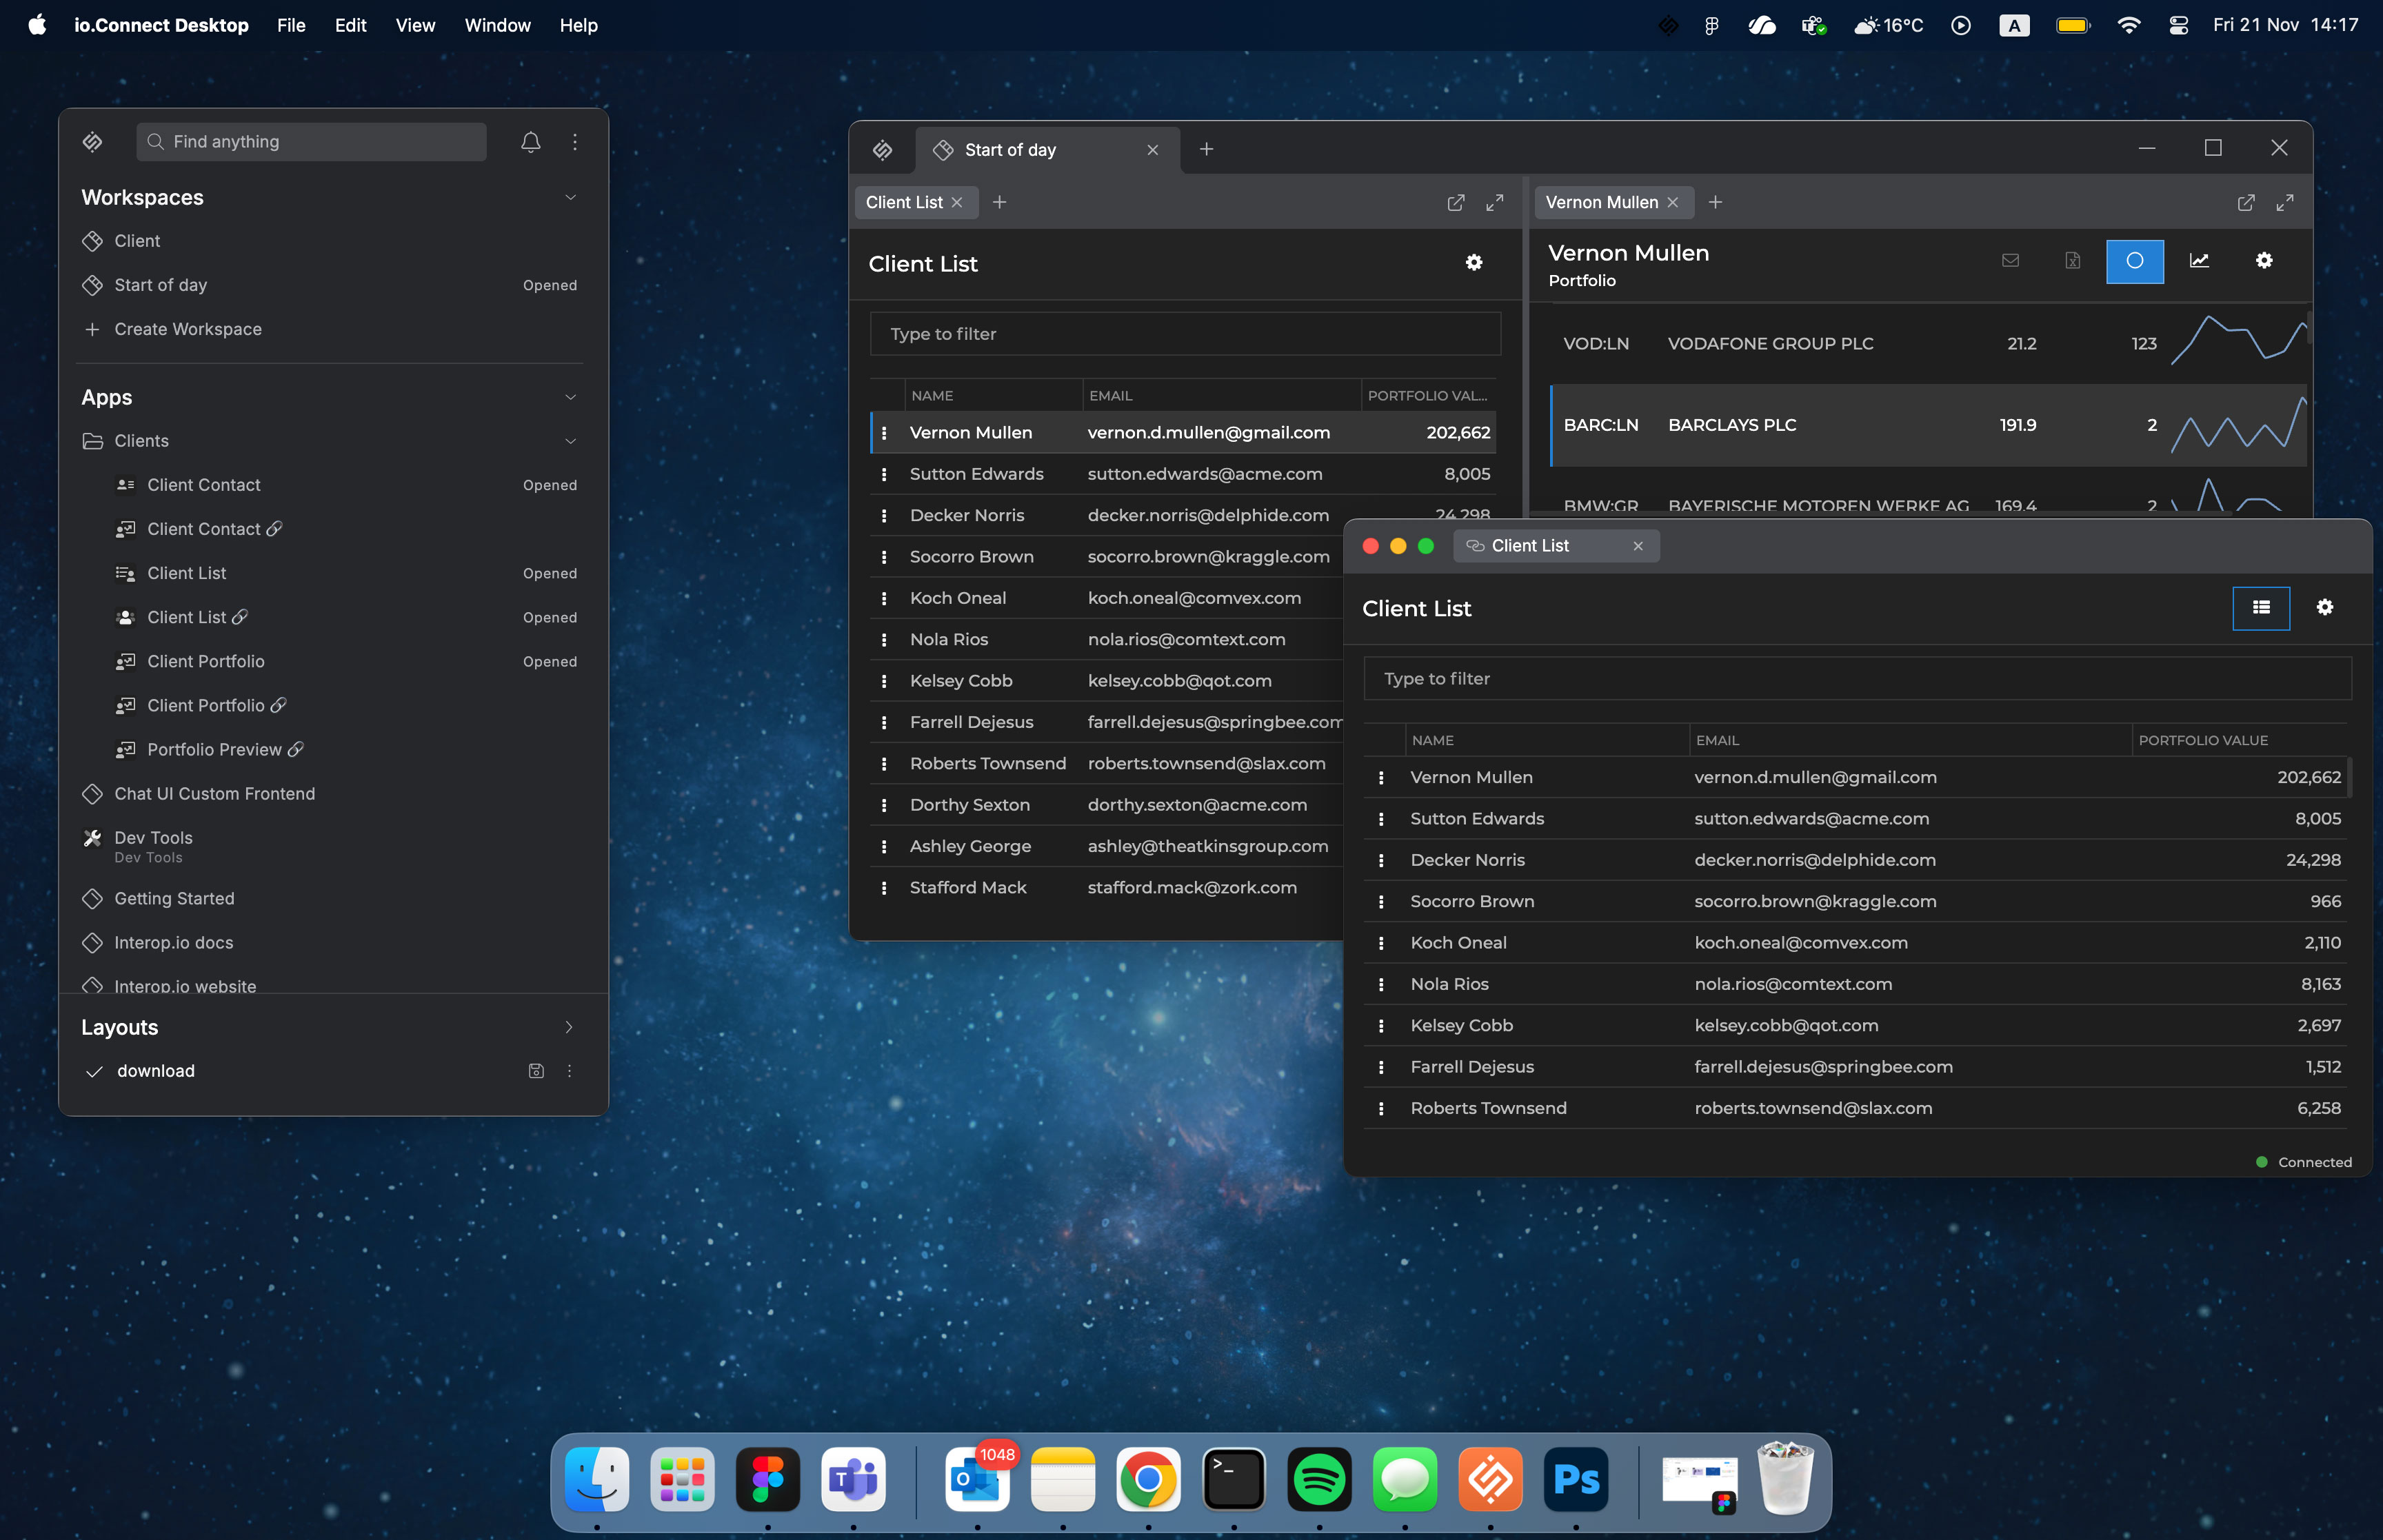
Launchpad
Docking
The io.Connect Launchpad can now be docked to the top of the screen for convenient access:
Extended Area
If you dock the Launchpad, you can utilize the extended area located between the search bar and the system icons. This area can show lists of favorite items, recent items, and you can also add custom categories in it. The extended area can be enabled and configured from the Platform Preferences panel in the Launchpad menu - it's possible to hide or show the "Favorites" and "Recent" section or to hide the item titles to save space:
To add custom categories to the extended area of the Launchpad, use the "extendedAreaCategories" property of the "customProperties" top-level key in the app definition of your custom Launchpad app:
{
    "customProperties": {
        "extendedAreaCategories": [
            {
                "name": "Client Management",
                "items": [
                    {
                        "name": "channelsclientlist",
                        "type": "application"
                    },
                    {
                        "name": "Client Info",
                        "type": "workspace"
                    }
                ]
            }
        ]
    }
}
Each object in the
"extendedAreaCategories"array has the following properties:
Property Type Description "name"stringRequired. Name for the category to be displayed in the Launchpad extended area. "items"object[]Required. Array of objects describing the items (apps and Workspaces) to be displayed in the specified category. Each object in the
"items"array has the following properties:
Property Type Description "name"stringRequired. The name of an app as specified in its app definition, or the name of a Workspace to be displayed in the category list. "type""application"|"workspace"Required. The type of the item to be displayed in the category list - an app or a Workspace.
Auto Updates
The io.Connect Desktop platform can be configured to auto update itself. This means that when your platform implementation has been distributed to your enterprise users, the platform can check for new updates from your update service or from a static storage location. You can choose to notify the user or directly install the update on restart of the platform. If the user is notified, they have the option to postpone the updates or apply them immediately by restarting the platform.
⚠️ Note that for the auto update configuration to work, you must setup your own update service or a static storage location that will hold the updates for the platform. The update service can be an existing service (Nucleus, Hazel, and more) or your own custom update server implementation.
To configure the platform to auto update, use the
"autoUpdater"top-level key:{ "autoUpdater": { "enabled": true, "updateSource": { "type": "Service", "baseUrl": "https://my-update-service" }, "notifyUser": true } }The
"autoUpdater"object has the following properties:
Property Type Description "enabled"booleanIf true, will enable automatically updating io.Connect Desktop. Defaults tofalse."notifyUser"booleanIf true(default), the user will be prompted to apply the platform update immediately after the update has been downloaded."updateIntervalMinutes"numberInterval in minutes at which to check for updates. The minimum allowed interval is 5 minutes. Defaults to 10."updateSource"objectRequired. Settings for the source from which to retrieve the updates. The
"updateSource"property can be an object defining an update service or an object defining a static storage location as an update source.The object for defining an update service has the following properties:
Property Type Description "baseUrl"stringRequired. Base URL pointing to the service from which to retrieve the io.Connect Desktop updates. The feed URL has the following shape: <baseUrl>/<platform>/<platform-version>/<channel>."channel"stringThe update channel for the feed URL. "type"stringRequired. Type of the update source. Must be set to "Service"for service-based updates.The object for defining a static storage location has the following properties:
Property Type Description "baseUrl"stringRequired. Base URL pointing to the static storage provider from which to retrieve the io.Connect Desktop updates. "type"stringRequired. Type of the update source. Must be set to "StaticStorage"for static storage updates.
Popup Windows
Creating Popup Window
To create a popup window dynamically, use the
createPopup()method on top level of the API. Optionally, you can pass aCreatePopupOptionsobject as an argument and specify settings for the popup window.The created popup window will be frameless and hidden. The
createPopup()method will resolve with aCreatePopupResultobject which will contain two window abstractions - a browser window object which you can use to manipulate the DOM content of the popup window, and an io.Connect Window object which you can use to show and hide the popup window or to extract the ID and pass it to theshowPopup()method to display the popup window:// Options for creating the popup window. const options = { width: 200, height: 100 }; const myPopup = await io.windows.createPopup(options); // Manipulating the DOM content of the popup window. myPopup.browserWindow.document.body.innerText = "My Popup"; // Displaying the popup window. await myPopup.ioConnectWindow.show();Focusing Popup Windows
By default, all popup windows shown via the
showPopup()method of the Window Management API gain focus when created and hide automatically when they lose focus. If you want your popup window not to be on focus when created, set thefocusproperty of thePopupOptionsobject tofalse:const popupOptions = { windowId: "my-popup-window-id", targetBounds: { left: 42, top: 42, width: 42, height: 42 }, size: { width: 100, height: 200 }, targetLocation: "bottom", // The popup window won't be on focus. focus: false }; await myWindow.showPopup(options);⚠️ Note that popup windows that aren't on focus when created won't be automatically closed if they gain and lose focus afterwards. In this case, you become responsible for implementing the conditions and the mechanism for hiding or closing such popup windows.
Showing Popup Windows from the Workspaces App
To show a popup window from a Workspaces App instance, use the
showPopup()method of aFrameinstance and pass aPopupOptionsobject as a required argument:// Creating a popup window. const myPopup = await io.windows.createPopup(); // Manipulating the DOM content of the popup window. myPopup.browserWindow.document.body.innerText = "My Popup"; // Area which will trigger the popup when the user clicks on it. const buttonBounds = { left: 42, top: 42, width: 42, height: 42 }; const popupOptions = { windowId: myPopup.ioConnectWindow.id, targetBounds: buttonBounds, size: { width: 100, height: 200 }, targetLocation: "bottom" }; // Retrieving the Workspaces App instance which hosts the current window. const myFrame = await io.workspaces.getMyFrame(); // Displaying the popup window. const popup = await myFrame.showPopup(popupOptions);
Showing Dialogs from the Workspaces App
The
showDialog()method for displaying dialog windows is now available also on the WorkspacesFrameinstance.The following example demonstrates displaying a predefined io.Connect dialog:
const myDialog = {
    type: "SingleInputDialog",
    title: "Email Required",
    message: "Please, provide your email address:",
    inputPlaceholder: "john.doe@example.com",
    inputPattern: "[a-z0-9]@my-org.com",
    inputPatternErrorMessage: "Invalid email address!"
};

await myFrame.showDialog(myDialog);
Docking
The following methods and properties have been added to the Window Management API for docking windows:
Saving the Bounds of Docked Windows
When docking a window, you can now also save its last known bounds and specify size for the docked window. Use the
saveBounds,height, andwidthproperties of theDockingOptionsobject. Saving the last known window bounds will allow you to undock the window later and restore it to the saved bounds:const options = { position: "top", saveBounds: true, width: 300, height: 50 }; const dockingPlacement = await myWindow.dock();Undocking Windows
To undock a window, use the
undock()method and optionally pass anUndockingOptionsobject as an argument:const options = { // If the window bounds were saved when the window was docked, // the undocking operation will restore the window to the saved bounds. restoreBounds: true }; await myWindow.undock();Docking Configuration
To retrieve the current docking configuration of a window, use the
getDockingConfig()method. ThegetDockingConfig()method resolves with aDockingConfig()object:const dockingConfig = await myWindow.getDockingConfig();To set the docking configuration of a window, use the
setDockingConfig()method and pass aDockingConfig()object as a required argument:const dockingConfig = { enabled: true, claimScreenArea: true }; await myWindow.setDockingConfig(dockingOptions);
Restoring Workspaces by Reference
To specify whether Workspaces participating in the Global Layout will be restored in their original (unmodified) state when the Global Layout is restored, or in the exact state in which they were when the Global Layout was saved, use the
restoreWorkspacesByReferenceproperty of theRestoreOptionsobject:const restoreOptions = { name: "My Layout", restoreWorkspacesByReference: true }; const result = await io.layouts.restore(restoreOptions);The value of this property defaults to the value of the
"restoreWorkspacesByReference"property in the Workspaces App definition and will override it.
Intents API Operations Interception
It's now possible to intercept and decorate the
filterHandlers()method of the Intents API by using the Interception API:const config = { interceptions: [ { domain: "intents", operation: "filterHandlers" } ], handler: (message) => { console.log(`Interception phase: ${message.phase}`); } }; await io.interception.register(config);
Platform API
The Platform API provides facilities for managing system-level events like restarting or shutting down the io.Connect platform.
The following example demonstrates restarting the platform and providing options for the restart operation:
const options = {
    // Instructing the platform to save the current Global Layout before restarting.
    autoSave: true,
    // Disabling showing a dialog to the user.
    showDialog: false,
    // Specifying a reason for the platform restart.
    reason: "Platform restarted to apply updates."
};

await io.platform.restart(options);
ℹ️ For more details on using the Platform API and a complete API reference, see the Capabilities > Platform section and the Platform API reference documentation documentation.
Platform Version
To specify a custom platform version to be displayed in selected UI elements instead of the default platform version, you can now use the
"uiVersion"top-level key in thesystem.jsonsystem configuration file of io.Connect Desktop:{ "uiVersion": "My Custom Version" }This version is for display purposes only and doesn't have to be a valid semantic version string. It will be used in various UI elements, including the splash screen, the tray menu, the About app, and more.
The custom platform version is accessible at runtime via the
uiVersionproperty of theiodesktopobject injected in the globalwindowobject:// If a custom platform version isn't defined in the `system.json` file, // the `uiVersion` property will return the default platform version. const myCustomVersion = iodesktop.uiVersion;
Using the Default OS System Buttons in Web Groups
By default, web groups use the system buttons provided by the
@interopio/groups-ui-reactlibrary. To instruct your Web Group App to use the default OS system buttons instead, set the"useOSSystemButtons"property of the"details"top-level key in the Web Group App definition totrue:{ "name": "web-group-app", "type": "webGroup", "hidden": true, "details": { "url": "http://localhost:3000/", "useOSSystemButtons": true } }
Feedback Form Emails
To define the action to be performed when sending an email via the Feedback Form, use the
"action"property of the"mail"object under the"issueReporting"top-level key in thesystem.jsonsystem configuration file of io.Connect Desktop:{ "issueReporting": { "mail": { "enabled": true, "action": "display" } } }If the
"action"property is set to"send"(default), the email will be sent immediately (if possible, depending on security settings). If set to"display", an email draft will be shown to be reviewed and sent manually by the user. Valid only for Outlook and MAPI email clients.
Tracking In-Page Navigation
By default, when the user navigates within the current web page and the fragment identifier in the URL changes, the current app URL isn't updated. To instruct io.Connect Desktop to update the current URL of web apps when the user navigates within the current page, use the
"trackInPageNavigation"property of the"navigation"object under the"details"top-level key in the app definition:{ "details": { "navigation": { "trackInPageNavigation": true } } }This property may be useful if you want to save and later restore the entire URL with the fragment identifier when your app participates in a Global Layout.
Testing with WebdriverIO
The new
@interopio/wdio-iocd-servicelibrary provides a WebdriverIO service that facilitates testing your interop-enabled apps with WebdriverIO. The service takes care of launching the platform, providing the connection details to the test environment, and closing the platform after the tests have been executed.The
@interopio/wdio-iocd-servicelibrary exports anIOCDBaseConfigurationobject and anIOCDService()factory function to facilitate setting up the WebdriverIO service for io.Connect Desktop.The
IOCDBaseConfigurationobject provides the base settings required for the service to work with io.Connect Desktop.The
IOCDService()factory registers both the launcher and worker services with WebdriverIO.To configure WebdriverIO, create a
wdio.config.tsfile in your project root. The following example demonstrates how to set up the service with the base configuration and a single capability for io.Connect Desktop:import { IOCDBaseConfiguration, IOCDService } from "@interopio/wdio-iocd-service"; export const config: WebdriverIO.Config = { // Base WebdriverIO configuration for io.Connect Desktop. ...IOCDBaseConfiguration, // Configuring the services for io.Connect Desktop. services: IOCDService({ // Optional video recording for failing tests. videoRecording: { enabled: true, fps: 20, outputDir: "./artifacts/videos" } }), capabilities: [ { // Must be set to "iocd" for the service to activate. browserName: "iocd", // Providing the test specifications for this capability. "wdio:specs": ["./tests/**/*.spec.ts"], // Settings for launching io.Connect Desktop. "iocd:options": { binary: "%LocalAppData%/interop.io/io.Connect Desktop/Desktop/io-connect-desktop.exe" } } ], // WebdriverIO options. // The integration is agnostic in regard to frameworks and reporters. // You can use Mocha, Jasmine, Cucumber, or any other supported WebdriverIO framework and reporter combination. logLevel: "warn", framework: "mocha", reporters: ["spec"], // TypeScript auto compile options. autoCompileOpts: { autoCompile: true, tsNodeOpts: { transpileOnly: true, project: "./tsconfig.json" } } };
Improvements & Bug Fixes
Upgraded to Electron 39.2.3 (Chromium 142).
Upgraded the .NET framework from 4.5.2 to 4.8.
Added a view informing the user that the renderer process has crashed instead of closing the window automatically.
Improved the process for joining Channels after io.Connect Gateway reconnection.
Improved parsing of encoded white spaces in URLs passed to the protocol handler.
Fixed a race condition issue that would cause the Launchpad UI to crash in specific rare cases.